Introduction
In this tutorial you'll learn how to seamlessly create,
deploy, and configure a decentralized webstie using GrapesJS, Fleek, GitHub, and
Avvy Domains. Avvy Domains provides an address naming system on the Avalanche
blockchain which allows you to link your .avax
domain to IPFS-hosted content. This ensures your website remains censorship-resistant
and decentralized. We'll help you set up an account with GrapesJS, and guide you
through GitHub for a seamless deployment to Fleek. Finally, we'll configure your
Avvy Domain to point to your IPFS content. By the end of this tutorial you'll have
a fully functional decentralized website accessible via your .avax domain.
Prerequisites
- A registered Avvy domain (e.g., webpage.avax).
- Little to no knowledge of HTML/CSS (for GrapesJS).
- A Core wallet or another EVM-compatible wallet.
Create a Website with GrapesJS
GrapesJS Introduction
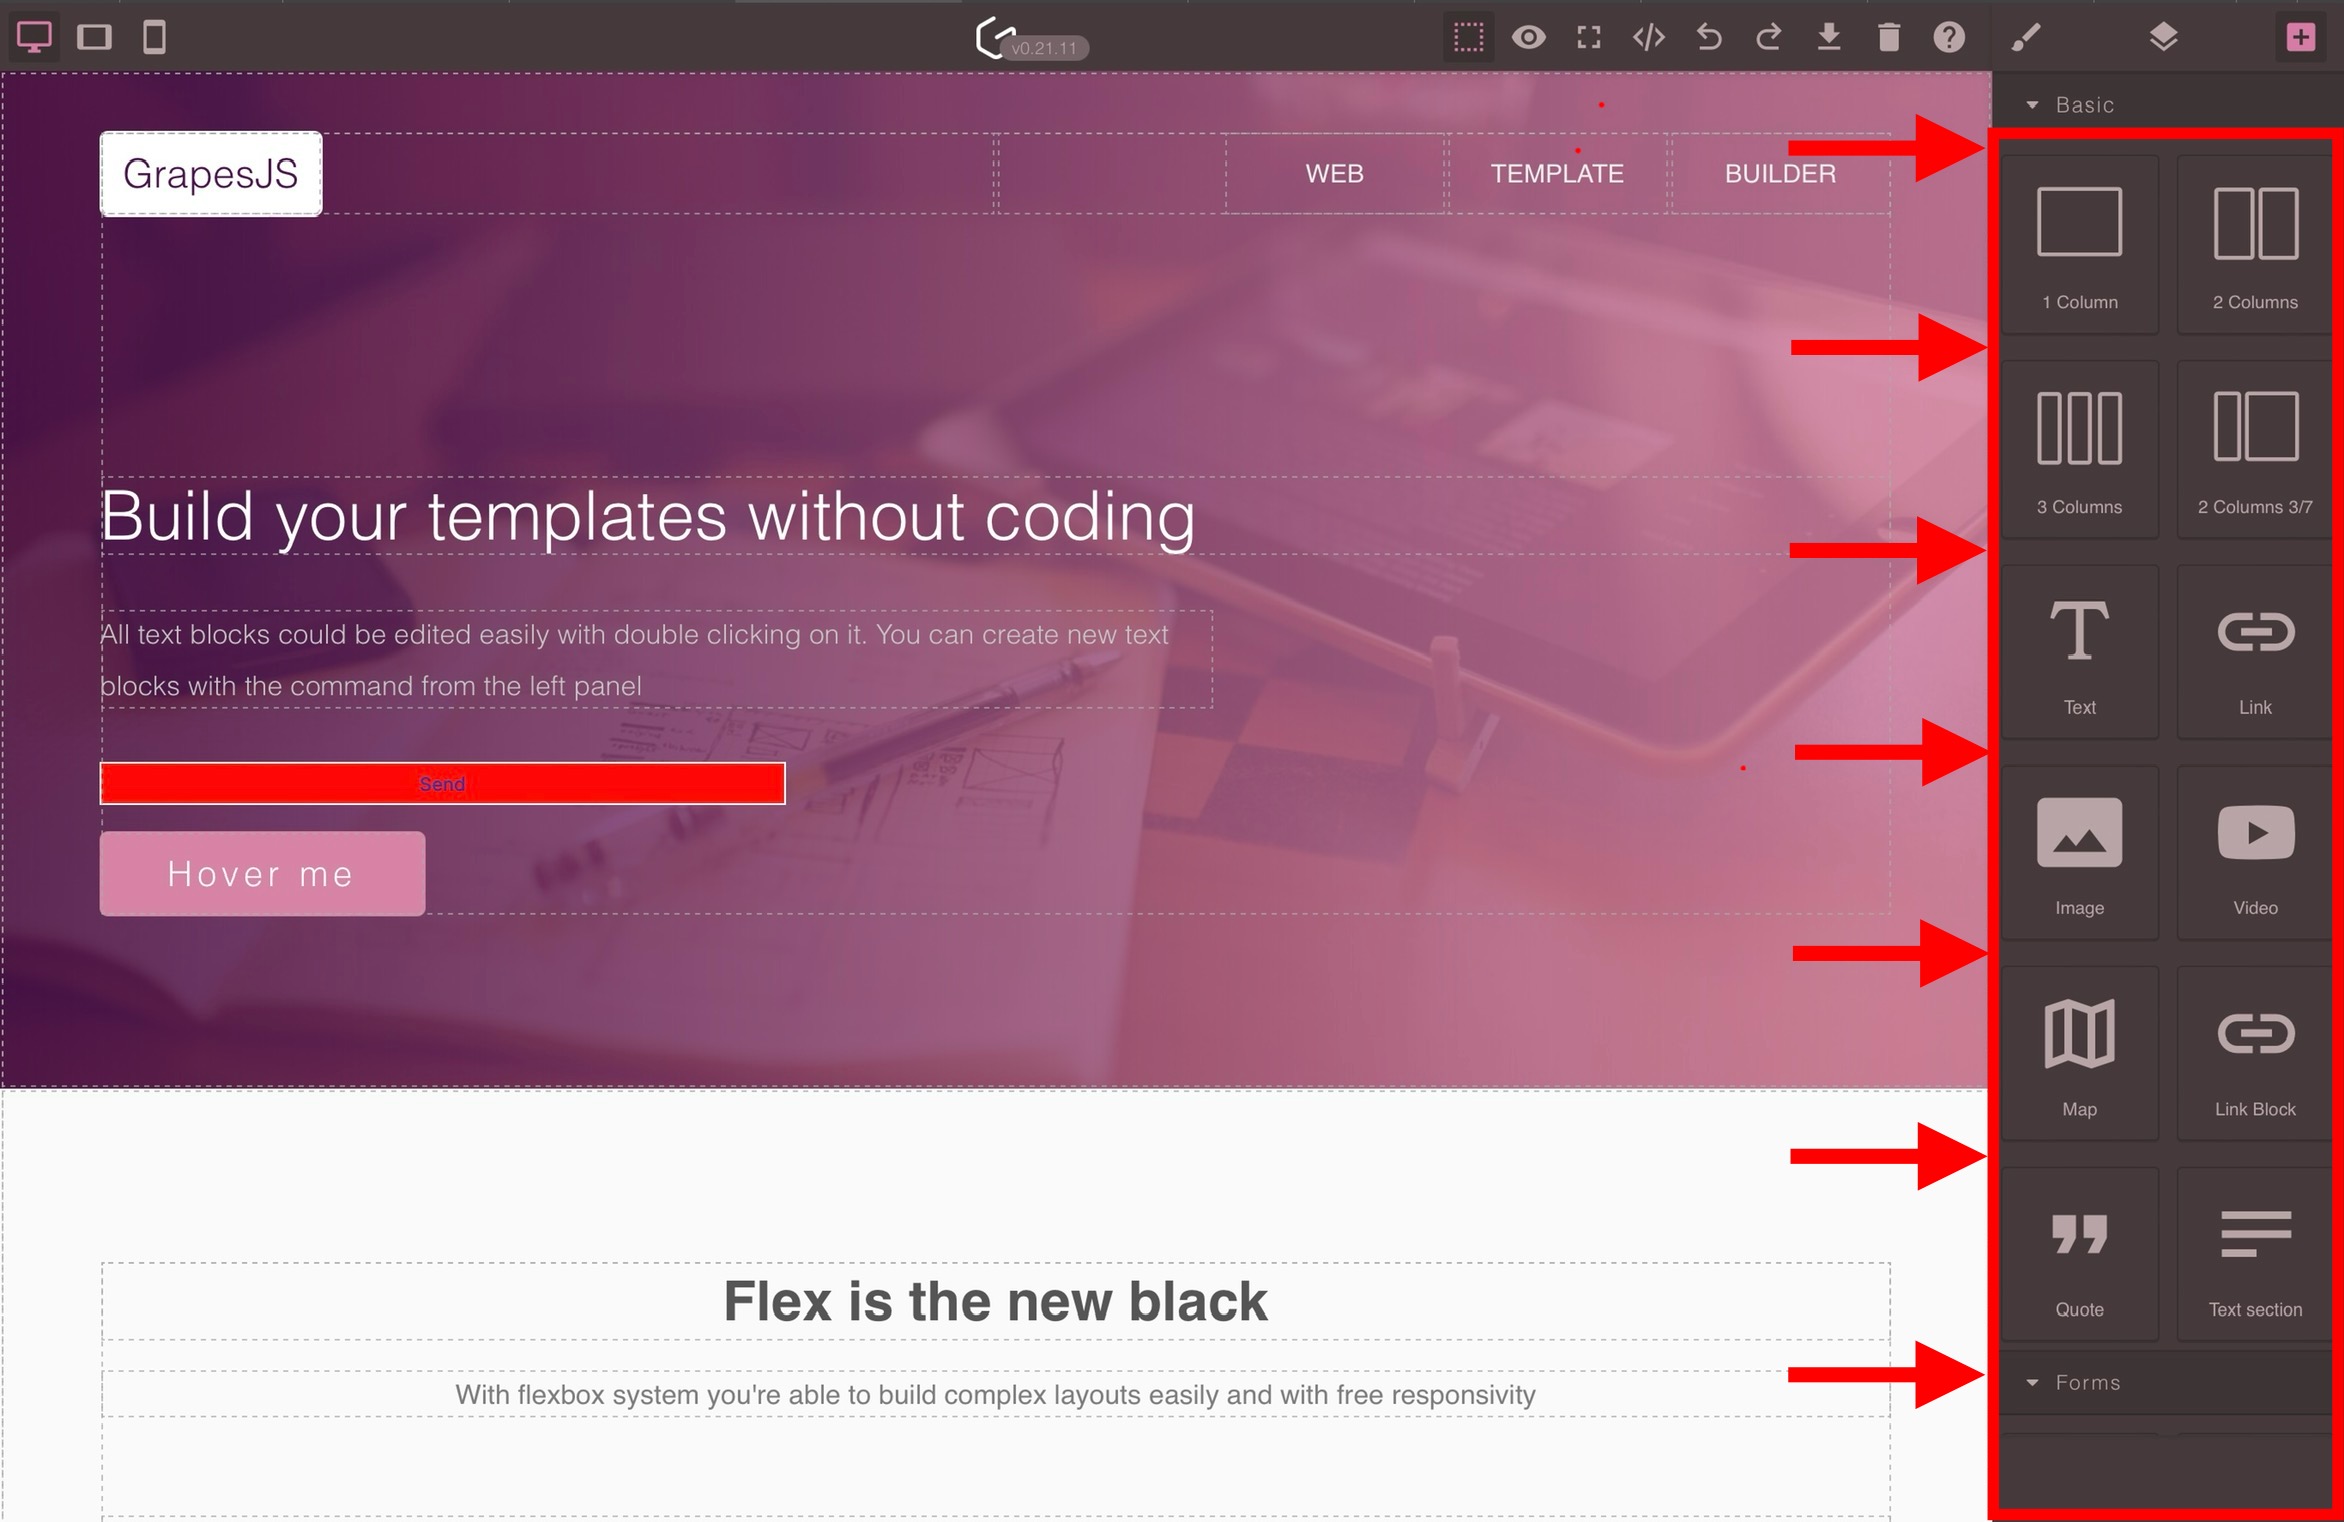
GrapesJS is a web-based, open-source tool designed to make website building easy for everyone - even those without coding knowledge. It offers a user-friendly, drag-and-drop interface where you can create and customize websites by simply dragging elements like text, images, and buttons onto your page. Think of it like a digital canvas where you can visually design and arrange your content, much like using a graphic design tool but for building web pages. GrapesJS provides a variety of pre-built components and templates, allowing you to create professional-looking websites without needing to write a single line of code.
Set up GrapesJS
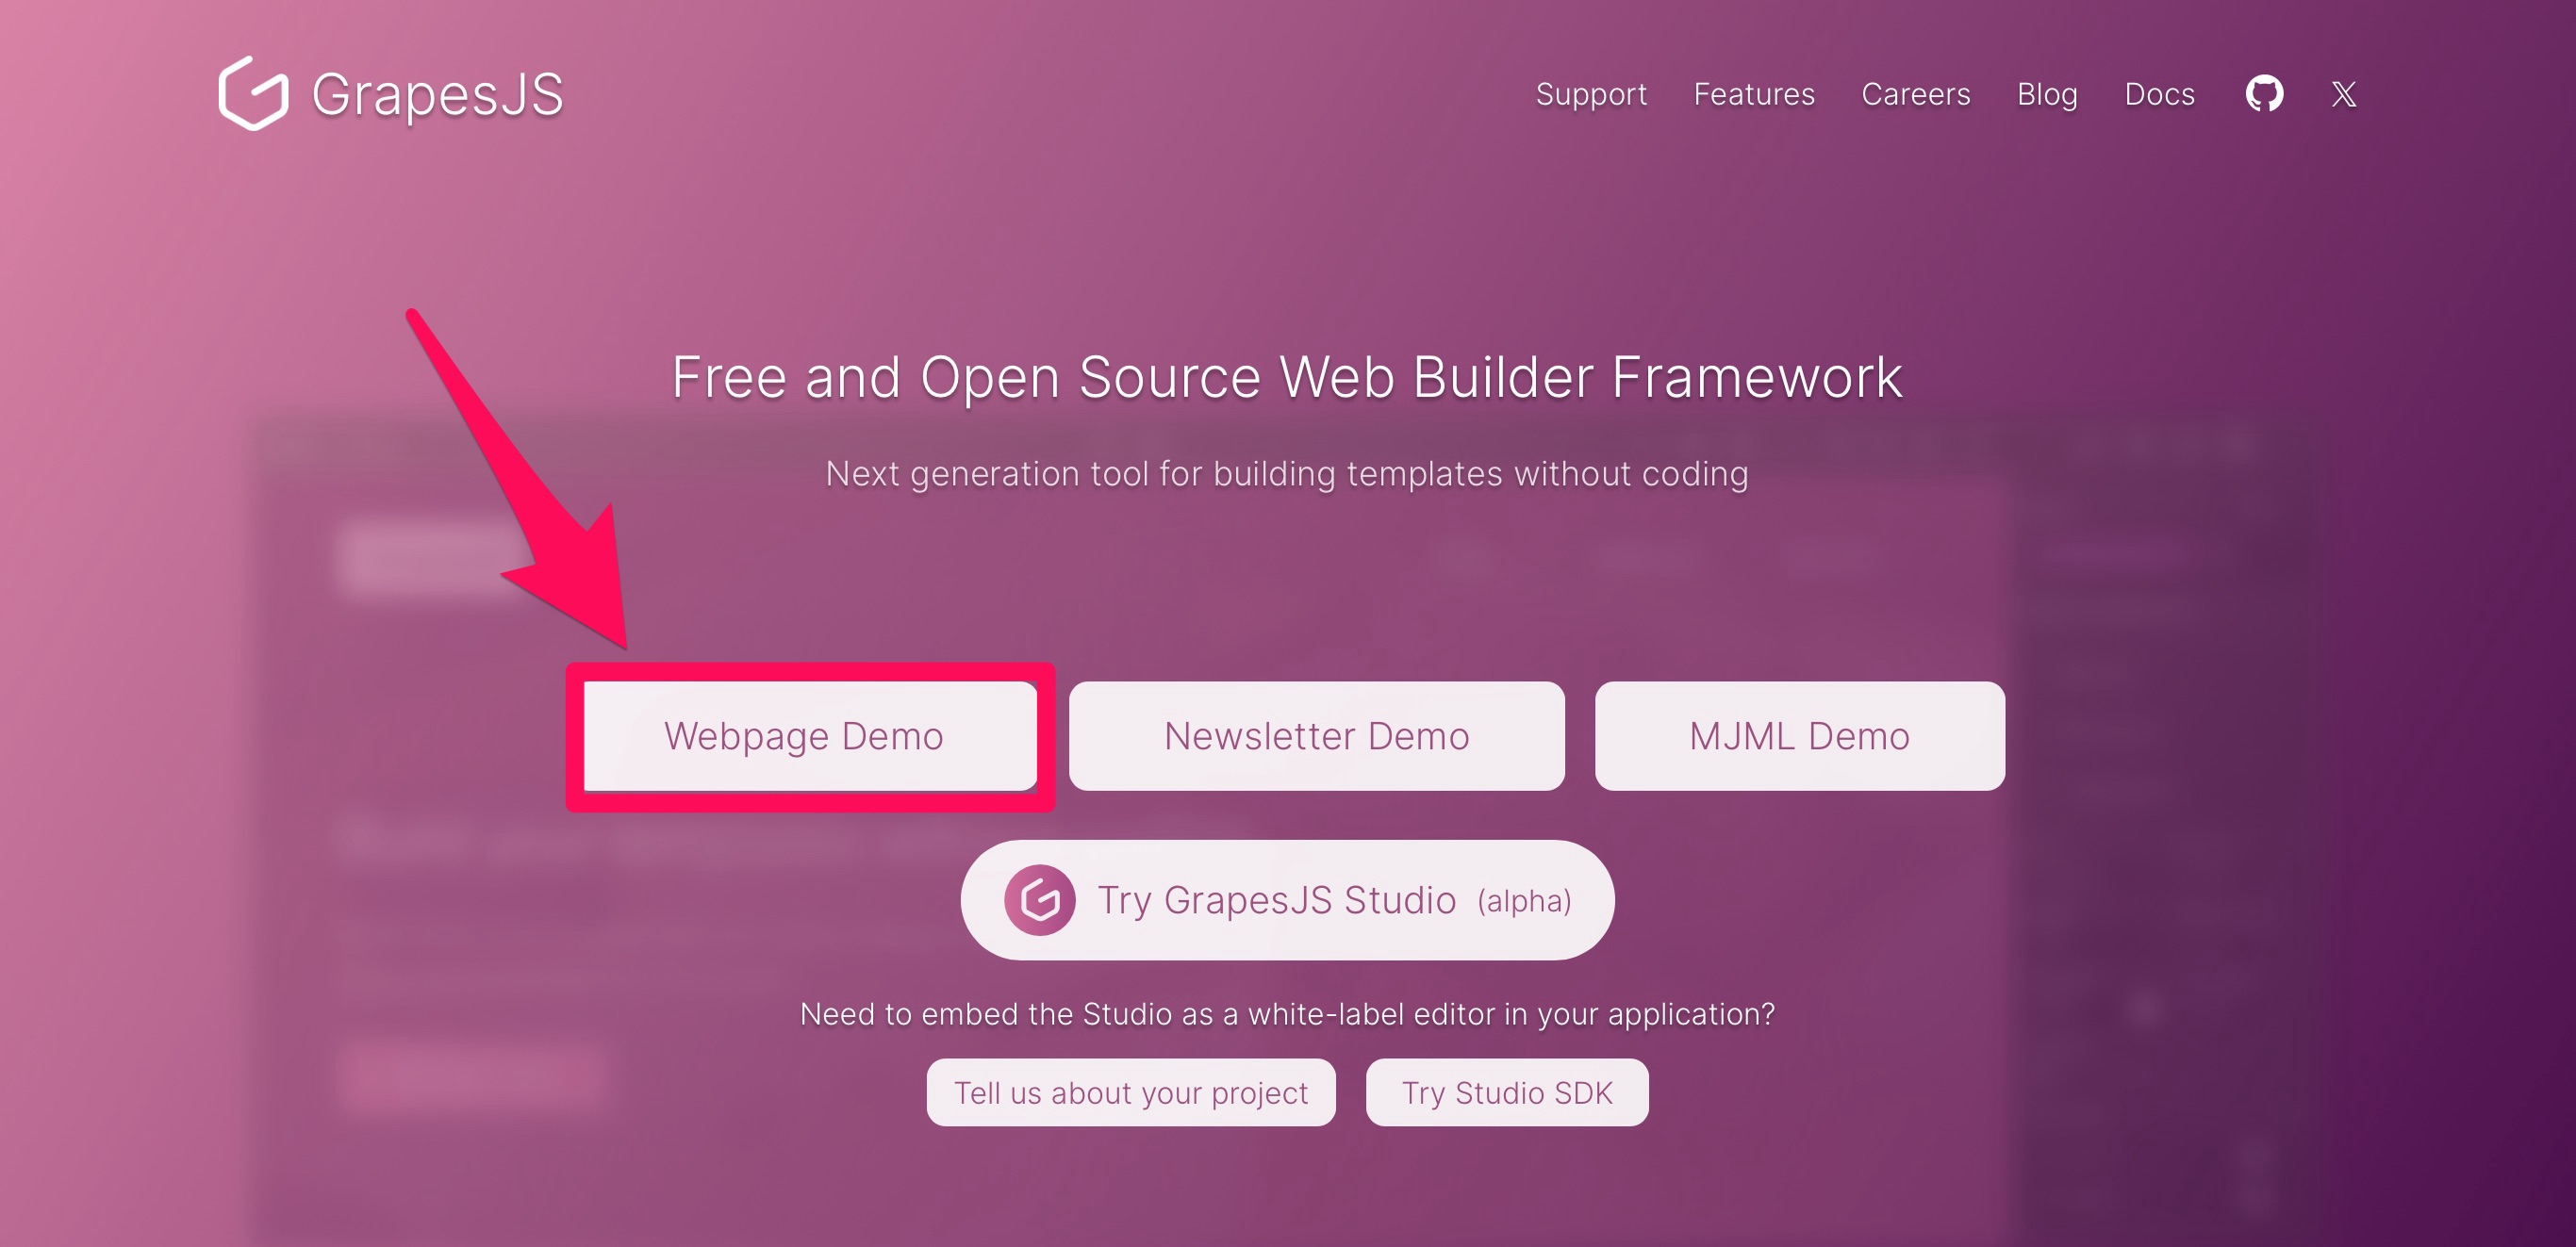
- Go to the GrapesJS website.
- Click on the button to start the GrapesJS editor.
- Design your website using the drag-and-drop interface.
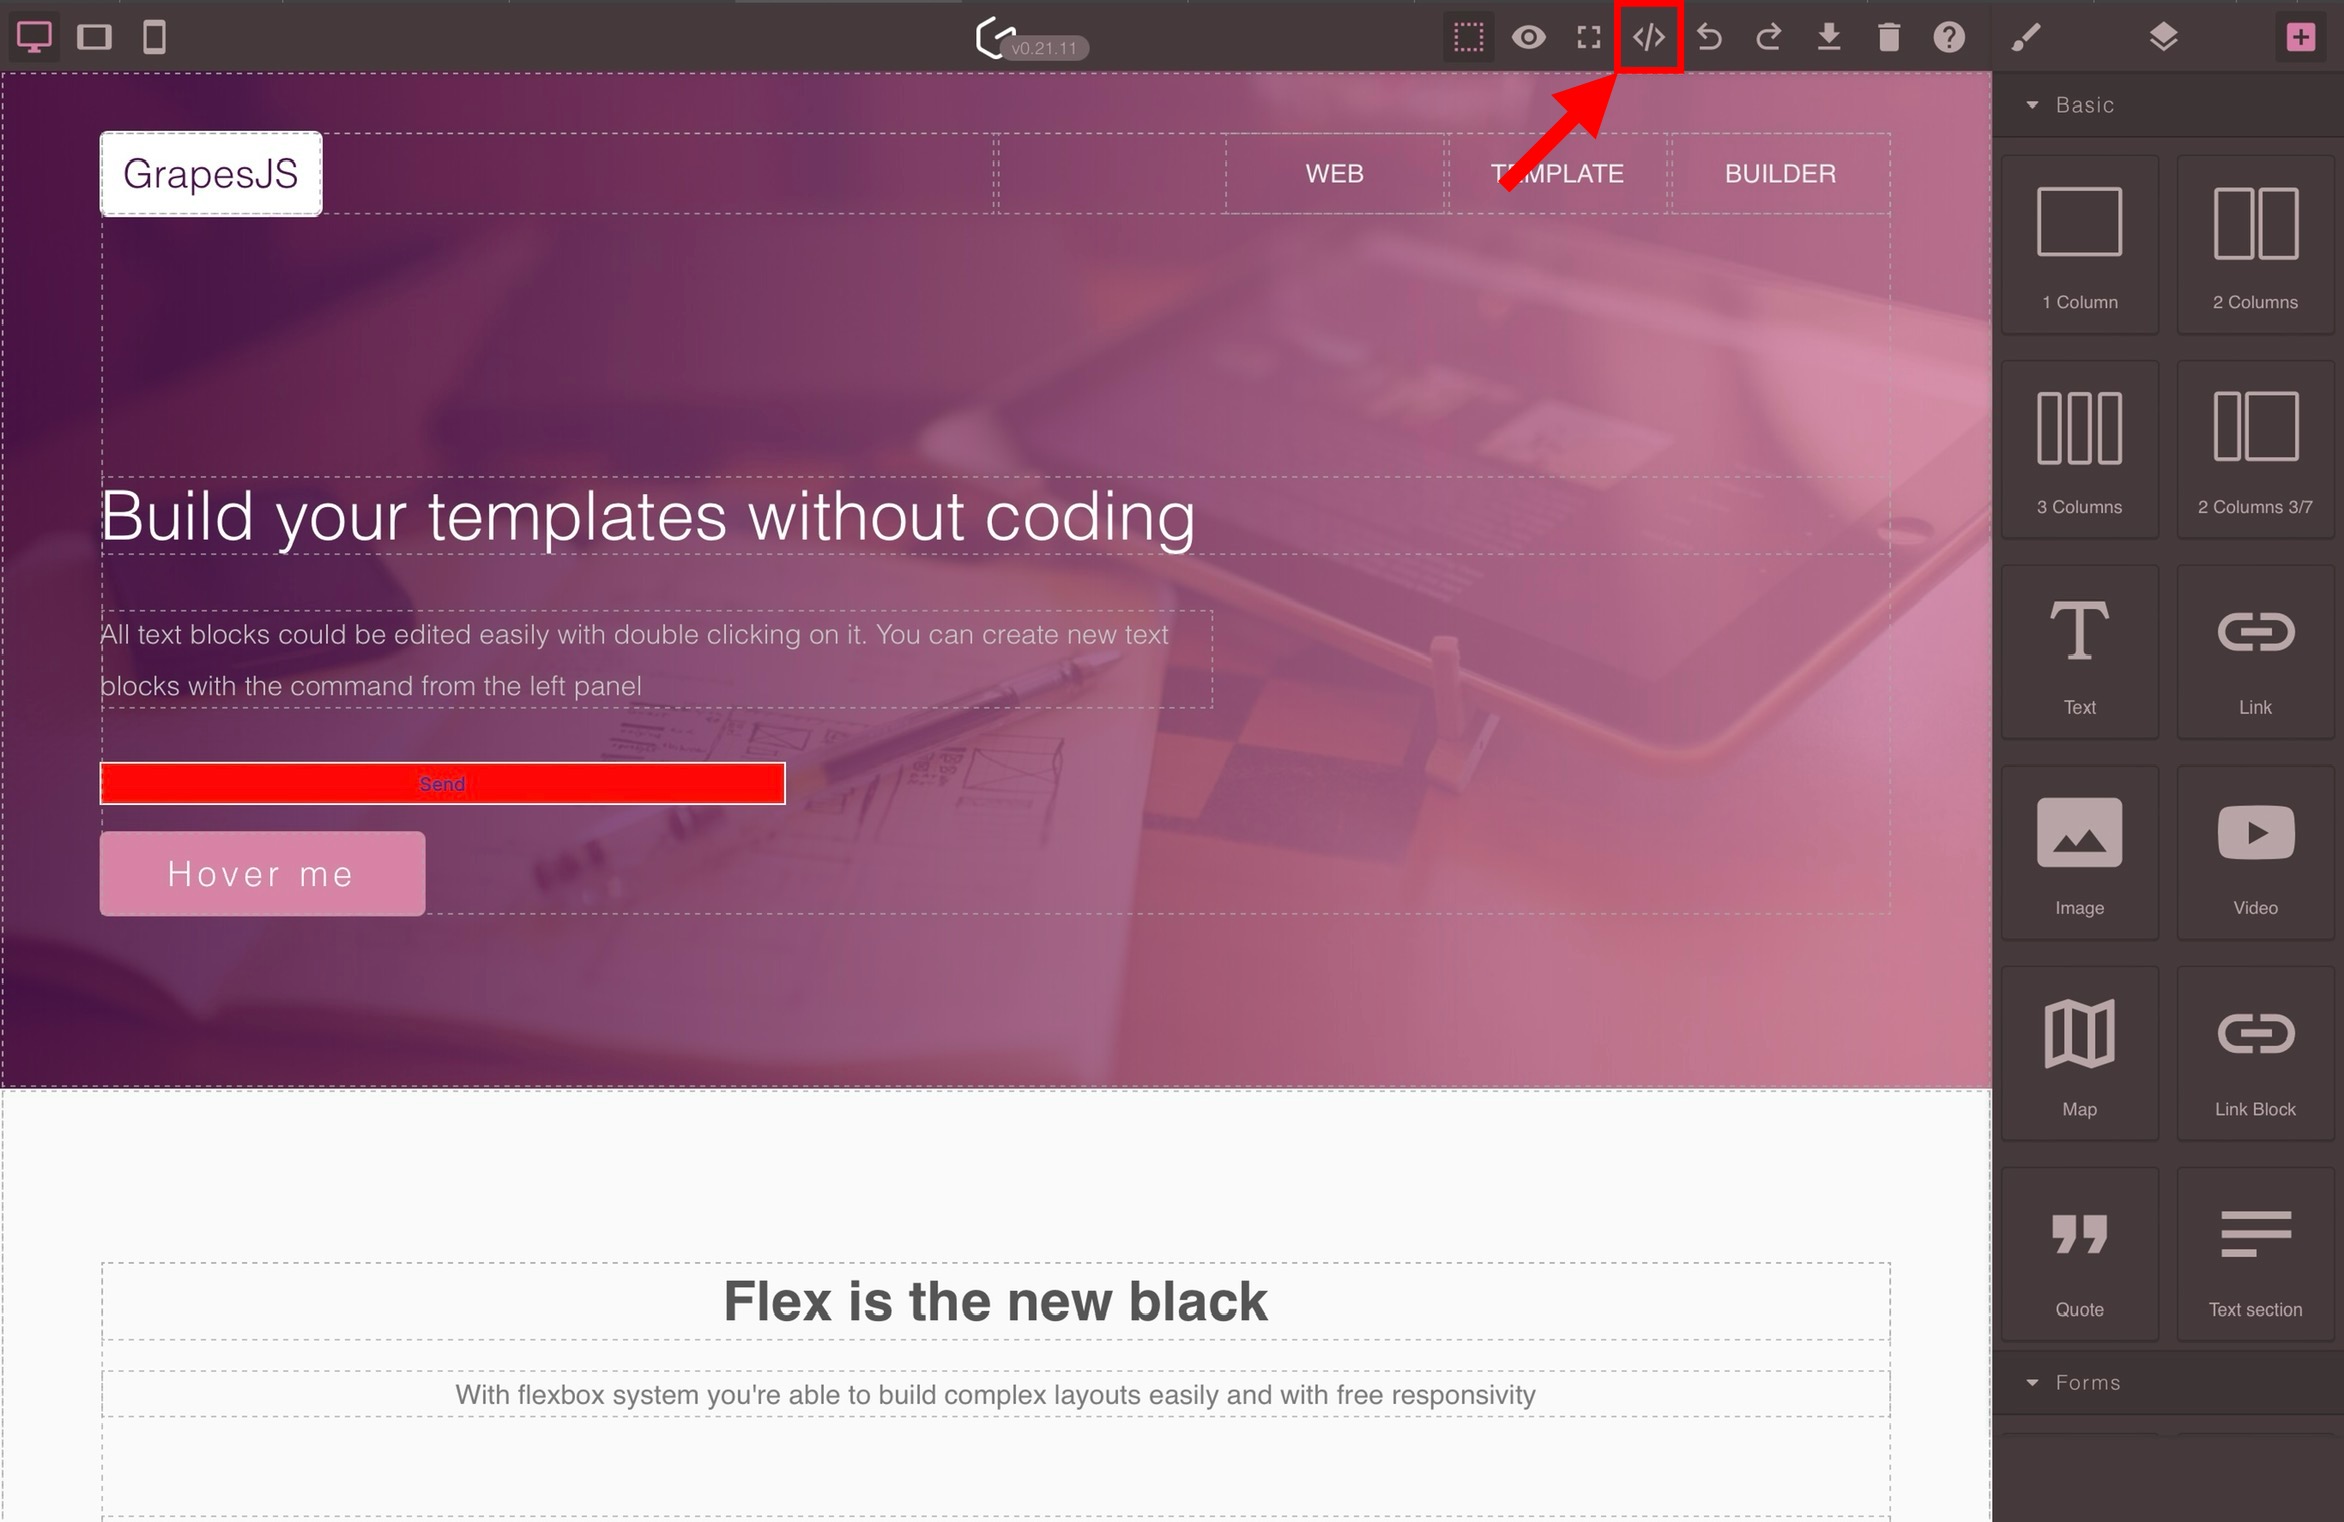
Download the Website
- Once you have completed your design, click on the button in the menu bar at the top of the screen.
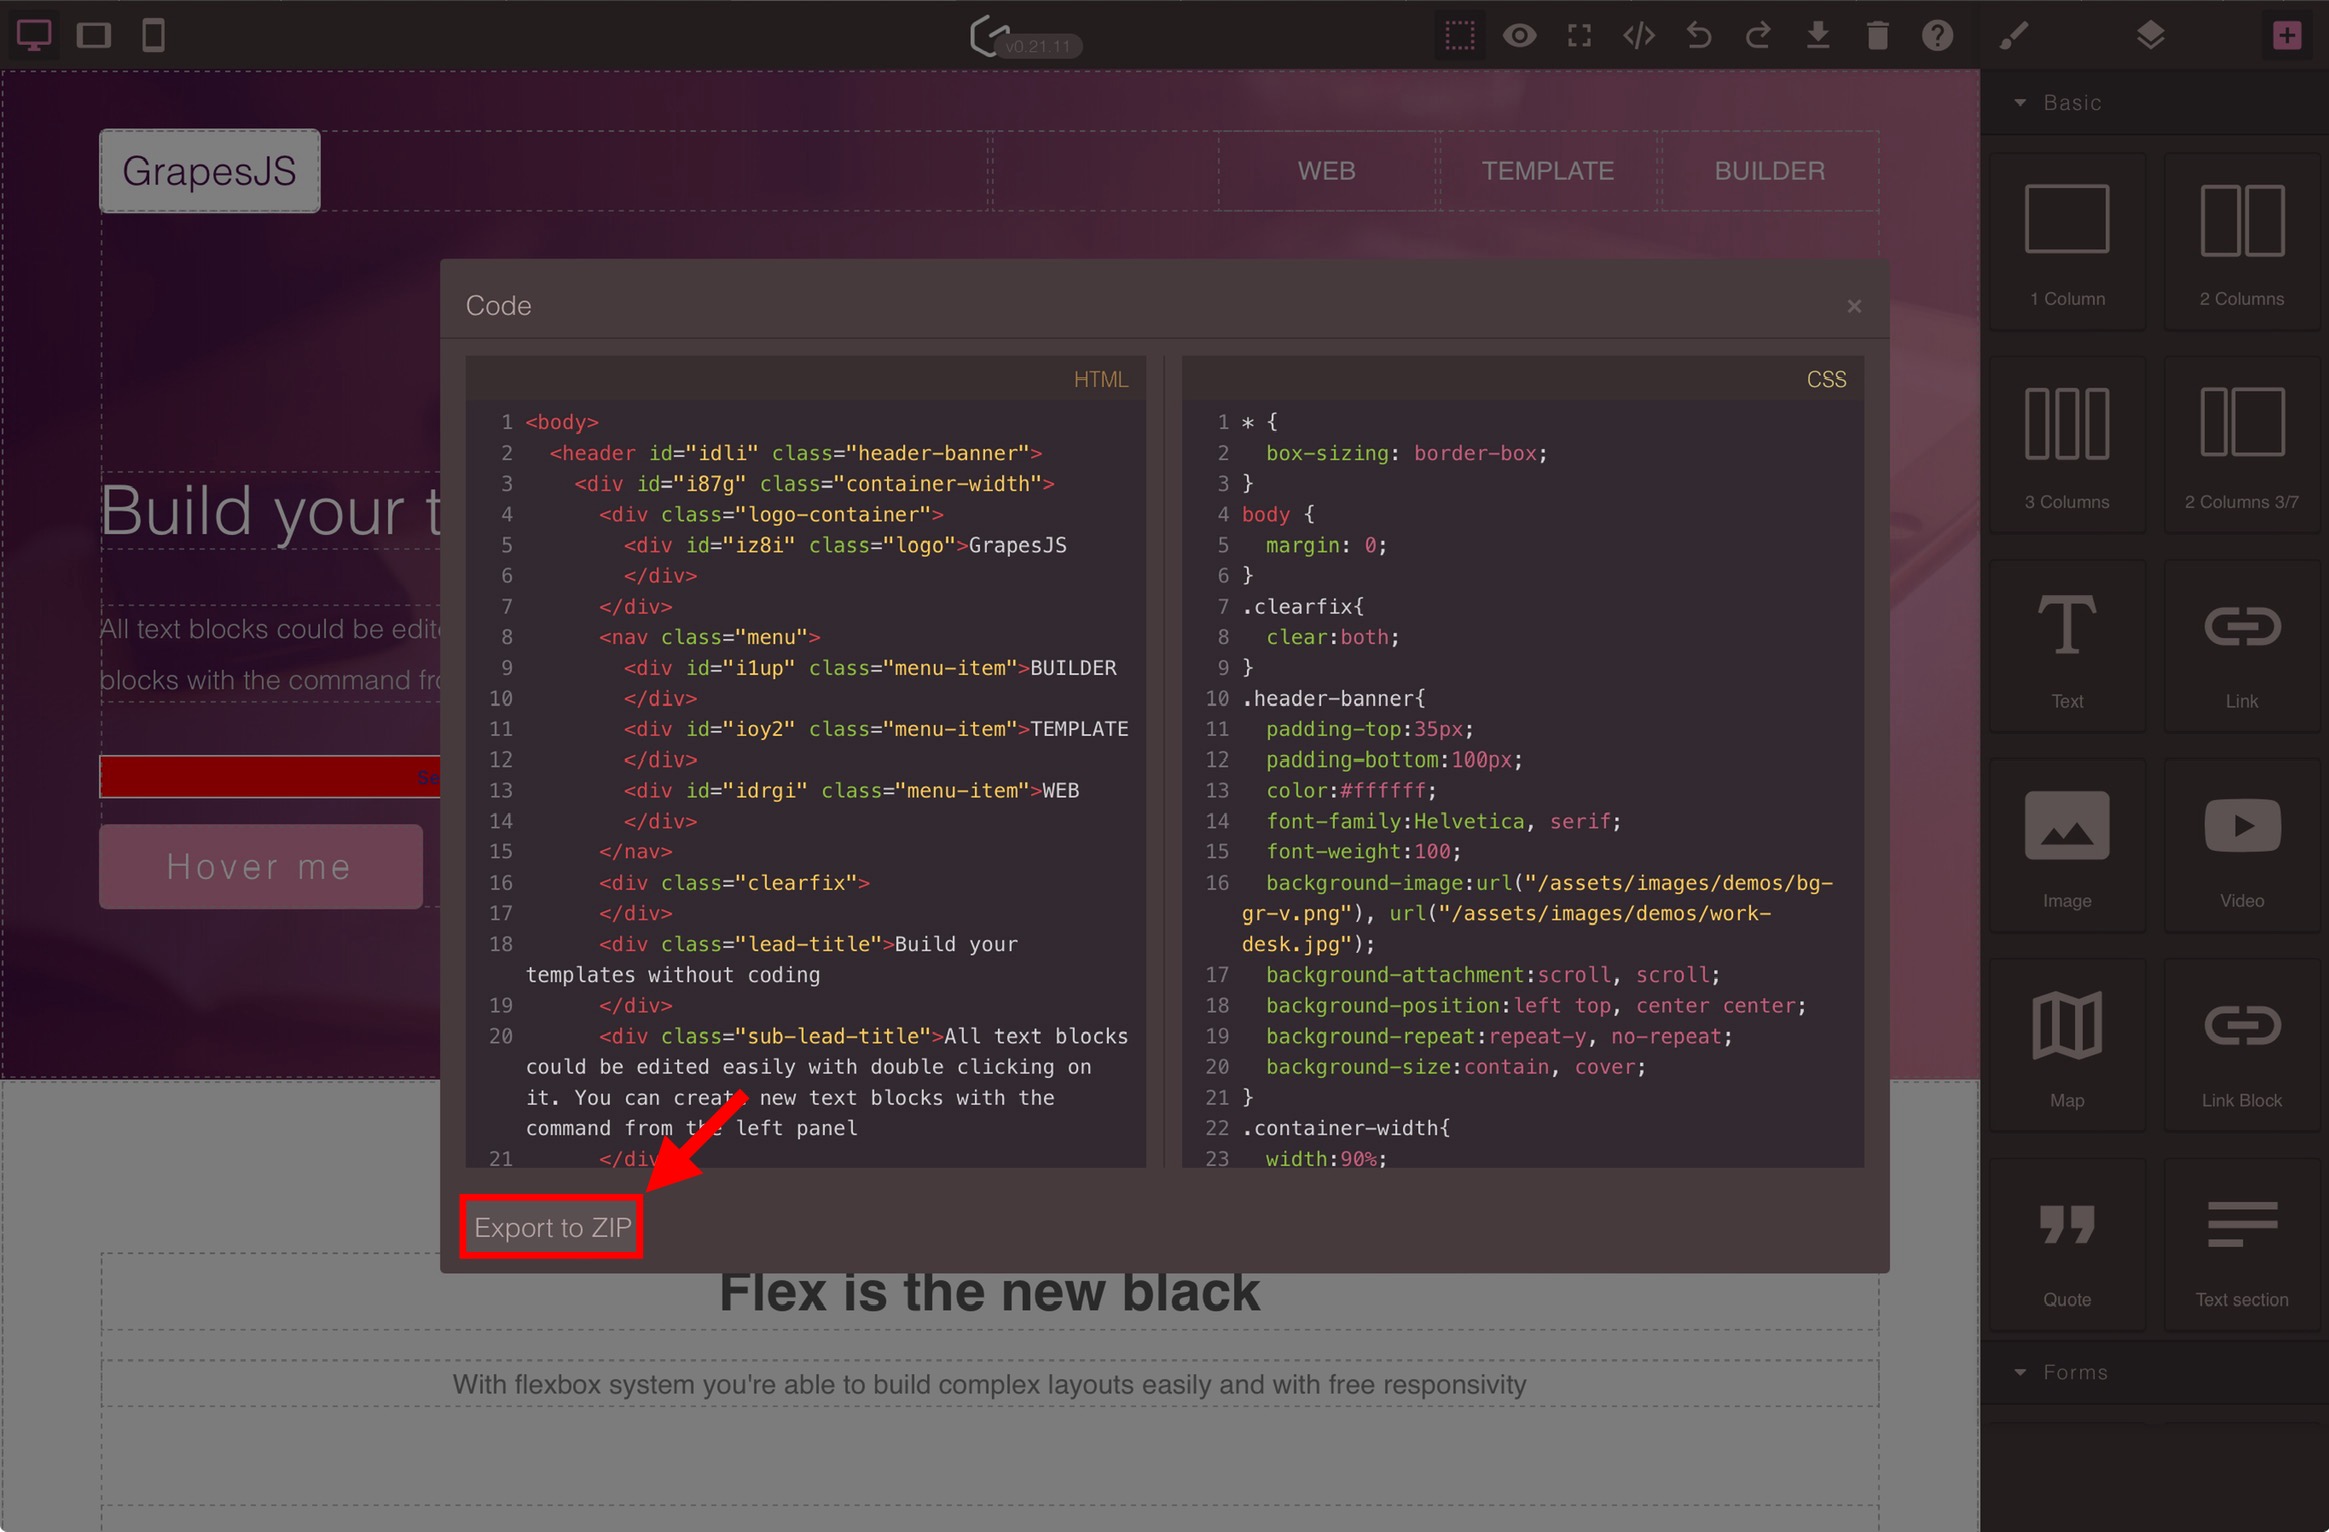
- In the window that displays you can select , in the bottom left corner of the window, to download your website files.
- Find the zip file you just downloaded in your file system (Windows Explorer, Finder, etc) and open it to reveal your HTML and CSS files.
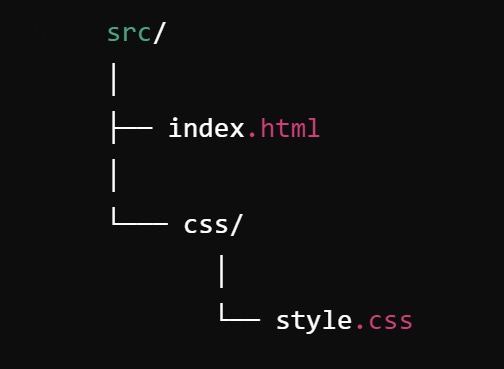
- Create a folder (these are called directories in GitHub) called “src” and put the “index.html” file and CSS folder from Step 1.2.3 into that “src” folder. Your folder structure should mimic the image below.
- Folder structure example
 return to Step 2.4.4
return to Step 2.5.5
return to Step 2.4.4
return to Step 2.5.5
Upload Files to GitHub
GitHub Introduction
GitHub is a web-based platform that allows people to collaborate on projects by managing and sharing files, primarily code, though it's useful for any file type. Think of it as a version control system where you can track changes to your documents, work with others simultaneously, and keep a history of all edits. It's like Google Docs, but for more complex projects, where every change is recorded, and multiple versions of the project can be worked on and merged together seamlessly. It also fosters community interaction through discussions, issue tracking, and collaborative problem-solving.
Create a GitHub Account
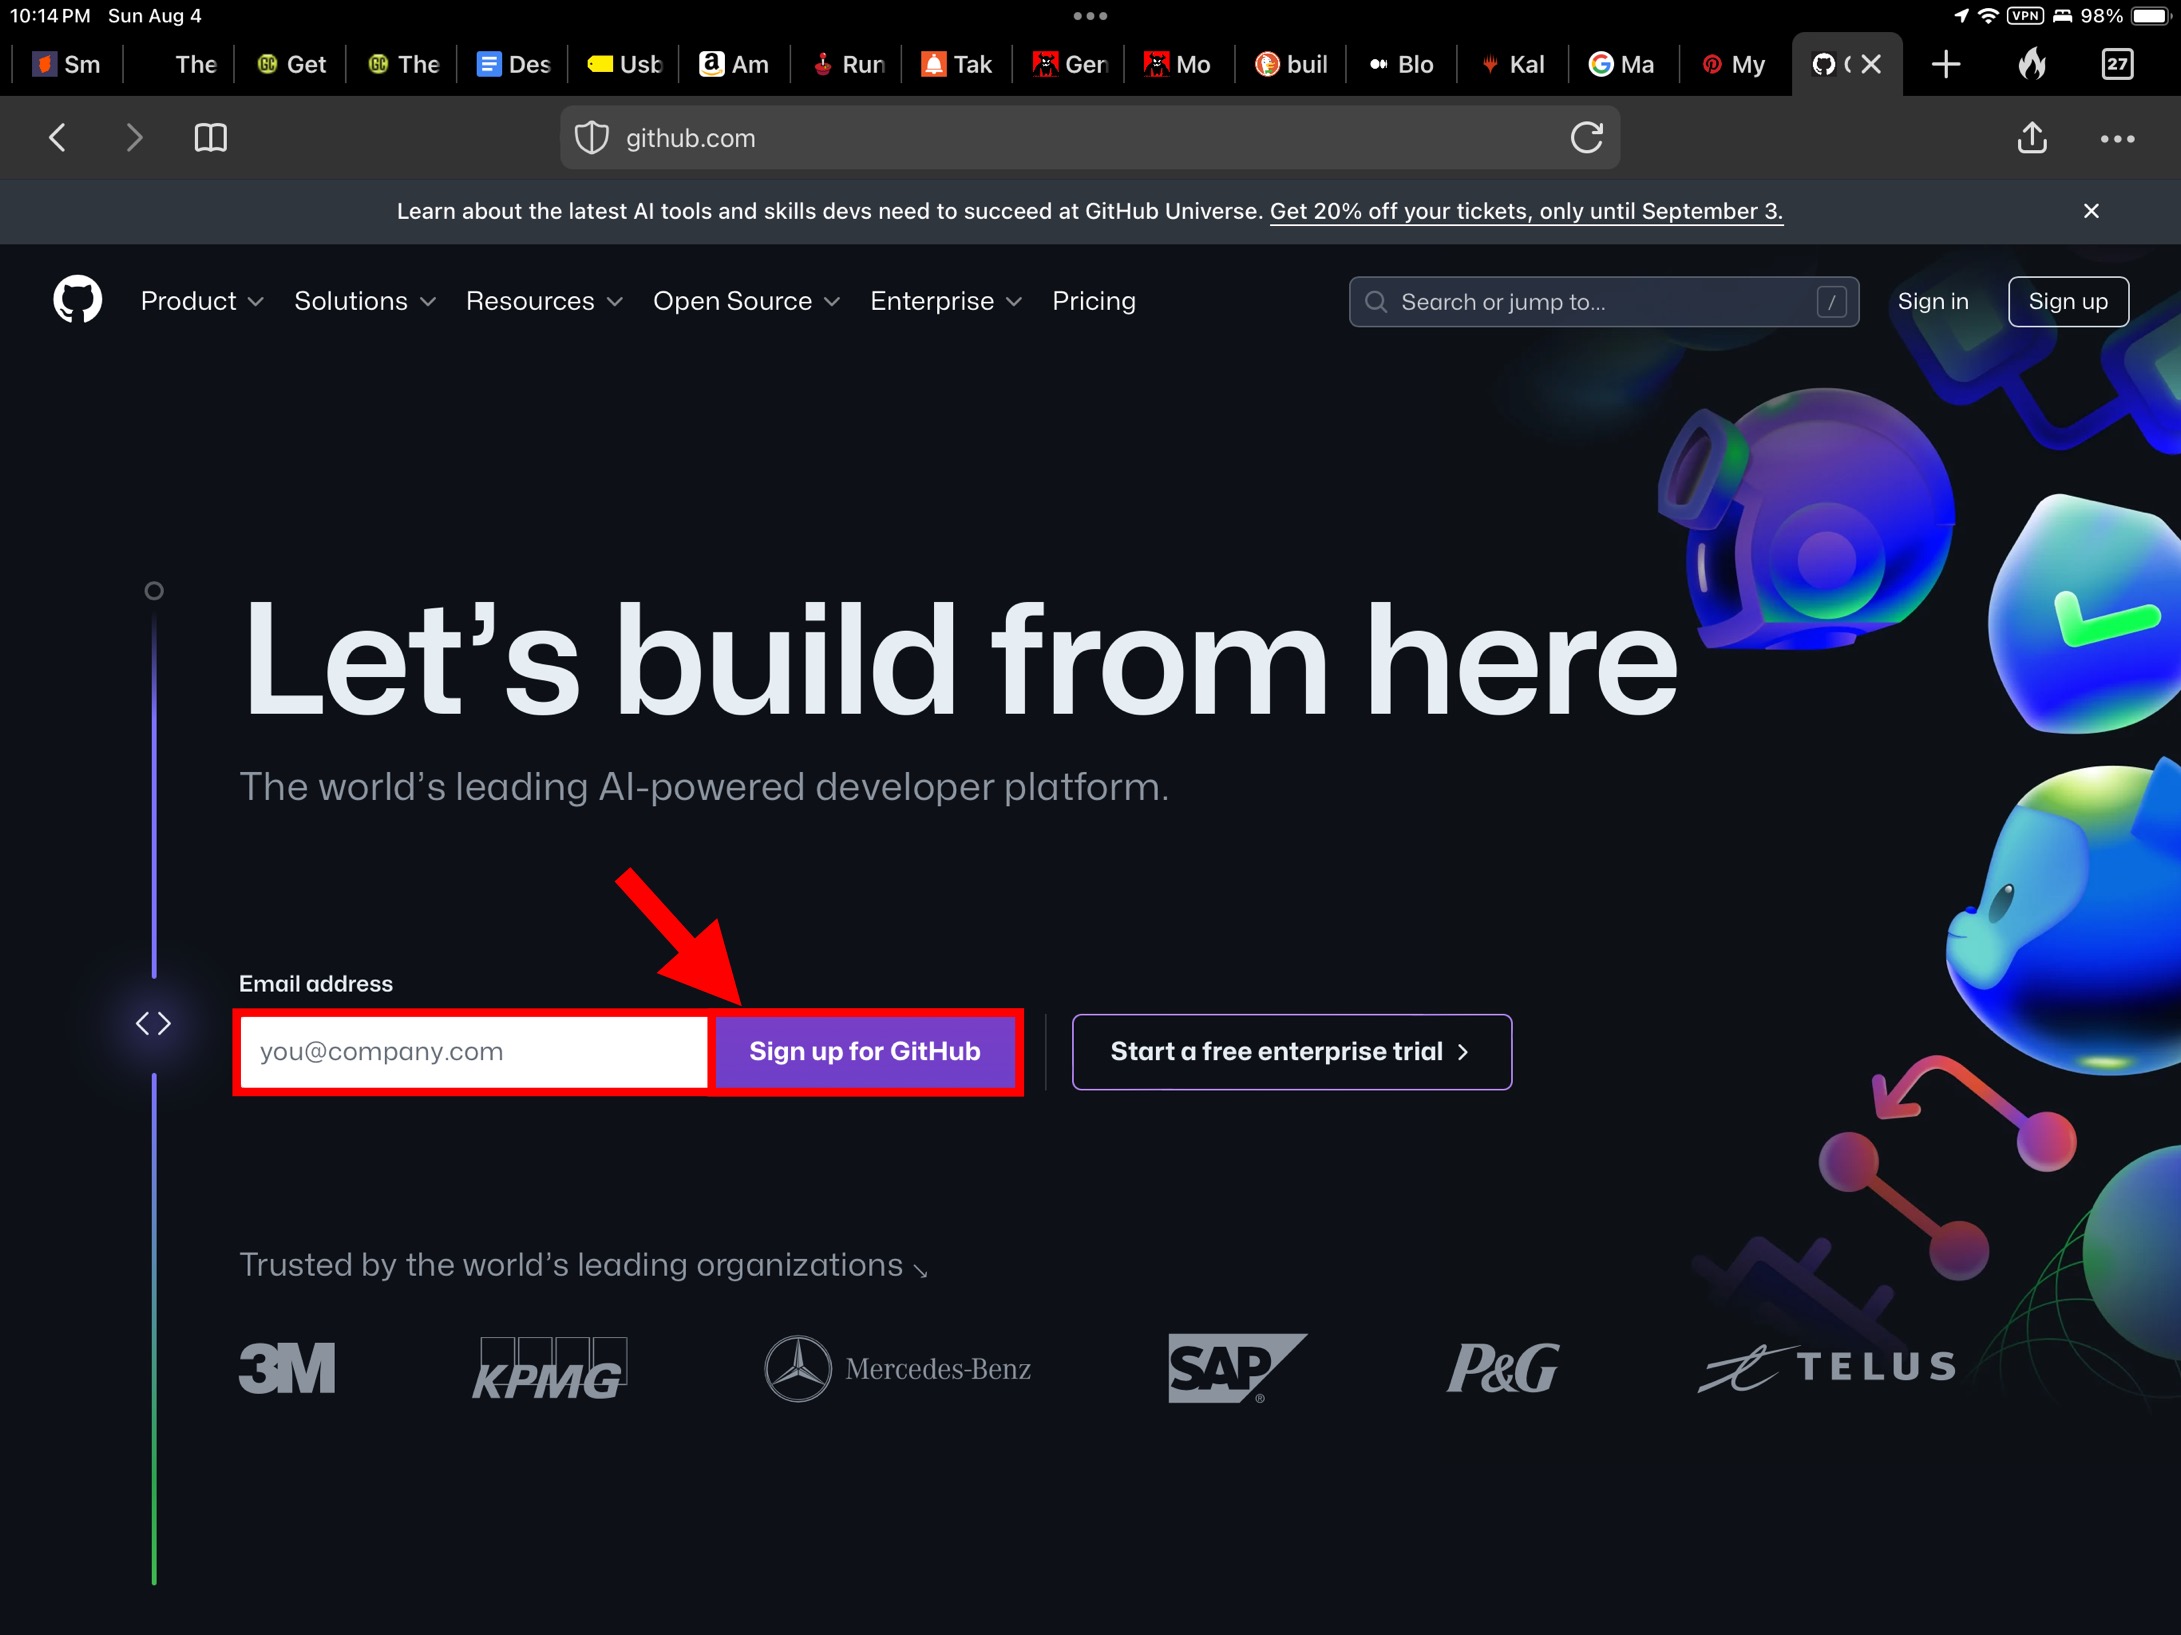
- Go to the GitHub website.
- Add an e-mail address, and click the button or sign in with an existing account.
- Click here to follow GitHub’s tutorial on creating an account.
Create Repository
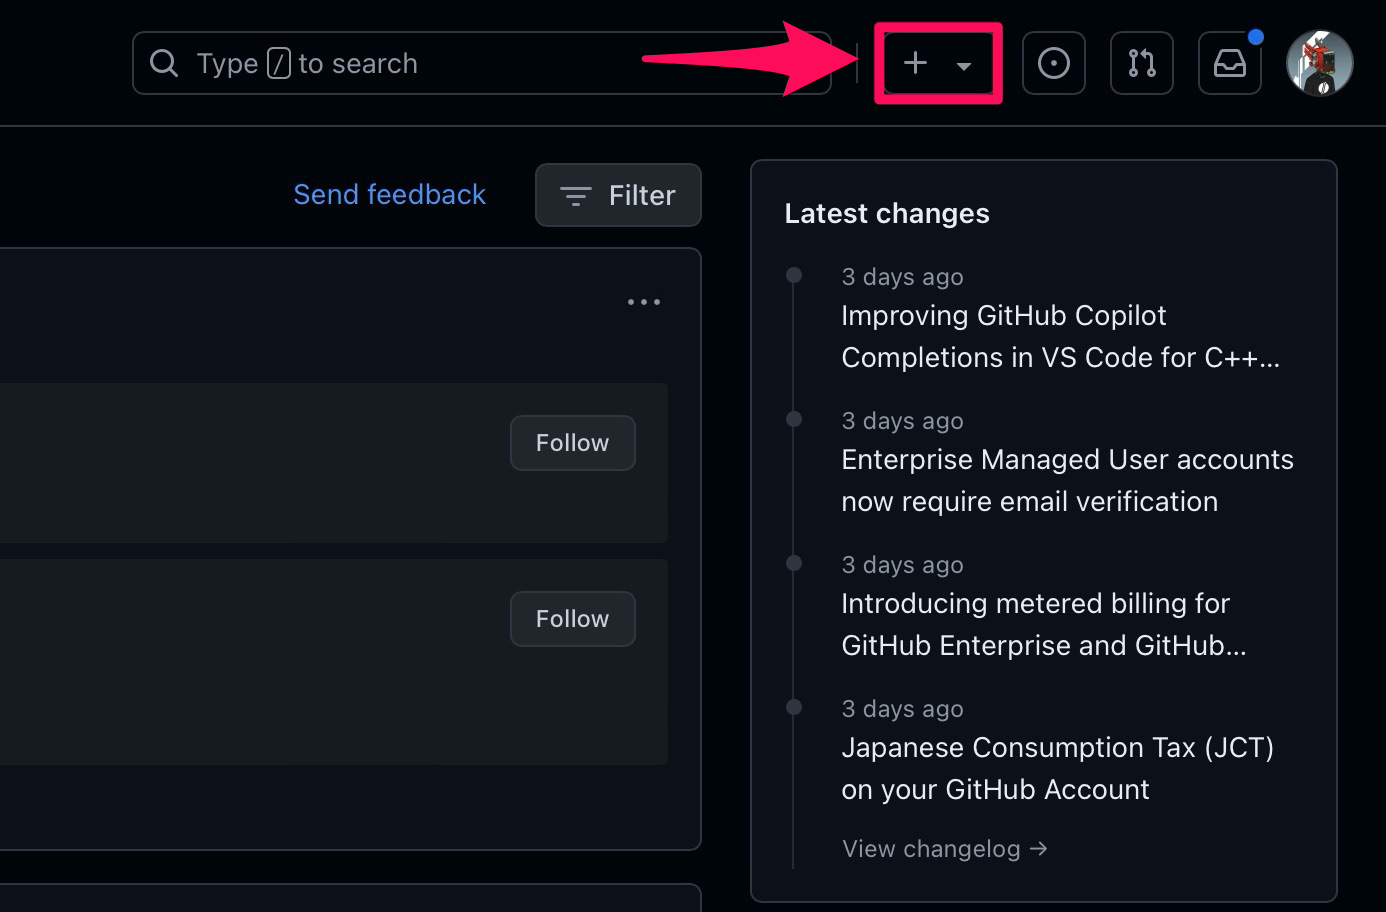
- Click the button, in the top-right corner of the screen, within the menubar.
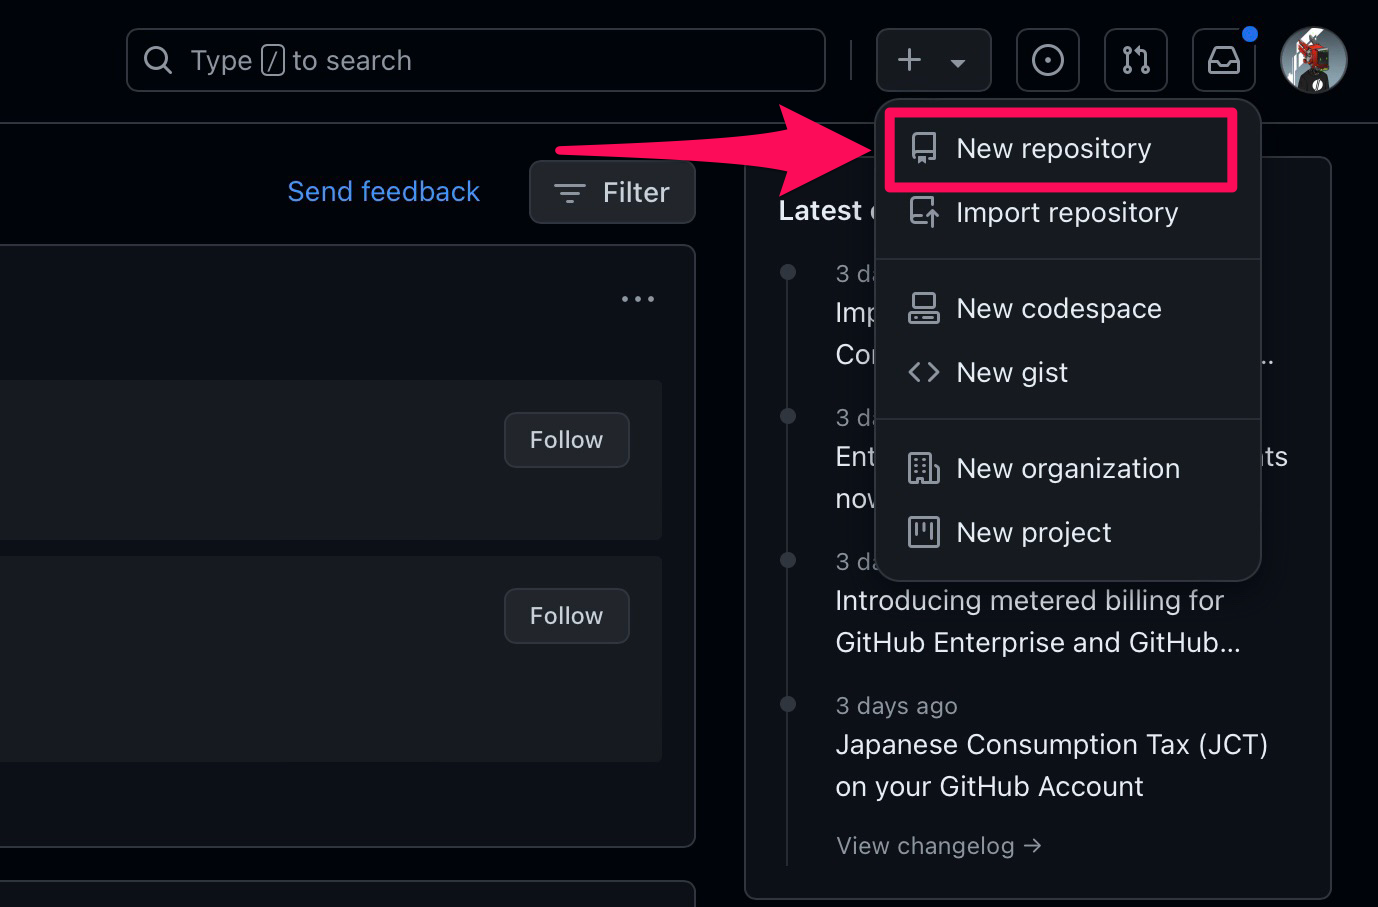
- Click the button, from the dropdown menu, and give it a name relevant to your website.
- Choose your repository to be public or private.
- Check the box to create a README.md. (optional) ~> About READMEs
- Check the box to create a License. (optional) ~> About Licensing
 return to Step 3.3.3
Create a src and css Directory
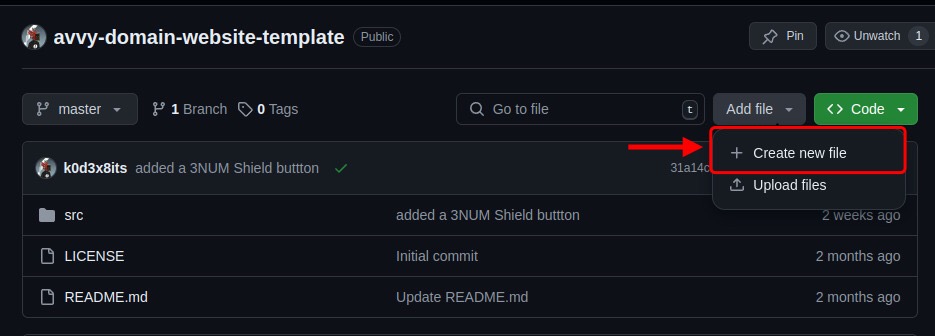
- Click the button to the left of the button.
- Click the button in the dropdown menu that displays.
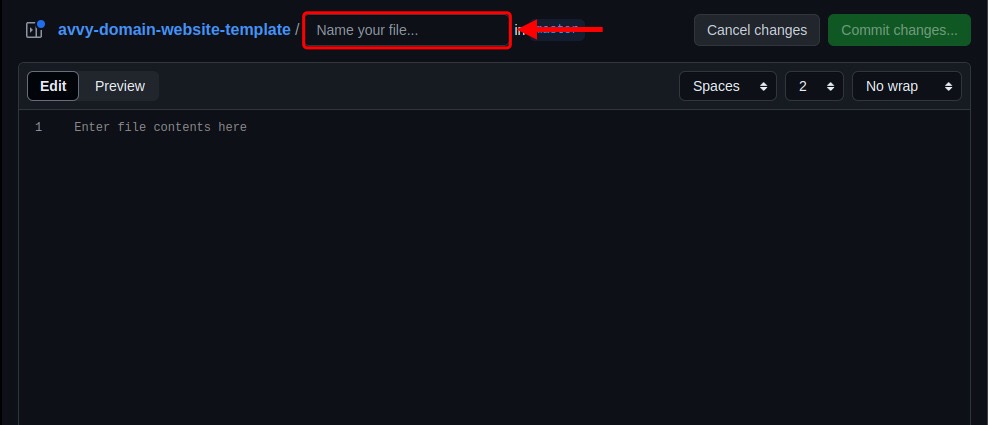
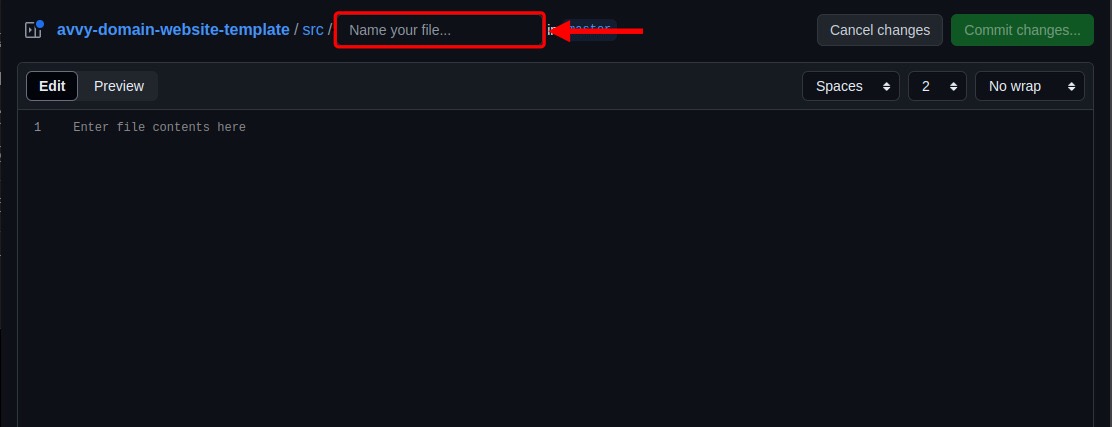
- A new page displays. Type “src/” in the “Name your file…” section to the right of your repository name. This will create you a “src” folder in GitHub.
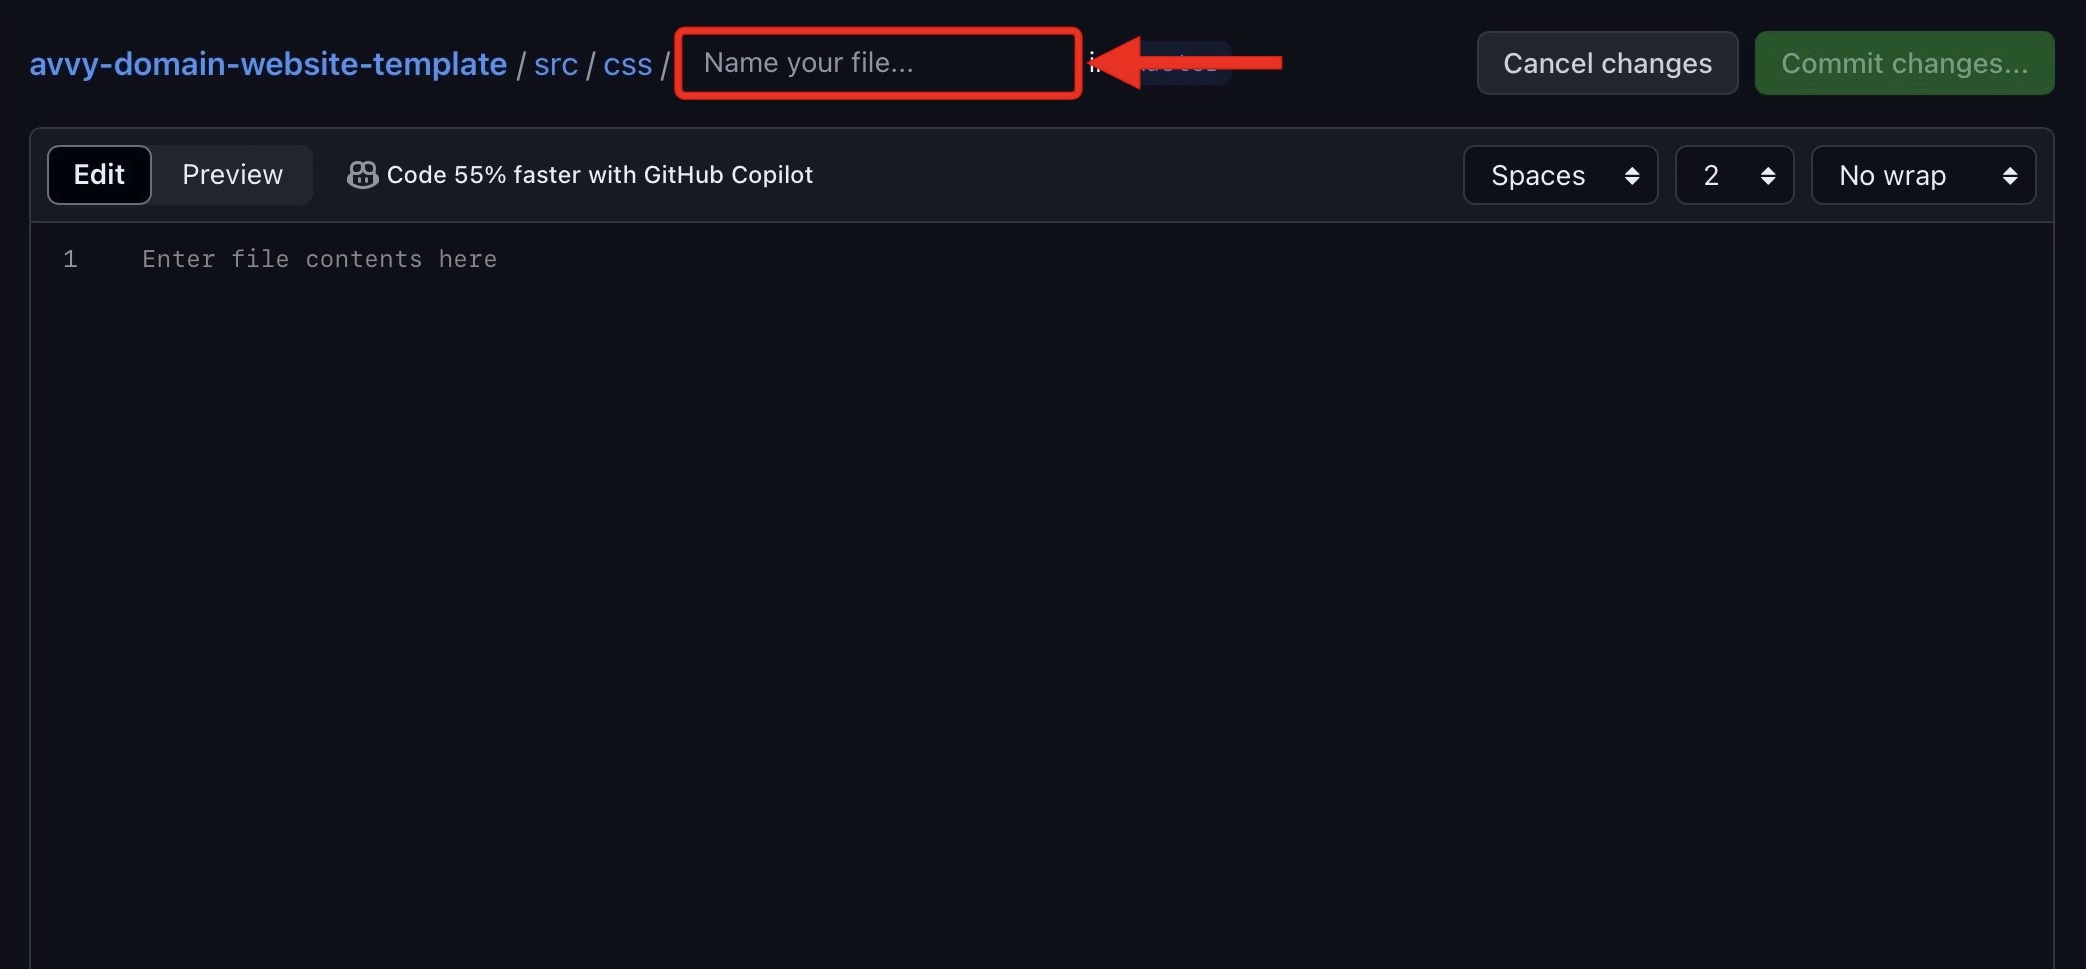
- Click the new “Name your file…” section and type “css/”. This will create another folder called “css”.
- Click the new “Name your file…” section and name the file “dummy.file”. GitHub does not allow the creation of empty directories so we must create a dummy file until we can upload the HTML/CSS in the coming step.
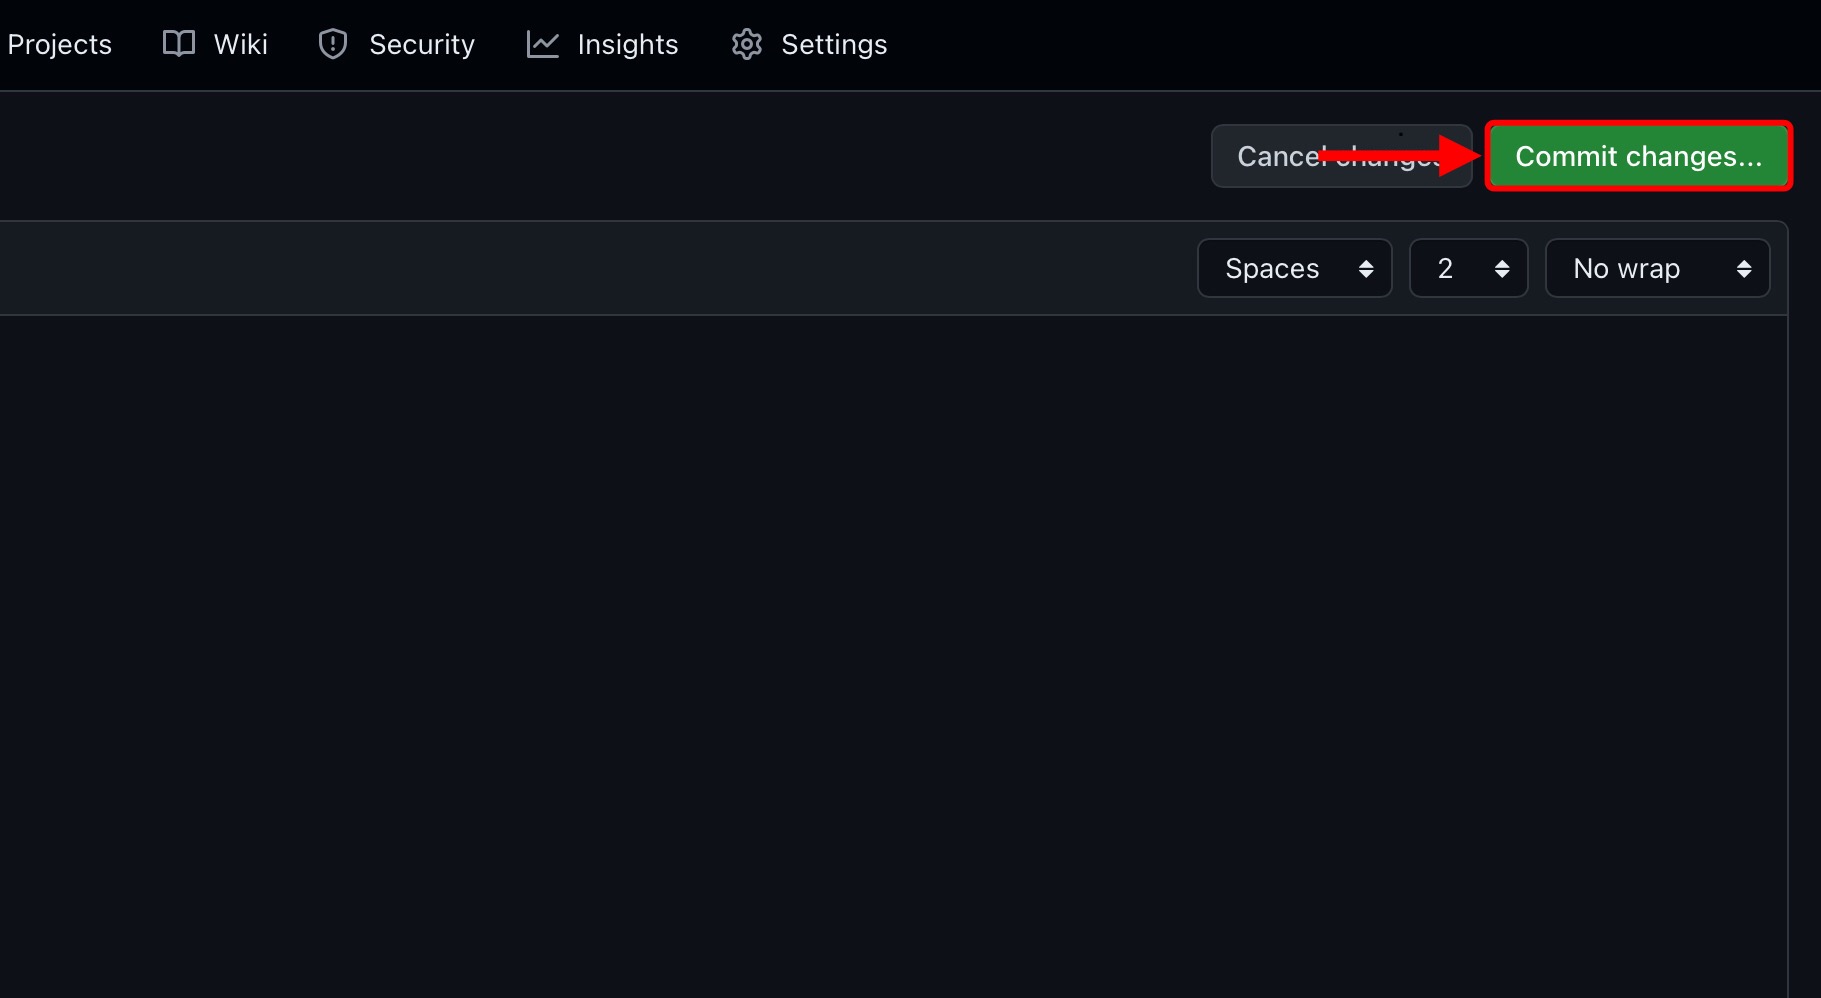
- Click the button. A new window displays with another button; click it.
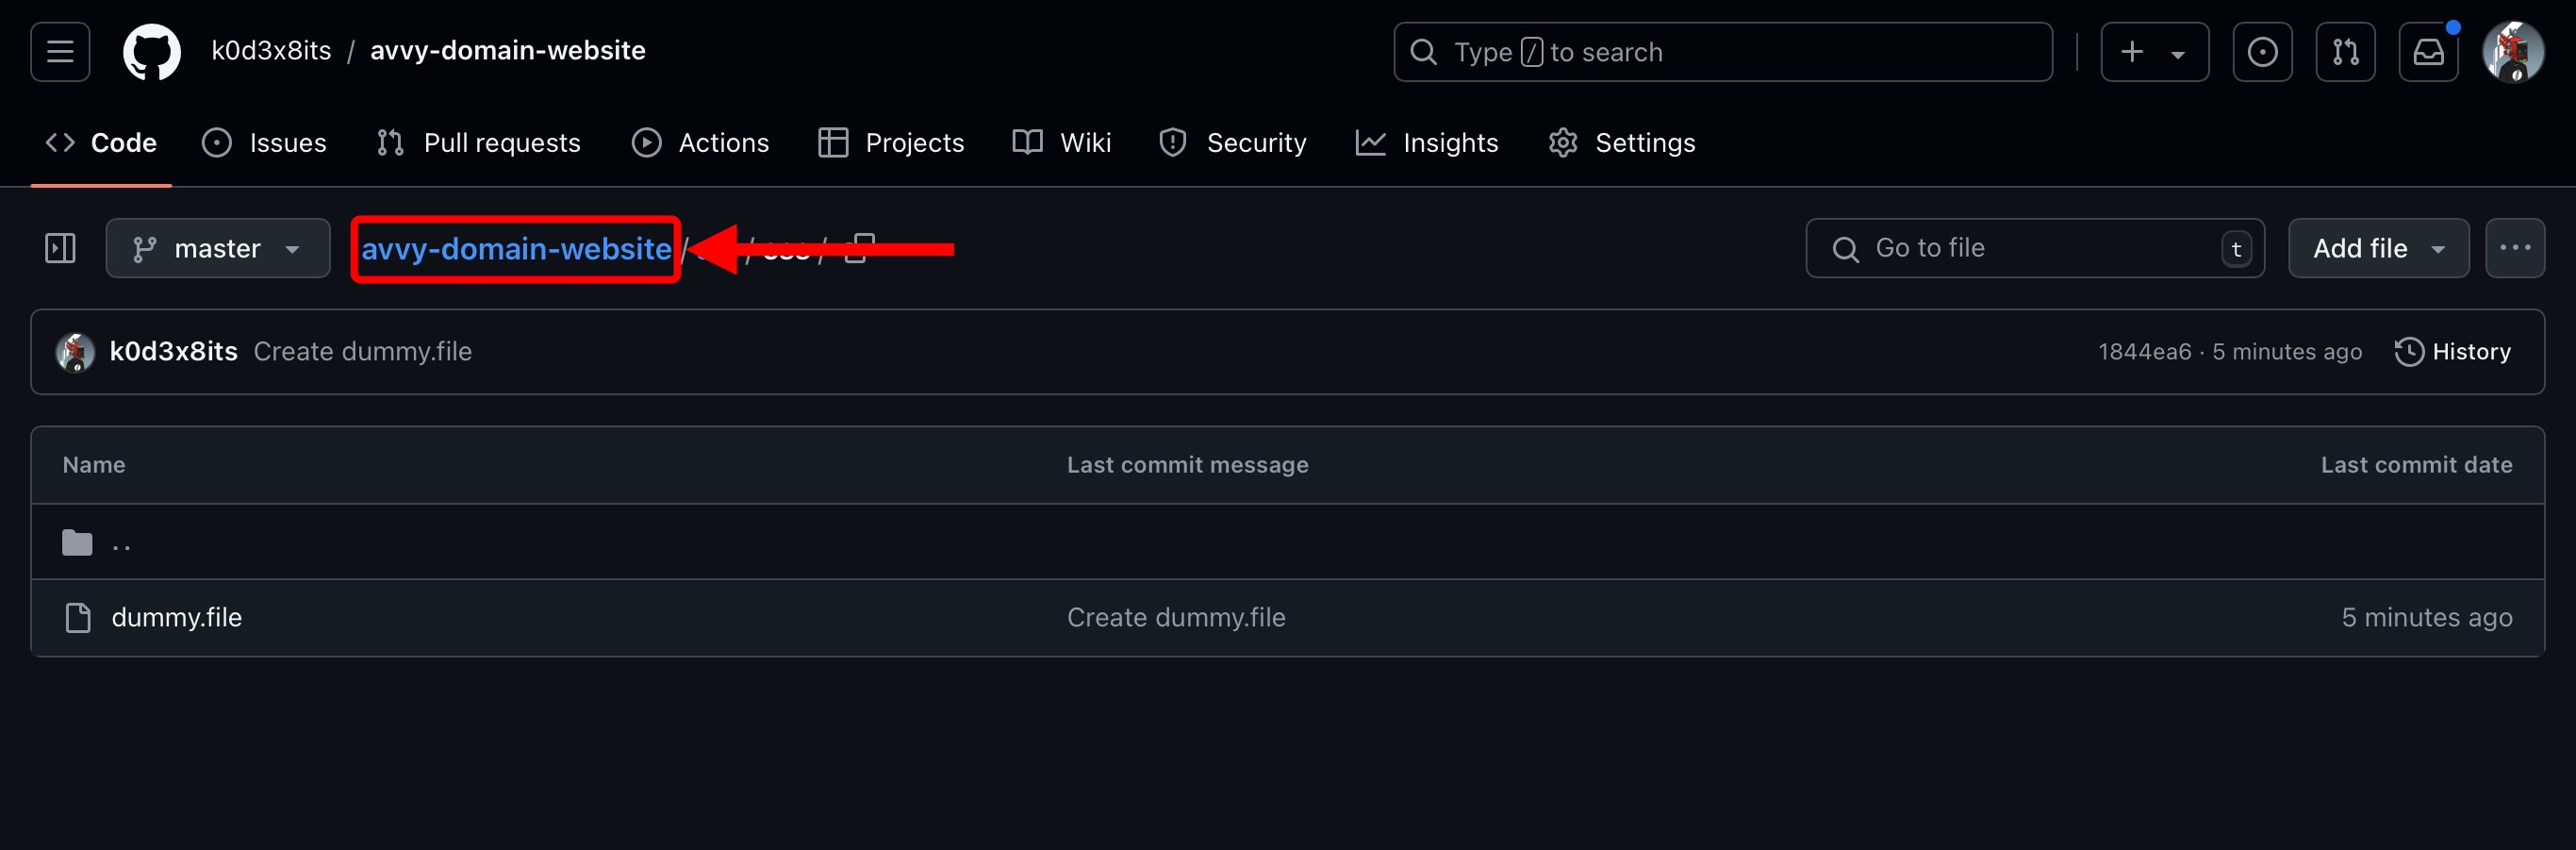
- The window will disappear. Click the link titled as your repository name.

 return to Step 3.4.2
Upload HTML File to Repository
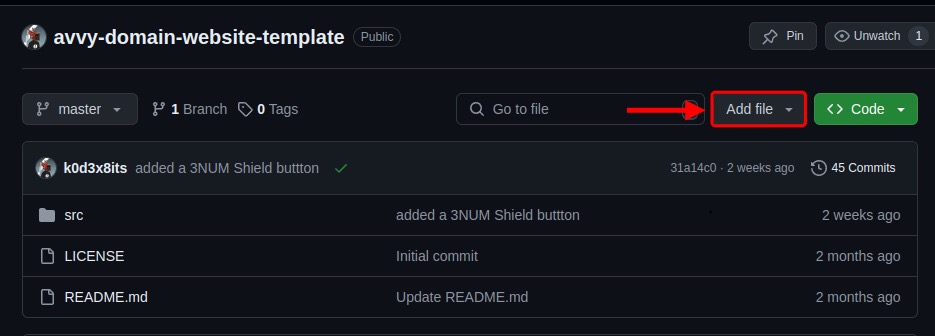
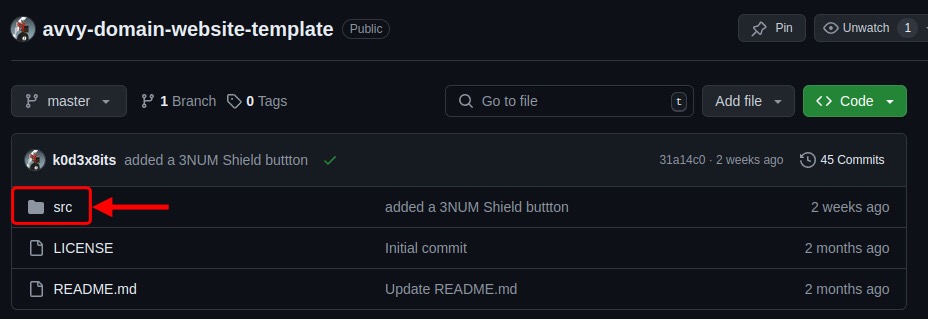
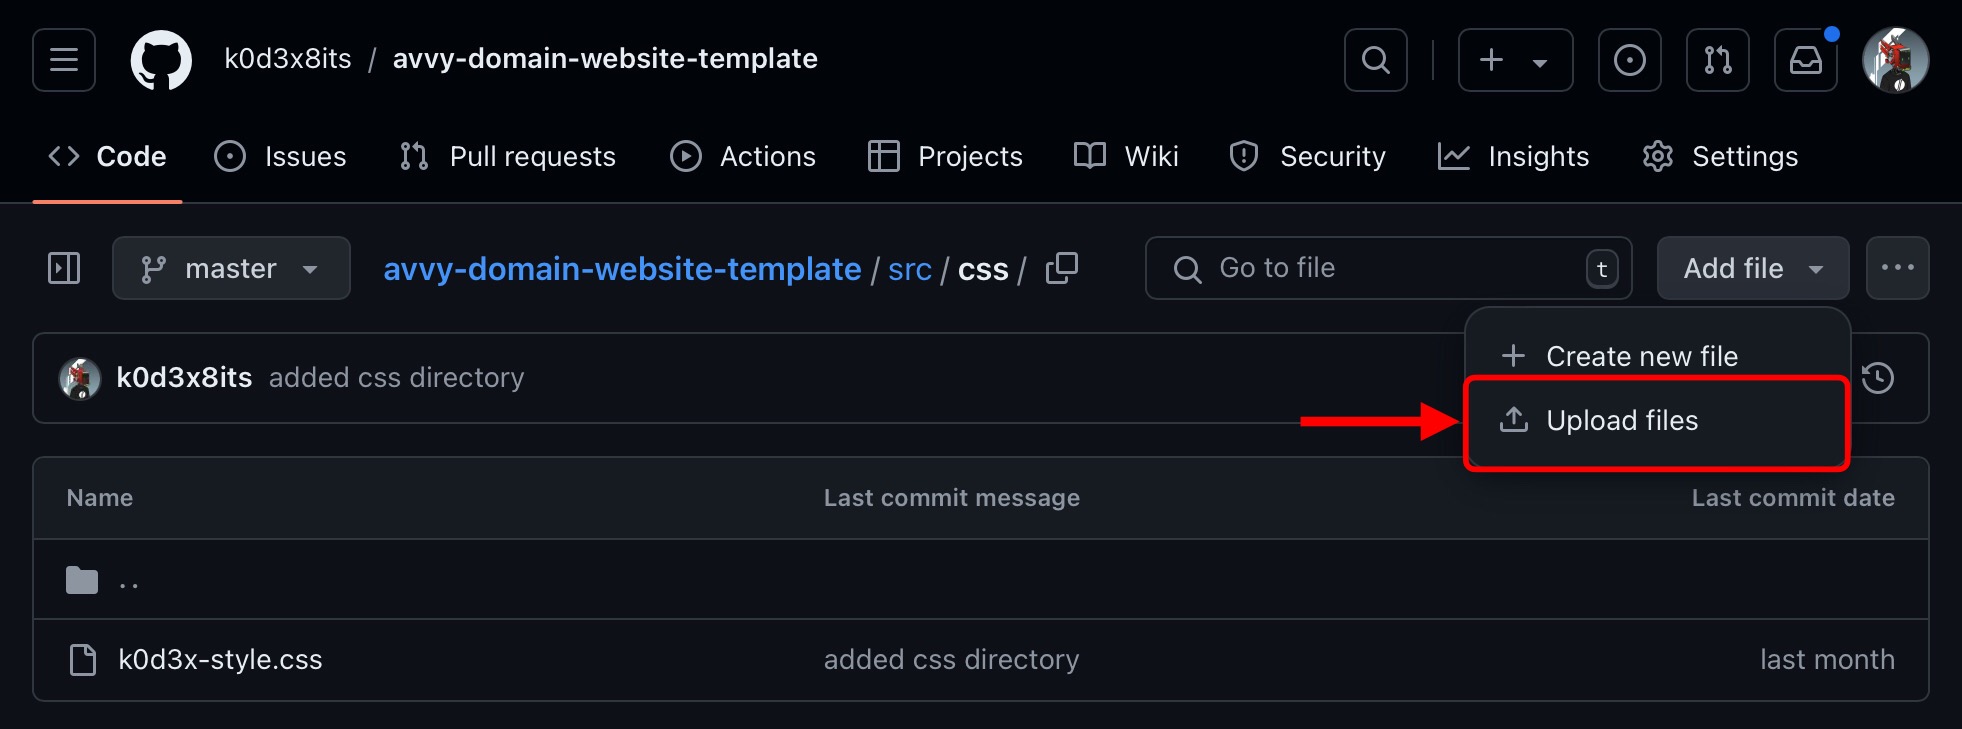
- Click the directory.
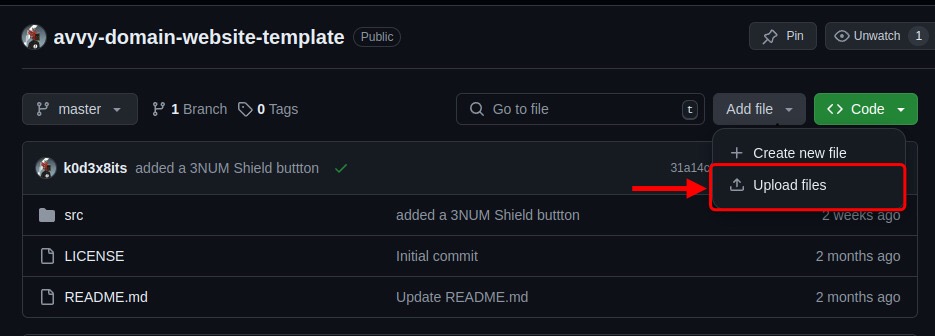
- Click the button to the left of the button.
- From the dropdown menu, click the button.
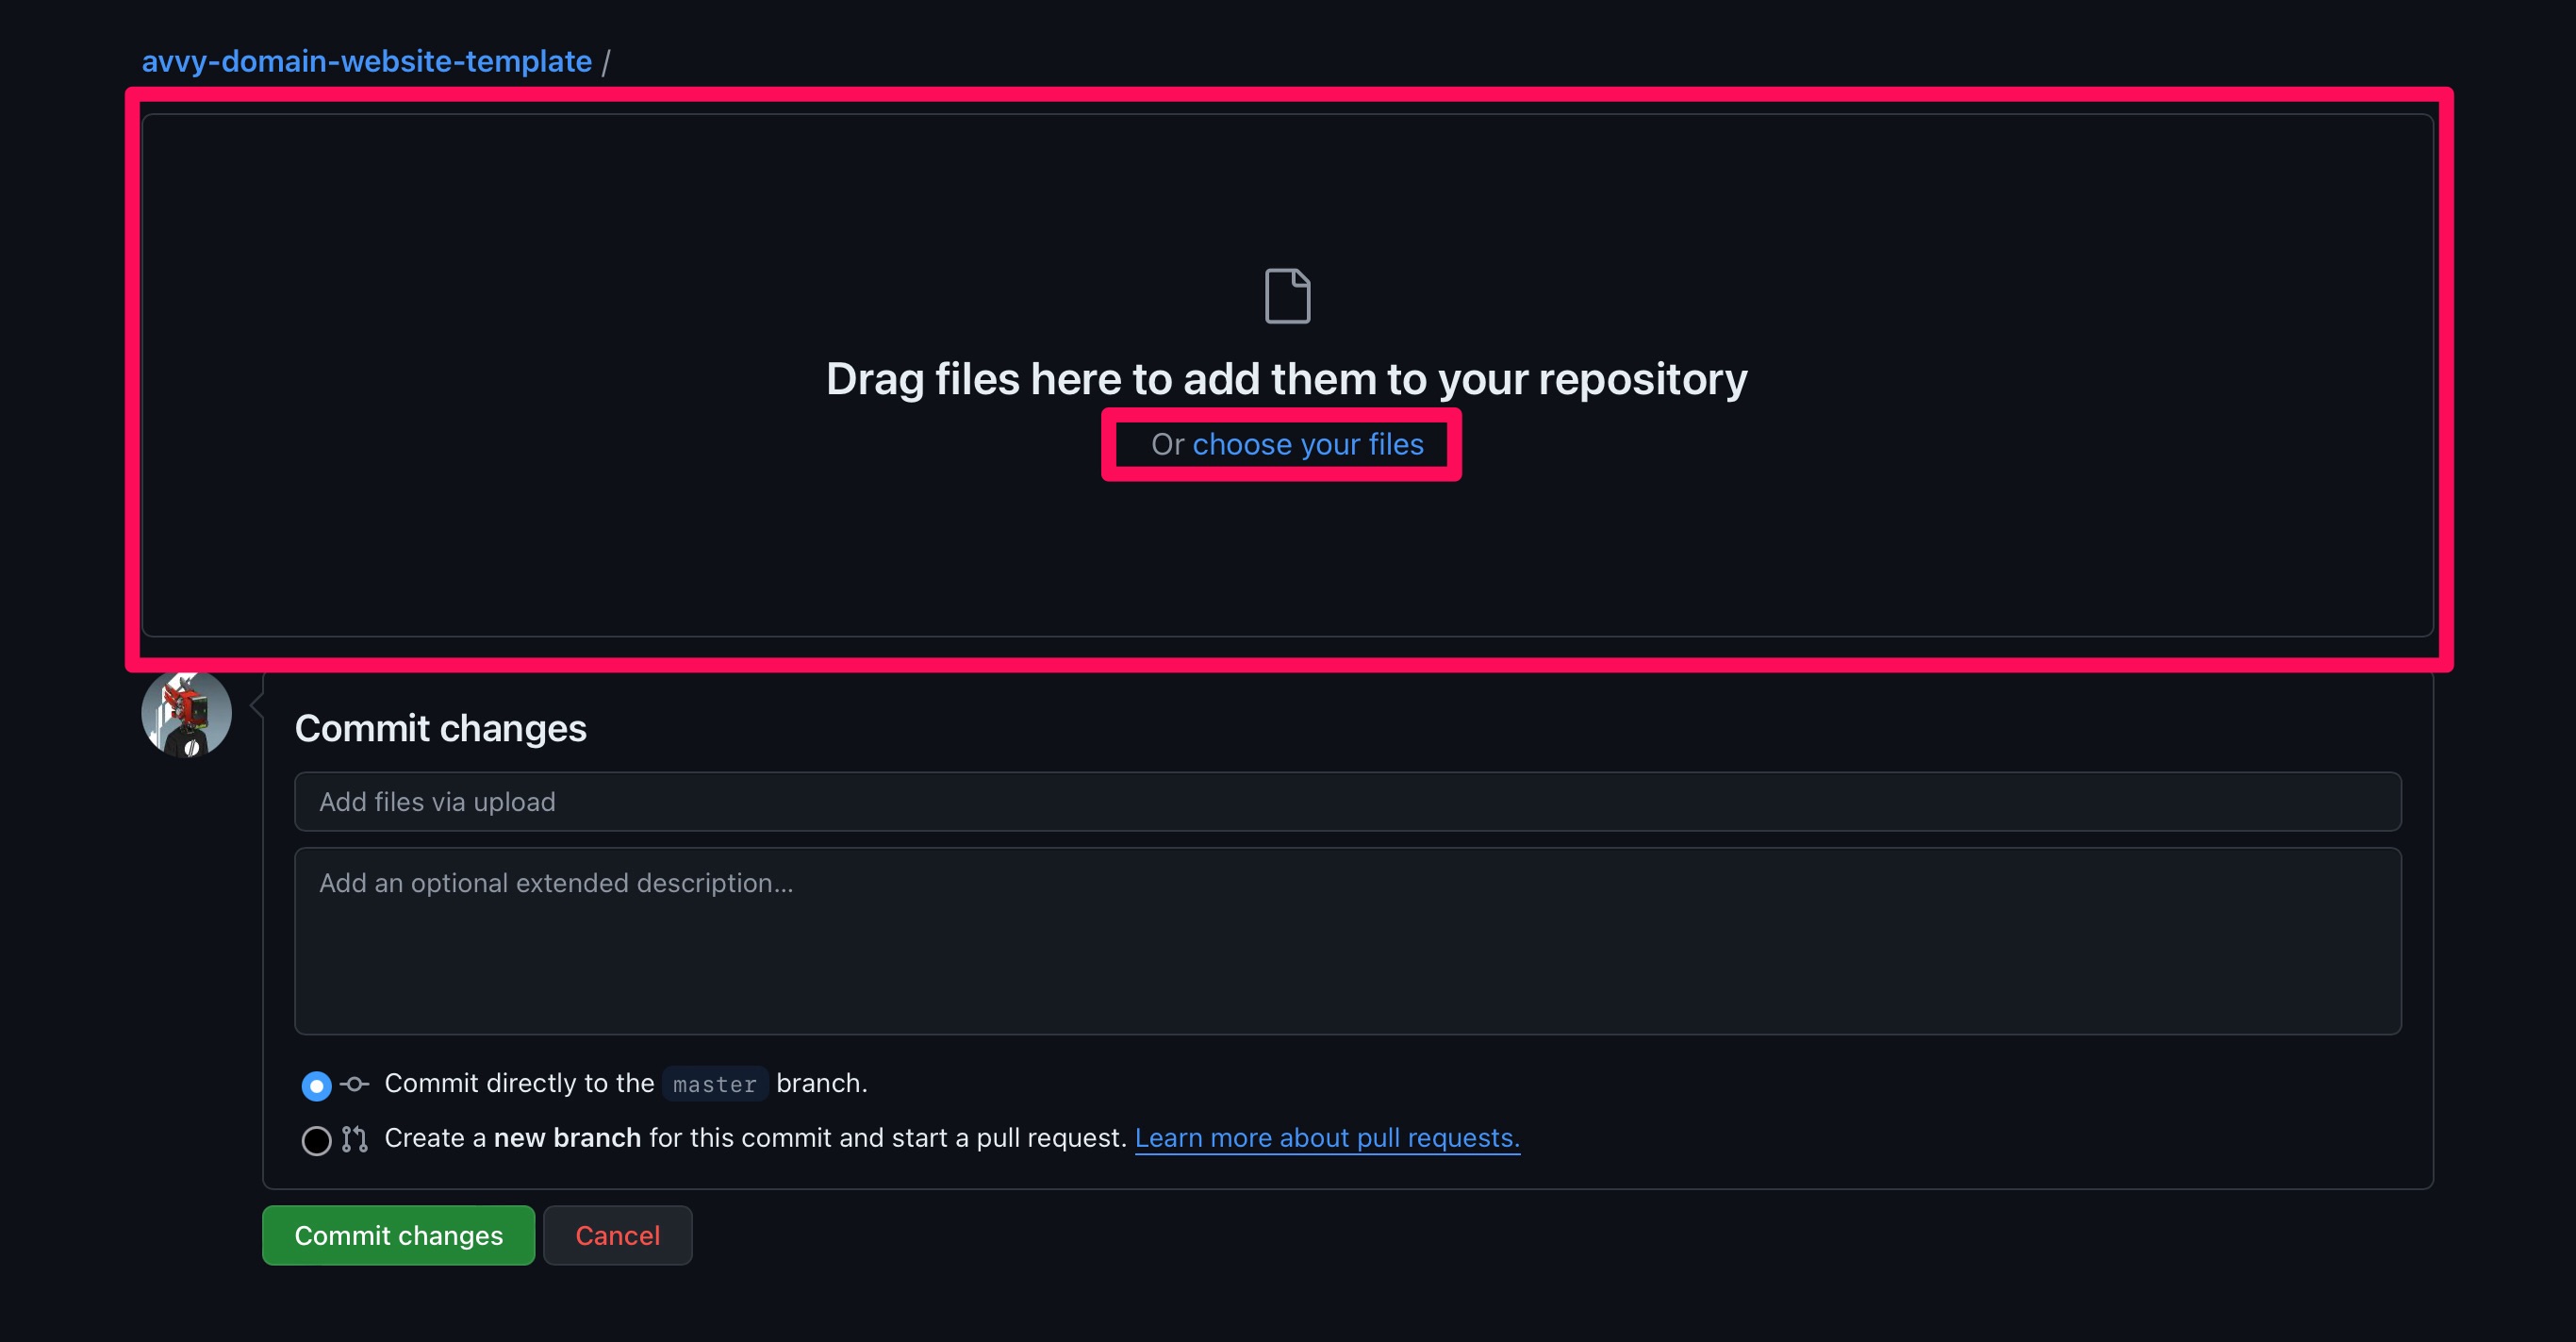
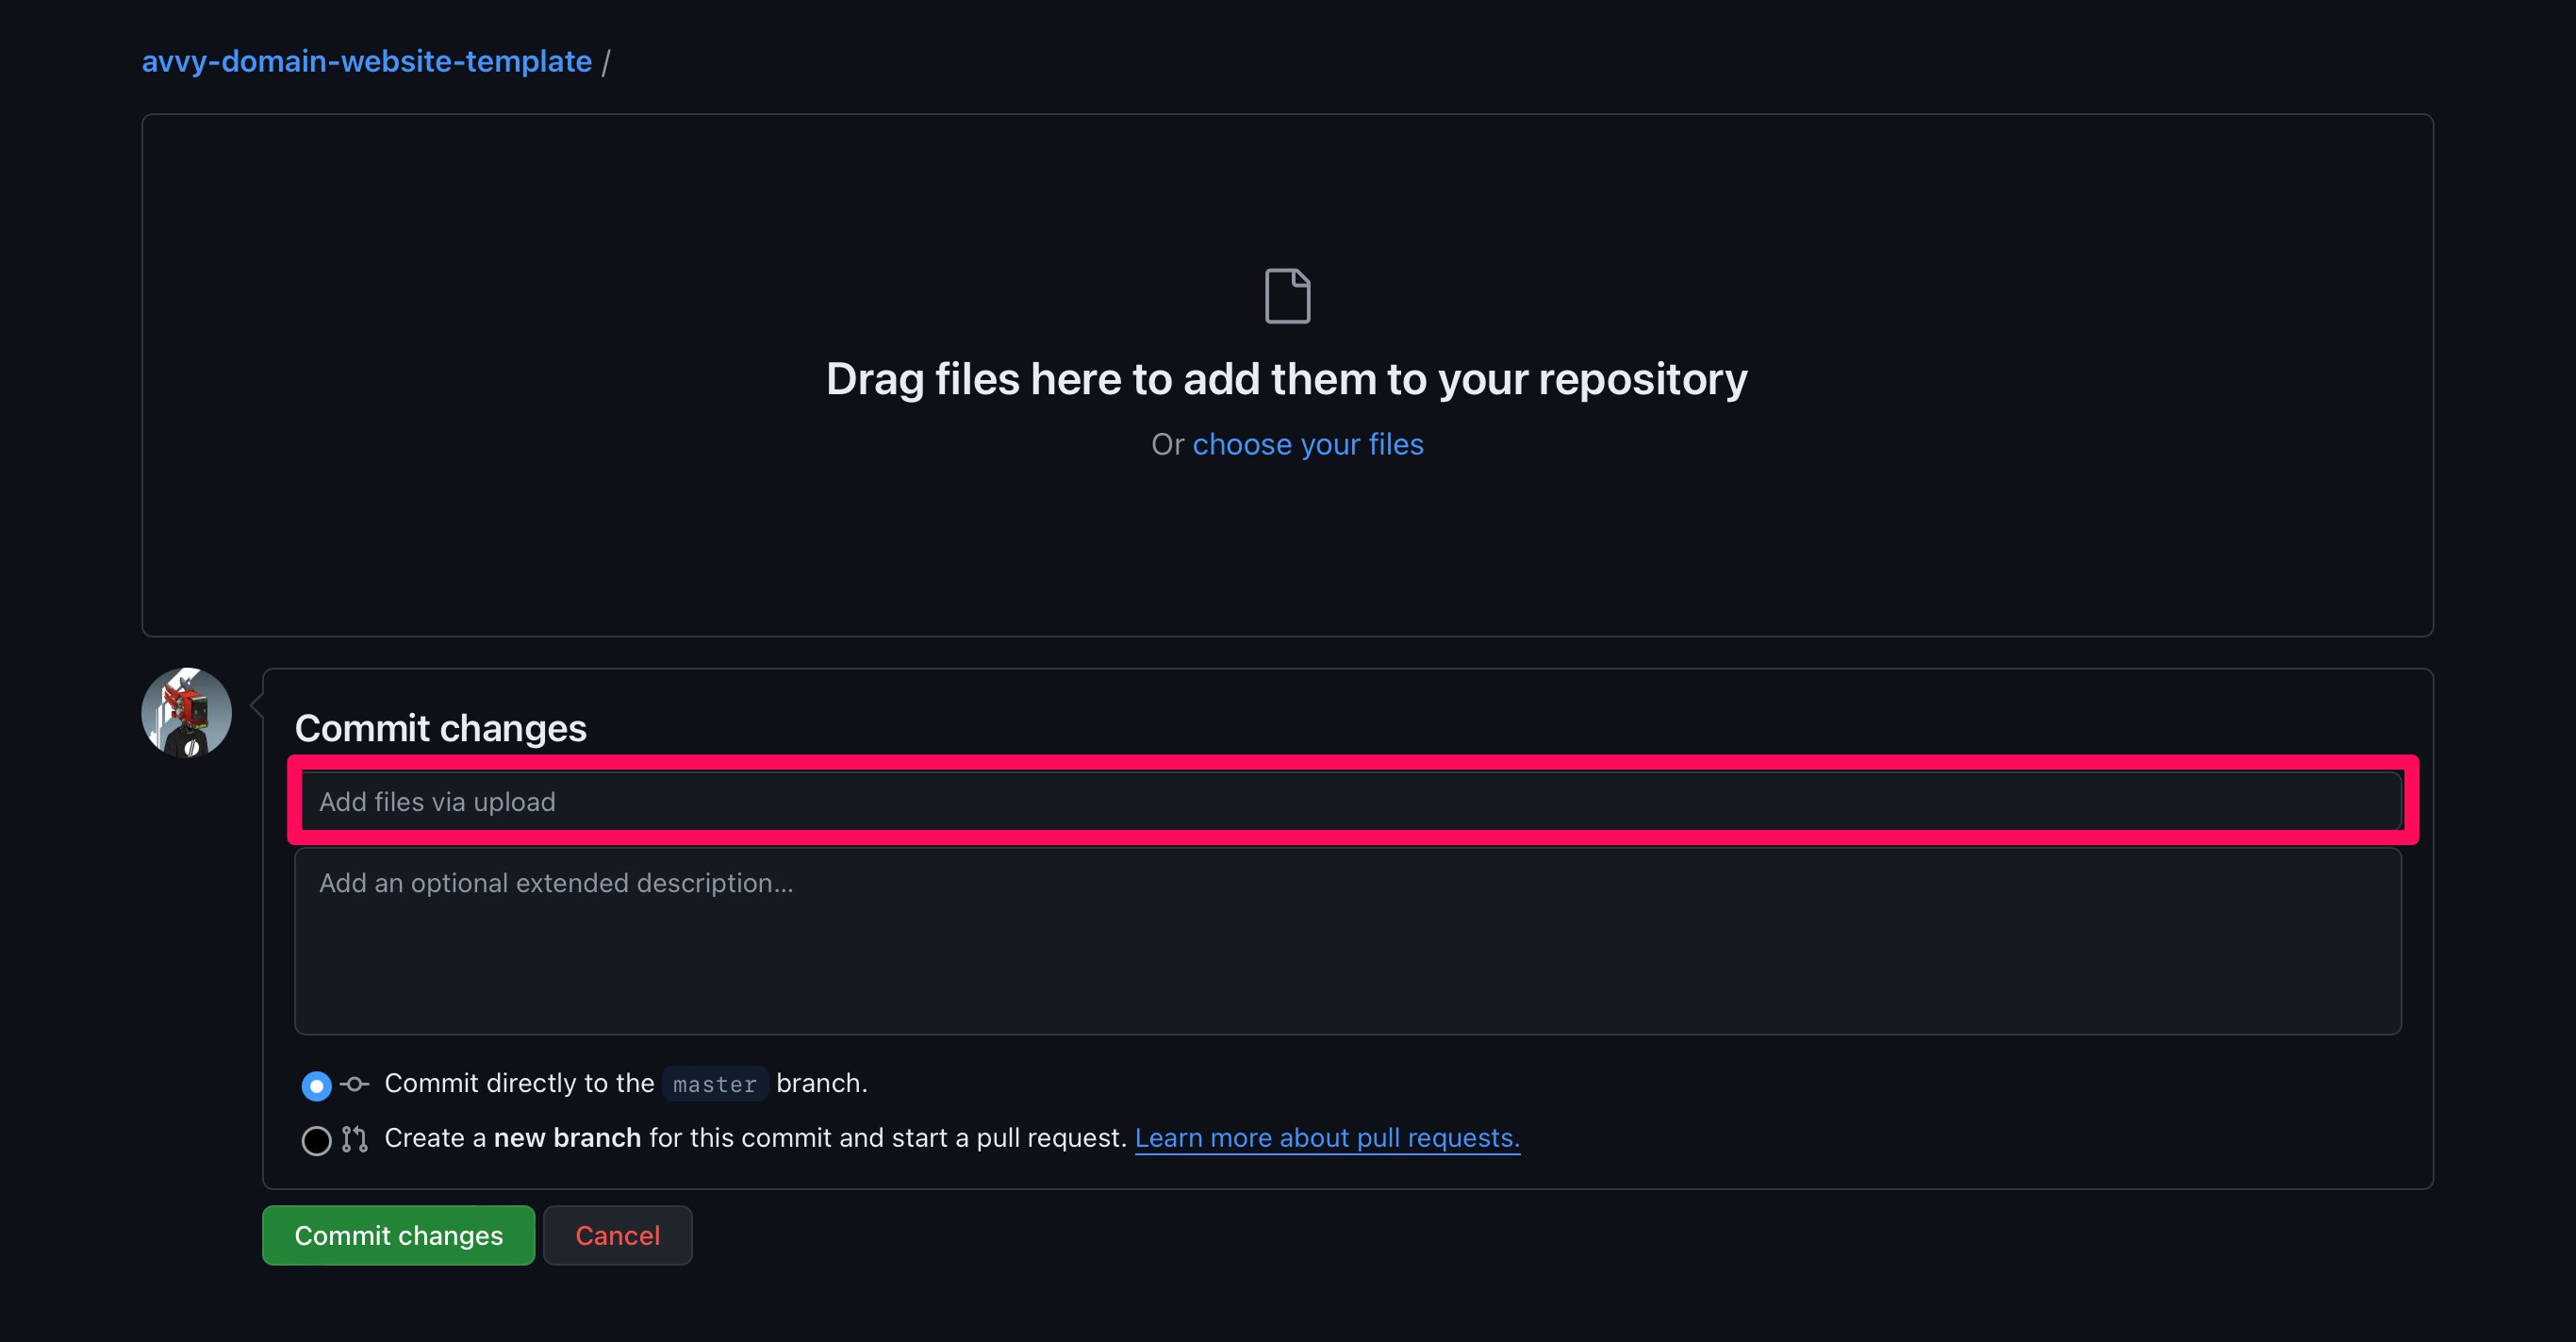
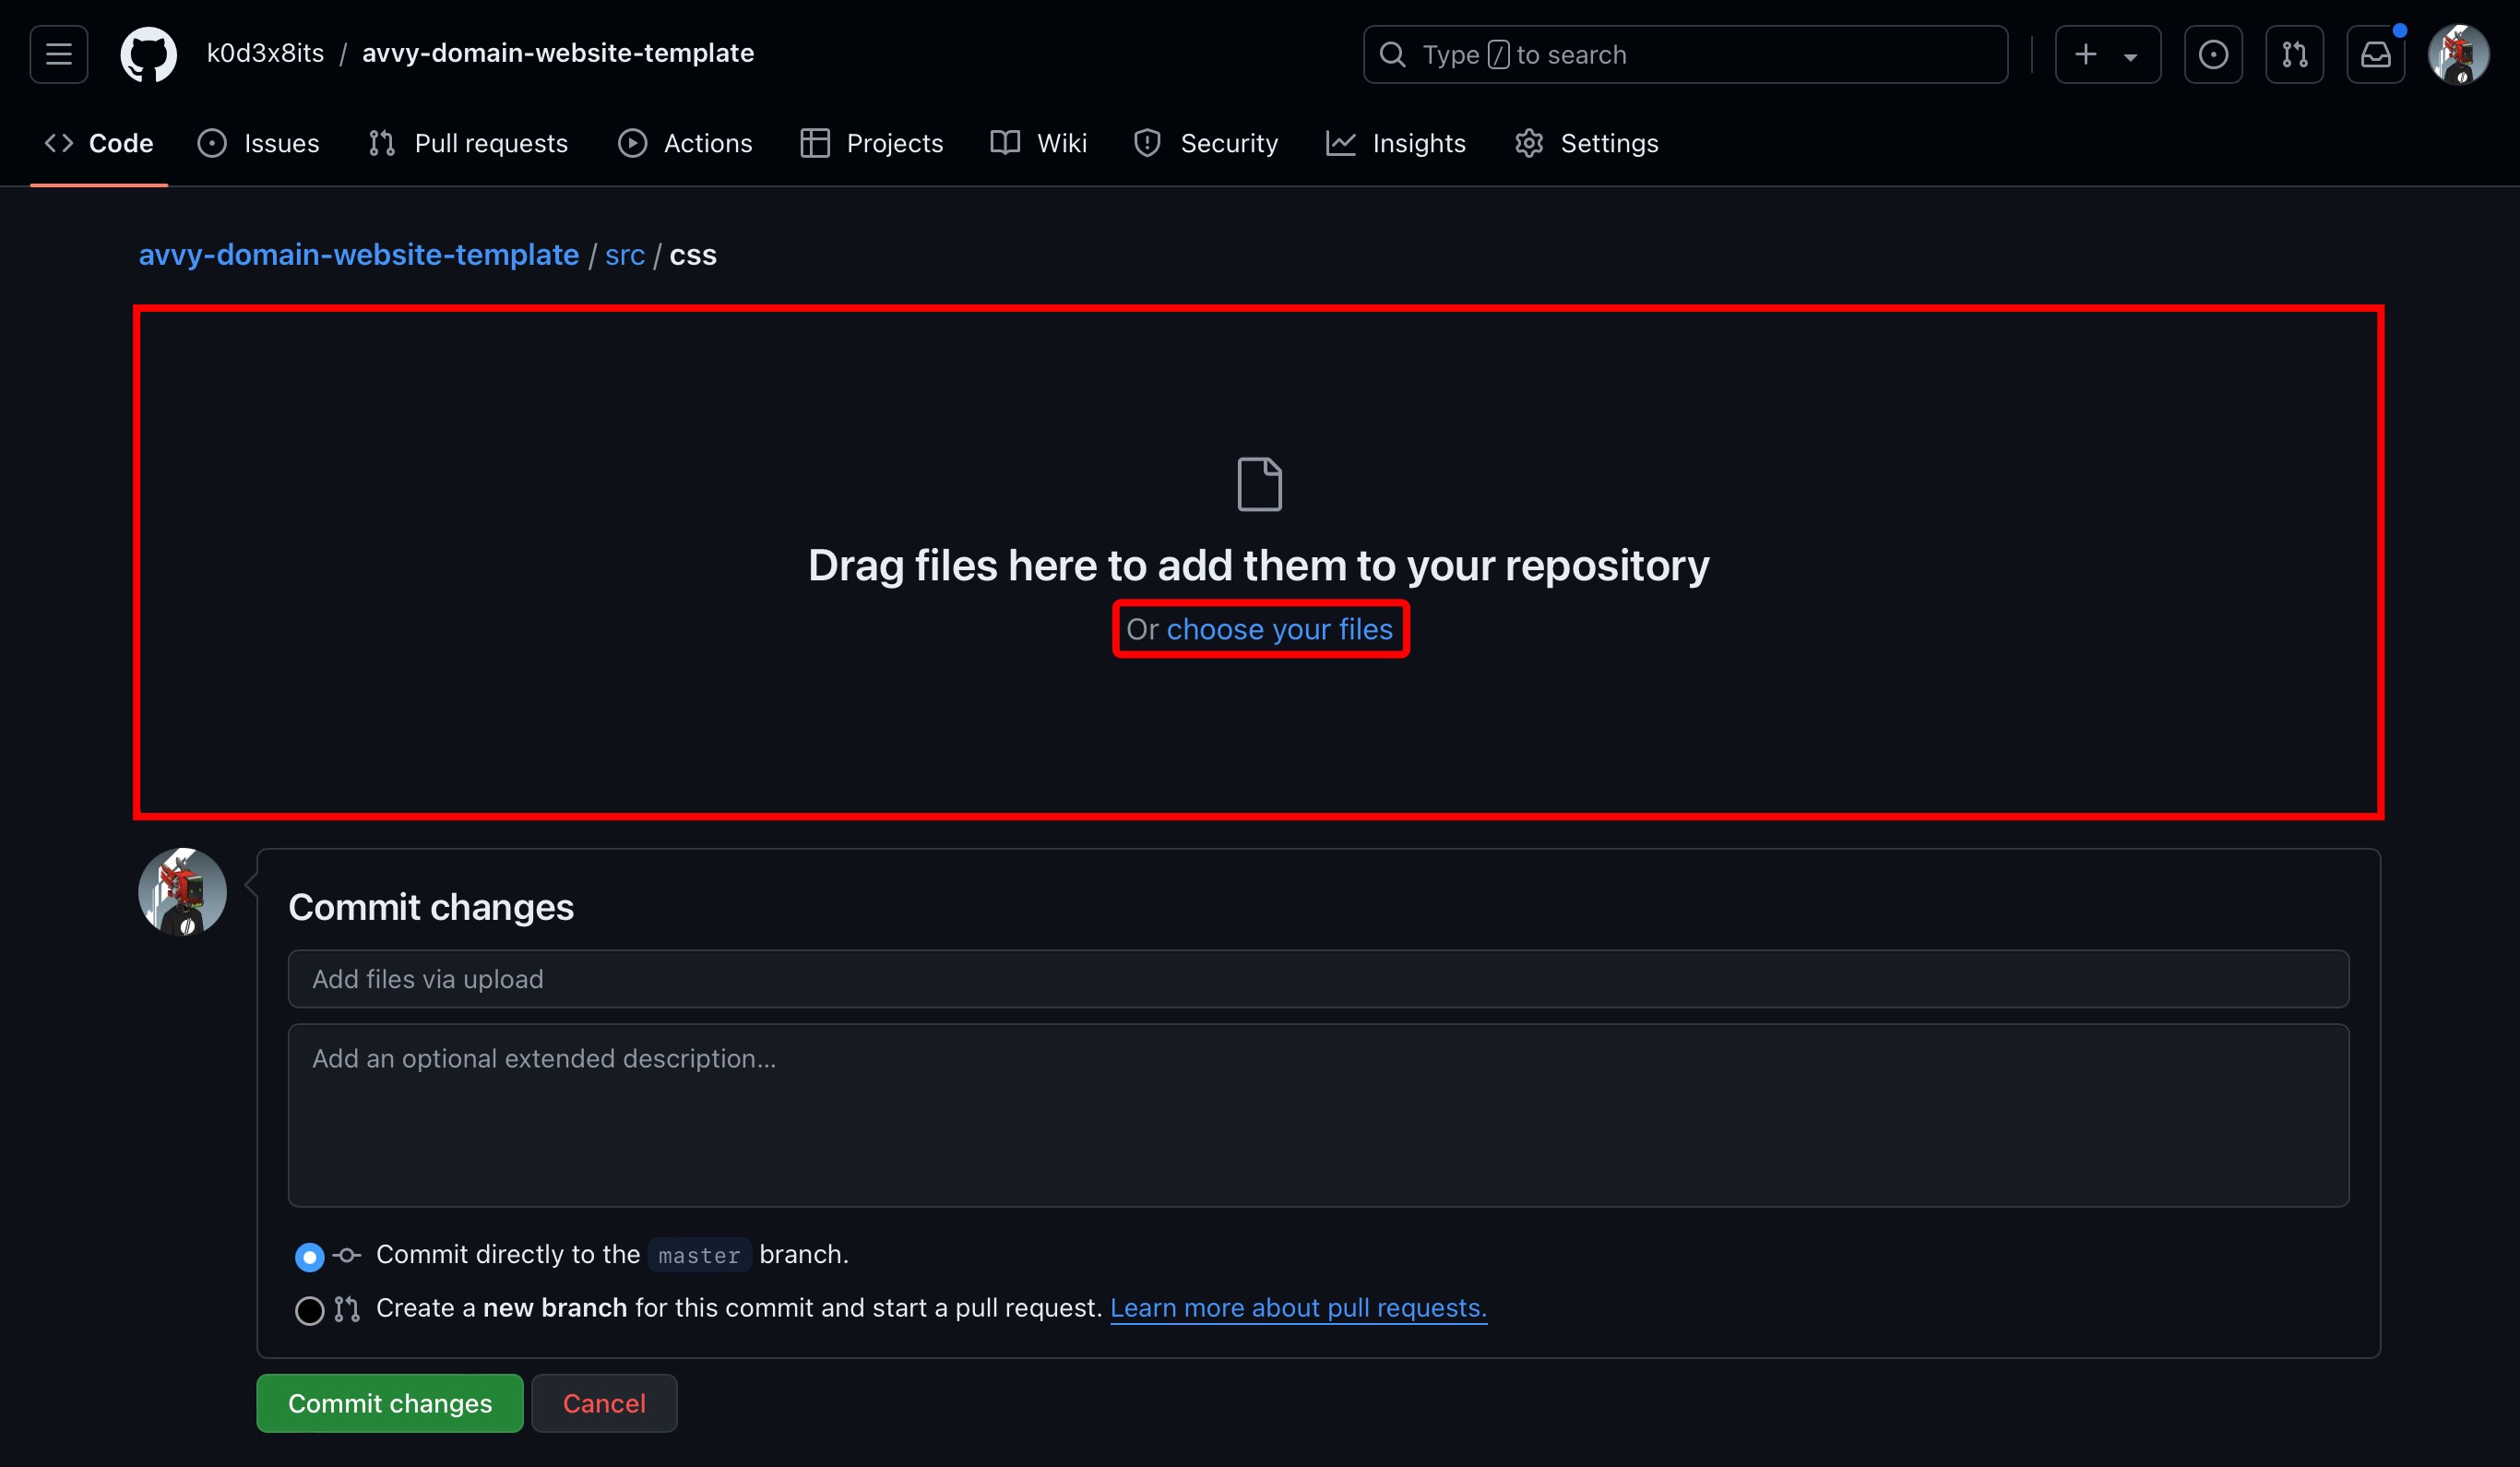
- Drag and drop the "index.html" file from Step 1.2.4 into the browser or click the "choose your files" link to upload the file from Step 1.2.4.
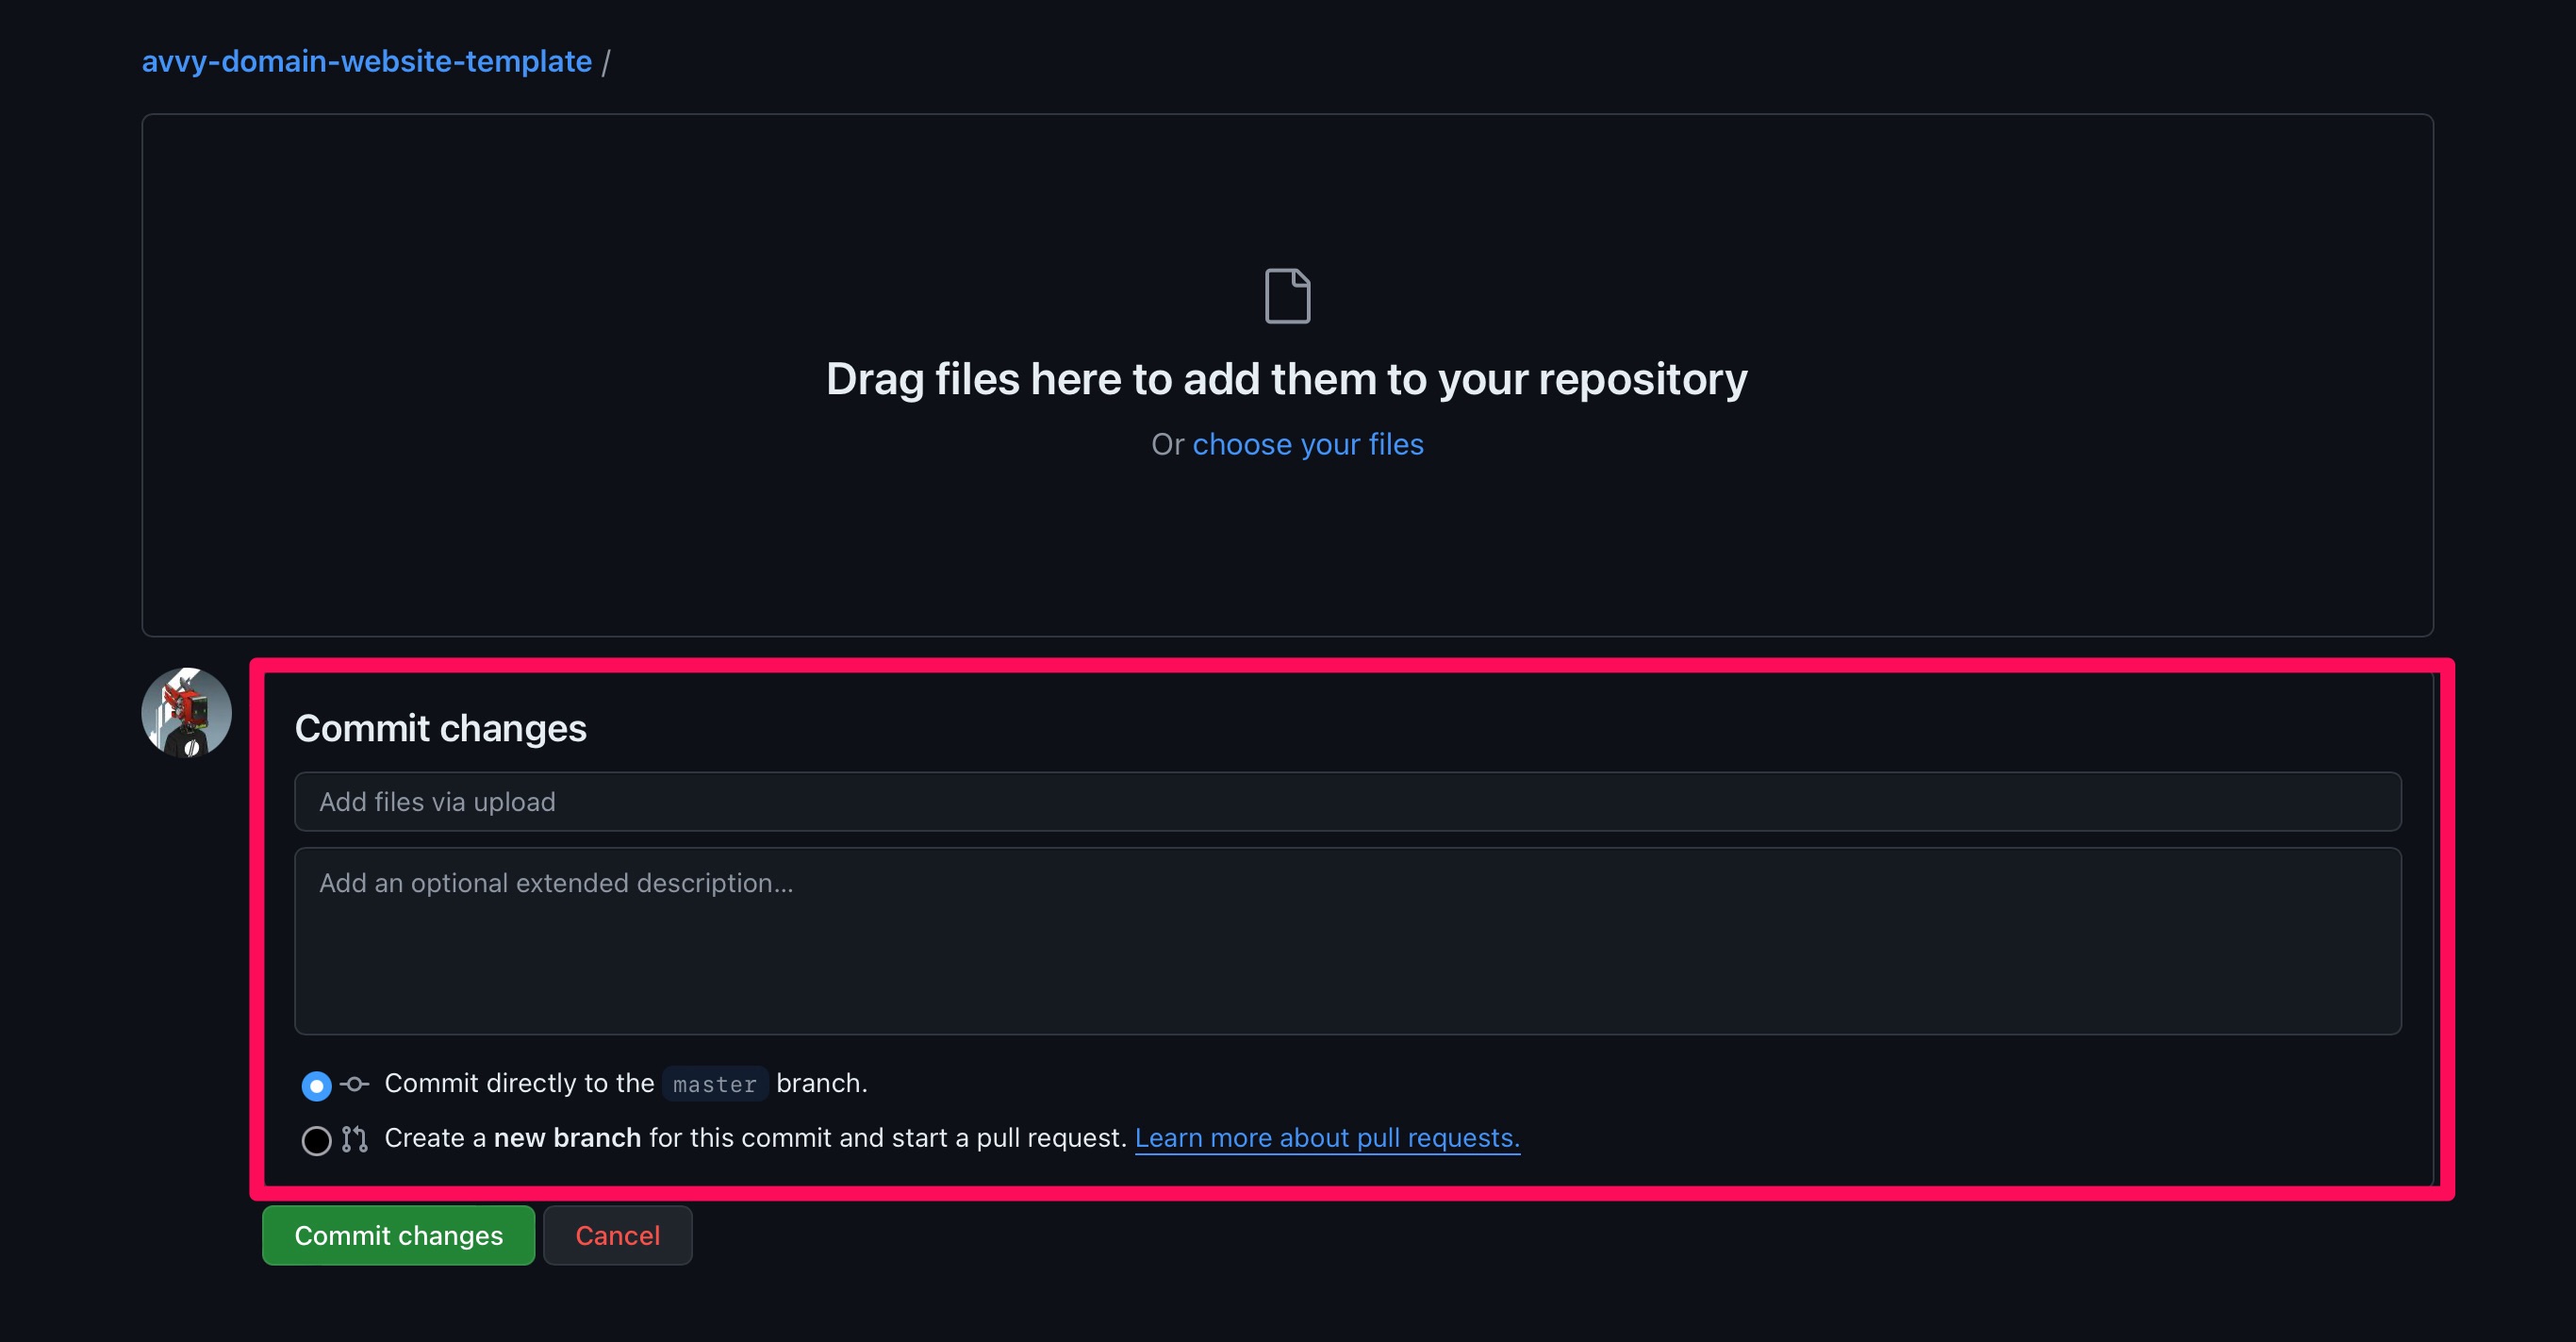
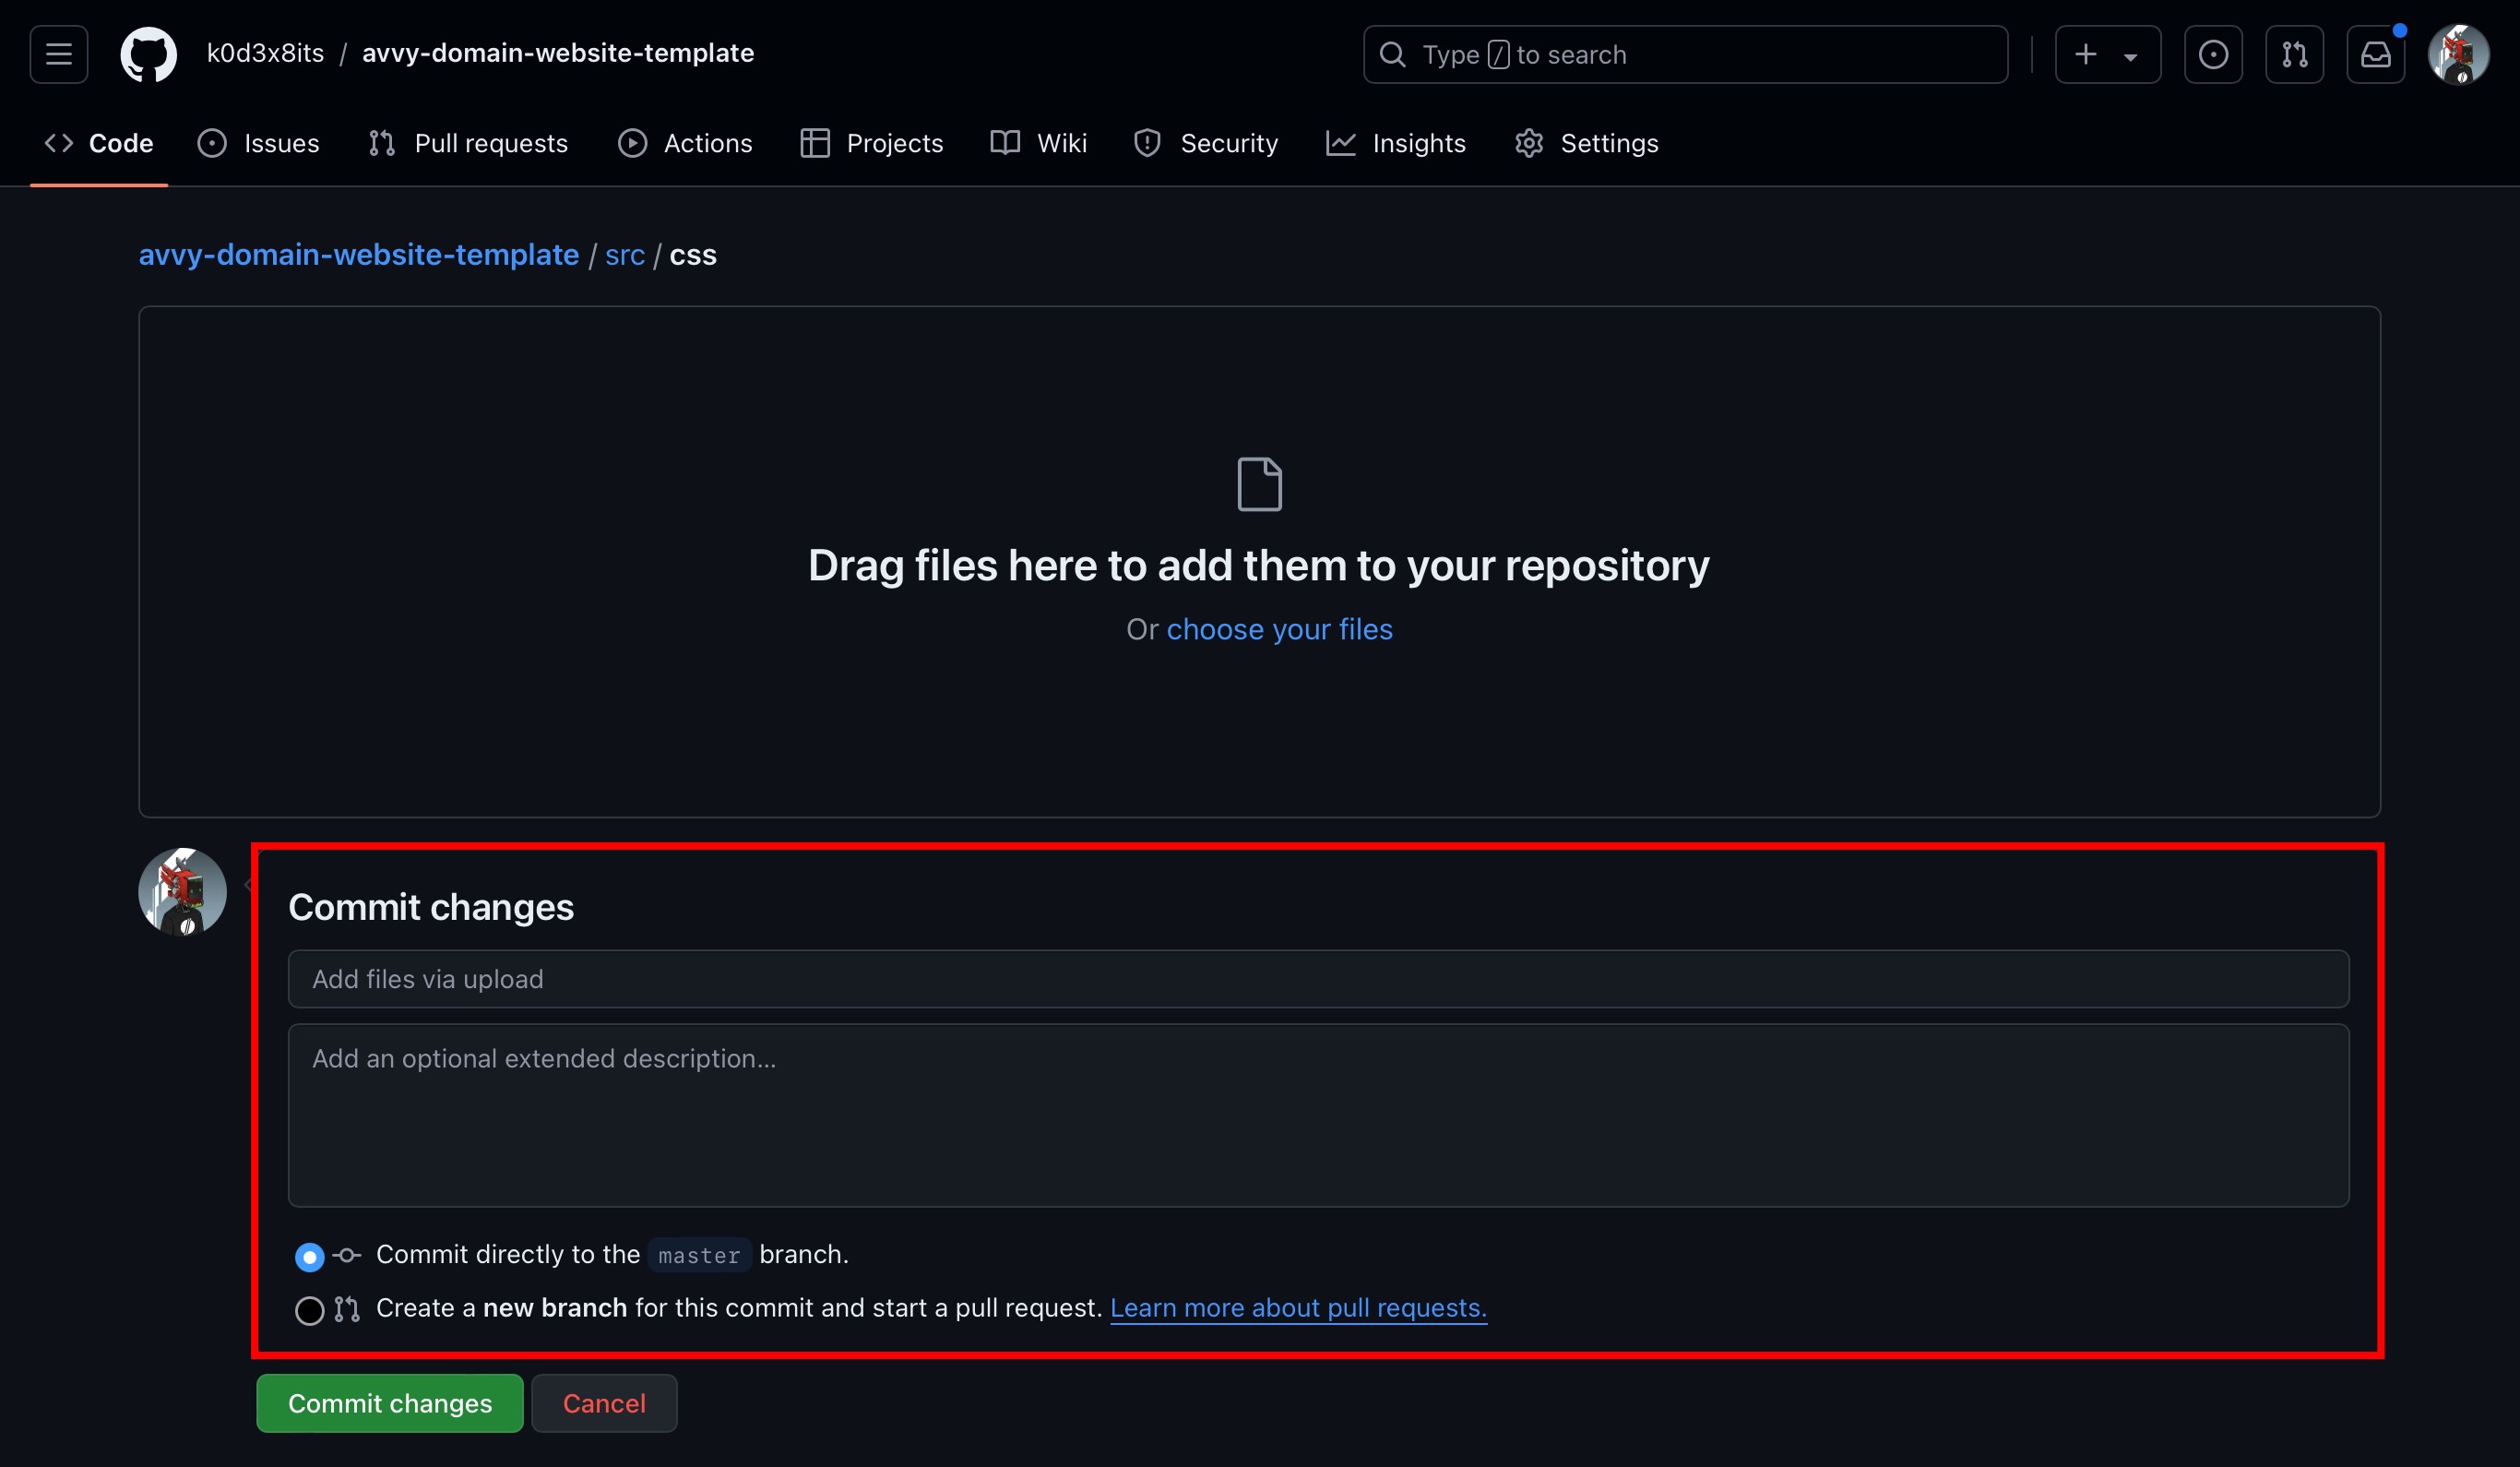
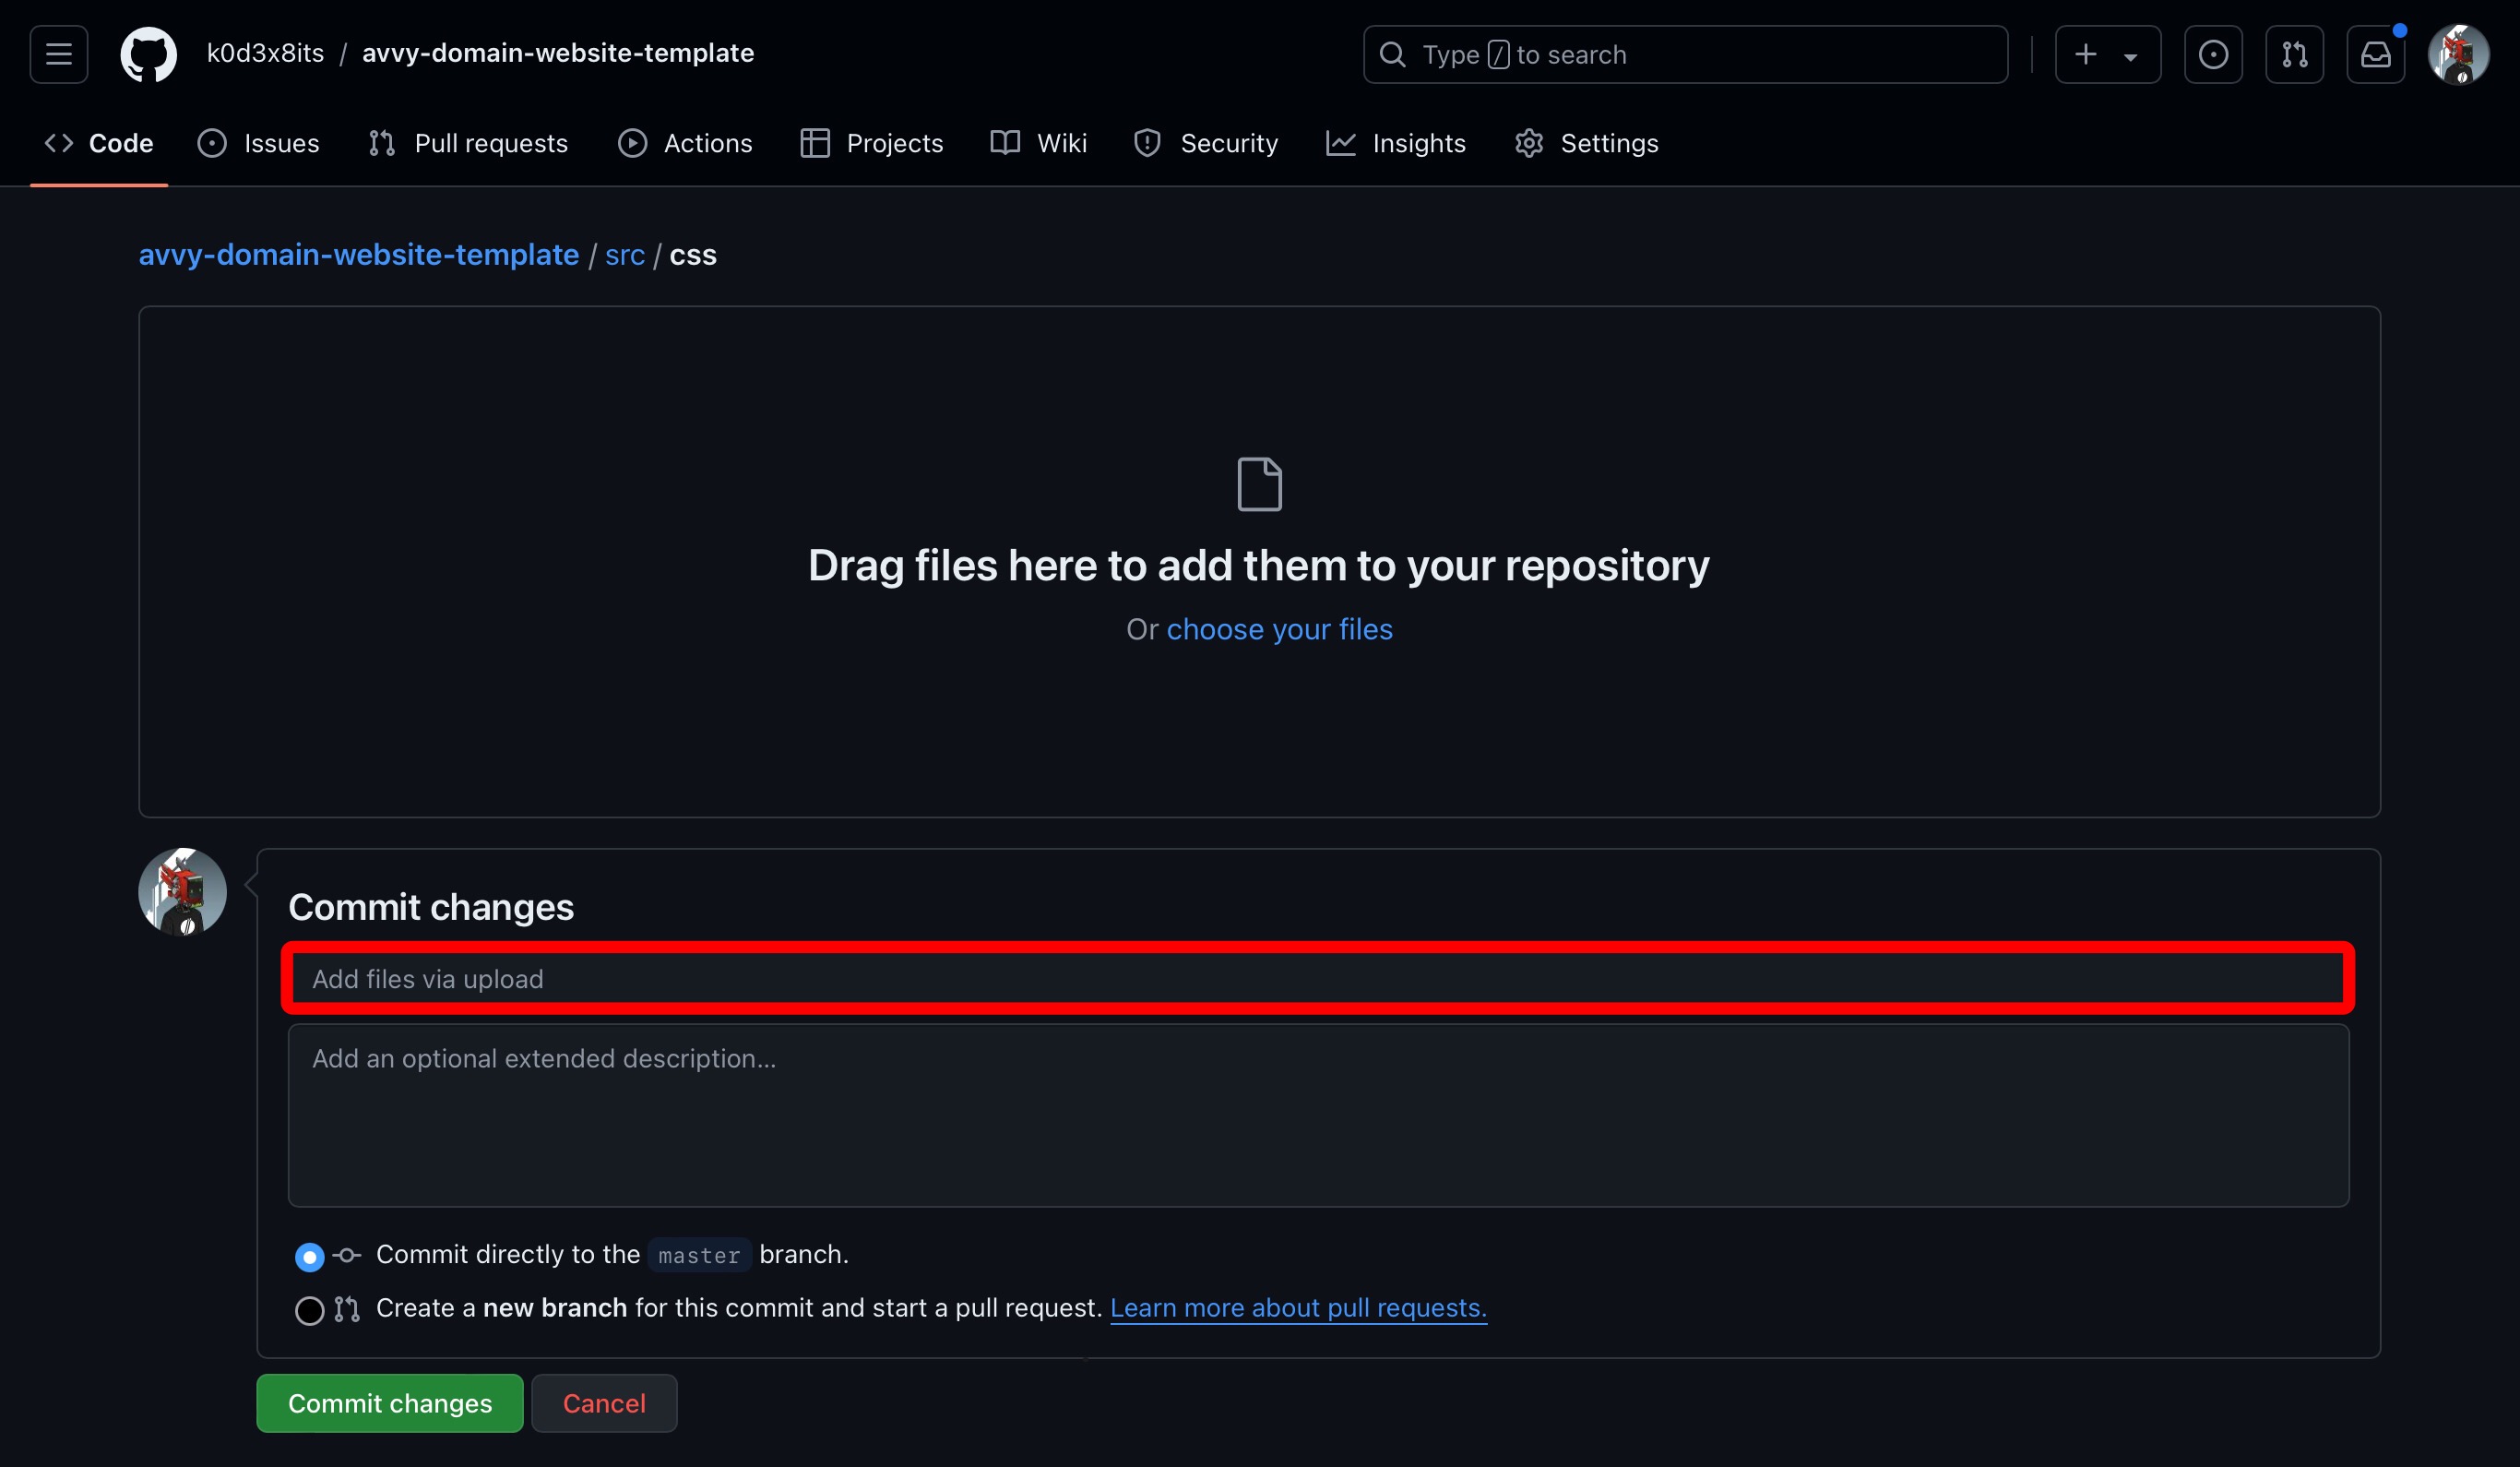
- Below that window is another window titled "Commit changes".
- In the top section insert a brief description of the upload - ex. uploading HTML file.
- Click the button.

Upload CSS File to Repository
- Click the directory.
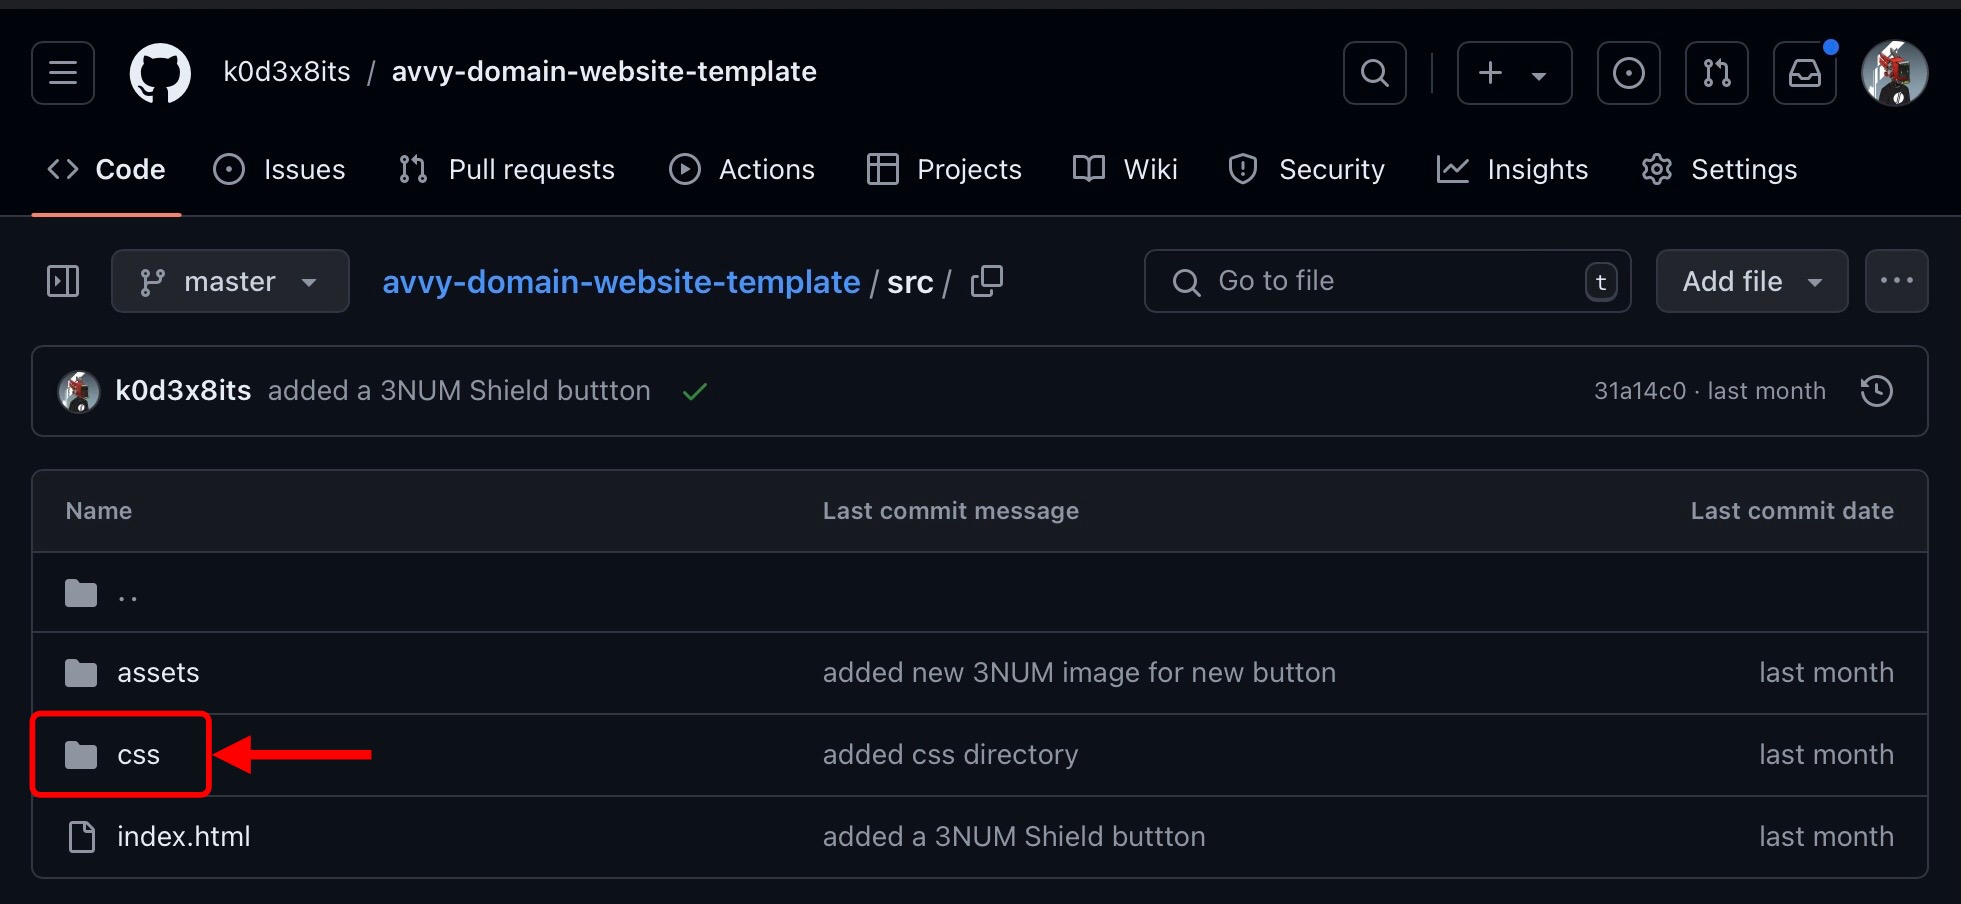
- Click the directory.
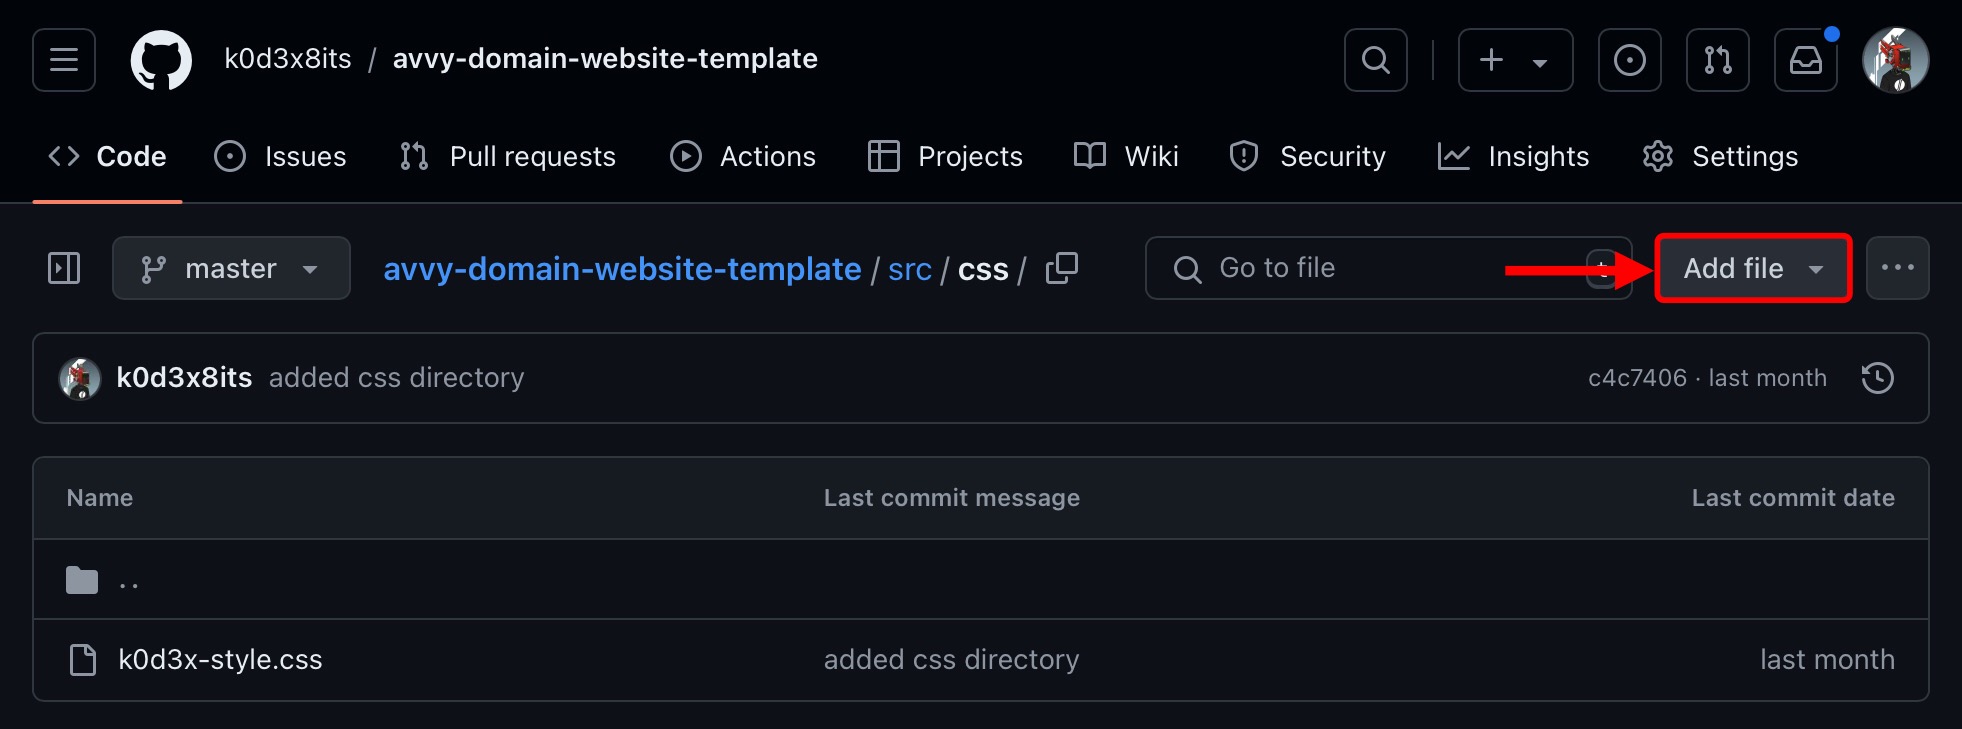
- Click the button next to the button.
- From the dropdown menu, click .
- Drag and drop the "styles.css" file from Step 1.2.4 into the browser or click the "choose your files" link to upload the file from Step 1.2.4.
- Below that window is another window titled "Commit Changes".
- In the top section insert a brief description of the upload - ex. uploading CSS file.
- Click the button.
Upload to Fleek for IPFS Deployment
Fleek Introduction
Fleek is a platform that simplifies the process of creating and hosting websites on the decentralized web. It allows anyone, even those without technical skills, to deploy websites using decentralized technologies like IPFS (InterPlanetary File System) and blockchain. With Fleek you can integrate seamlessly with popular web development frameworks, making it easy to maintain your site while leveraging the benefits of decentralized infrastructure, such as enhanced privacy and control over your data.
Create an Account on Fleek
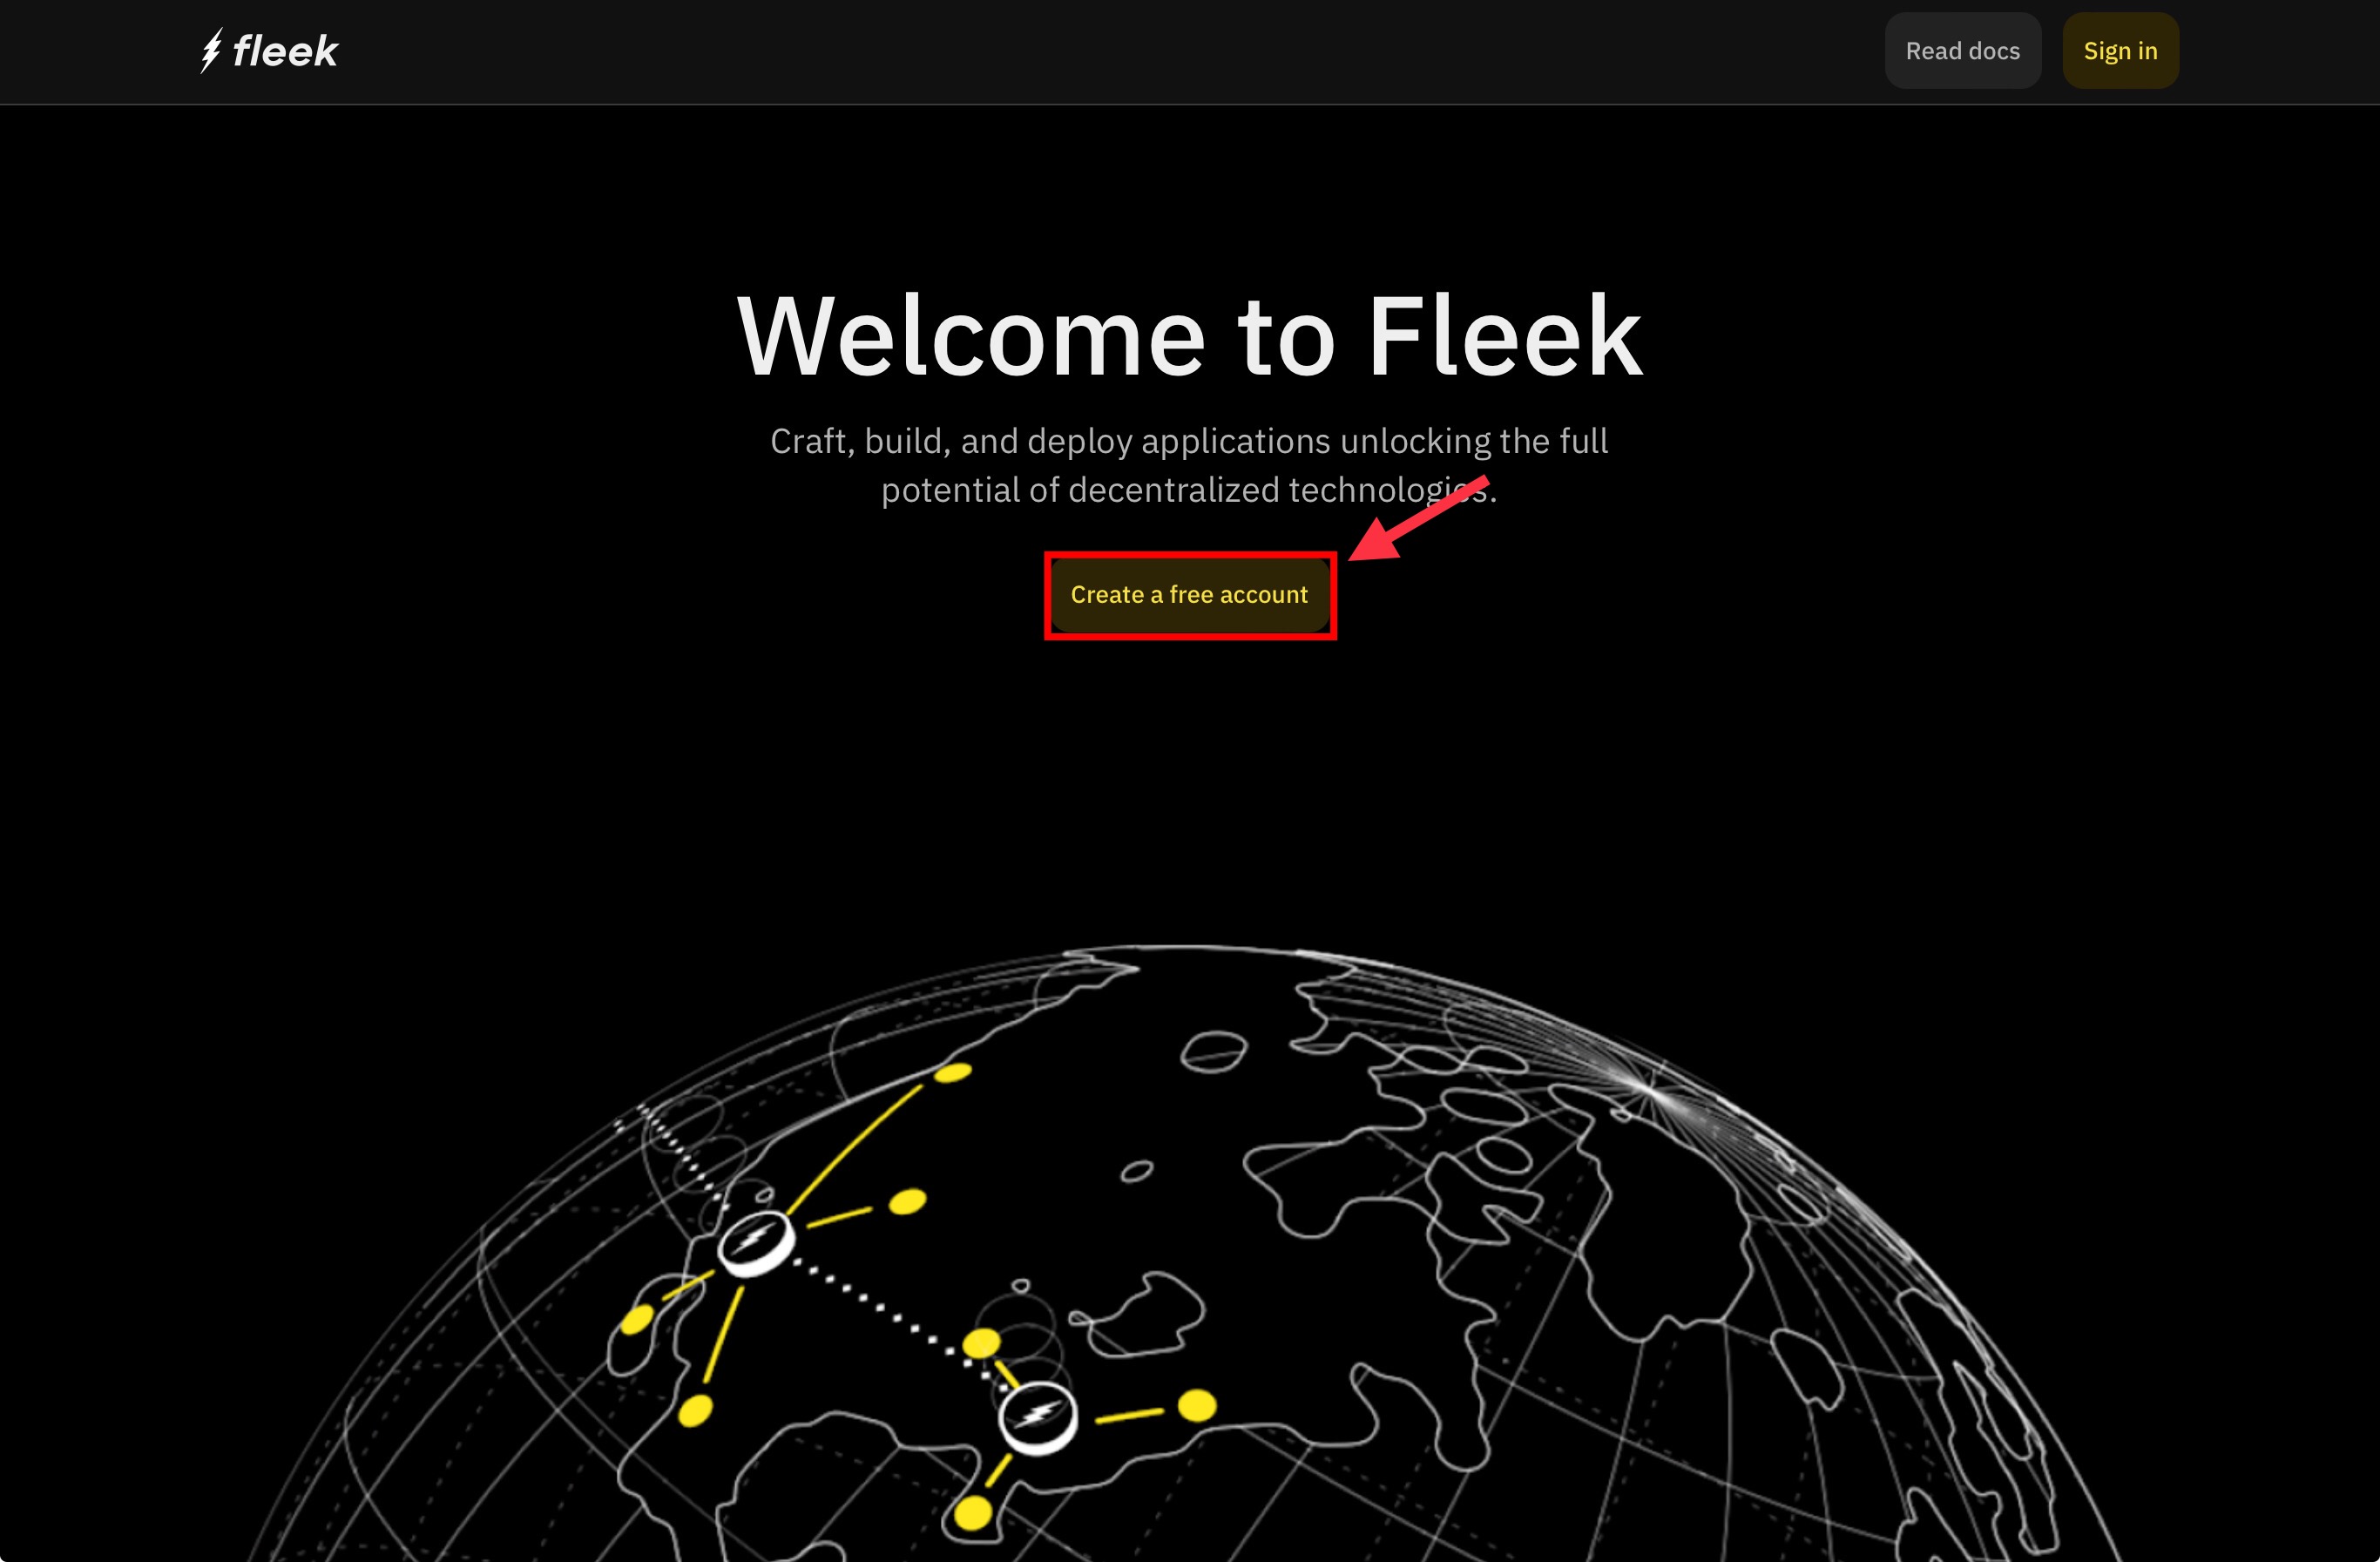
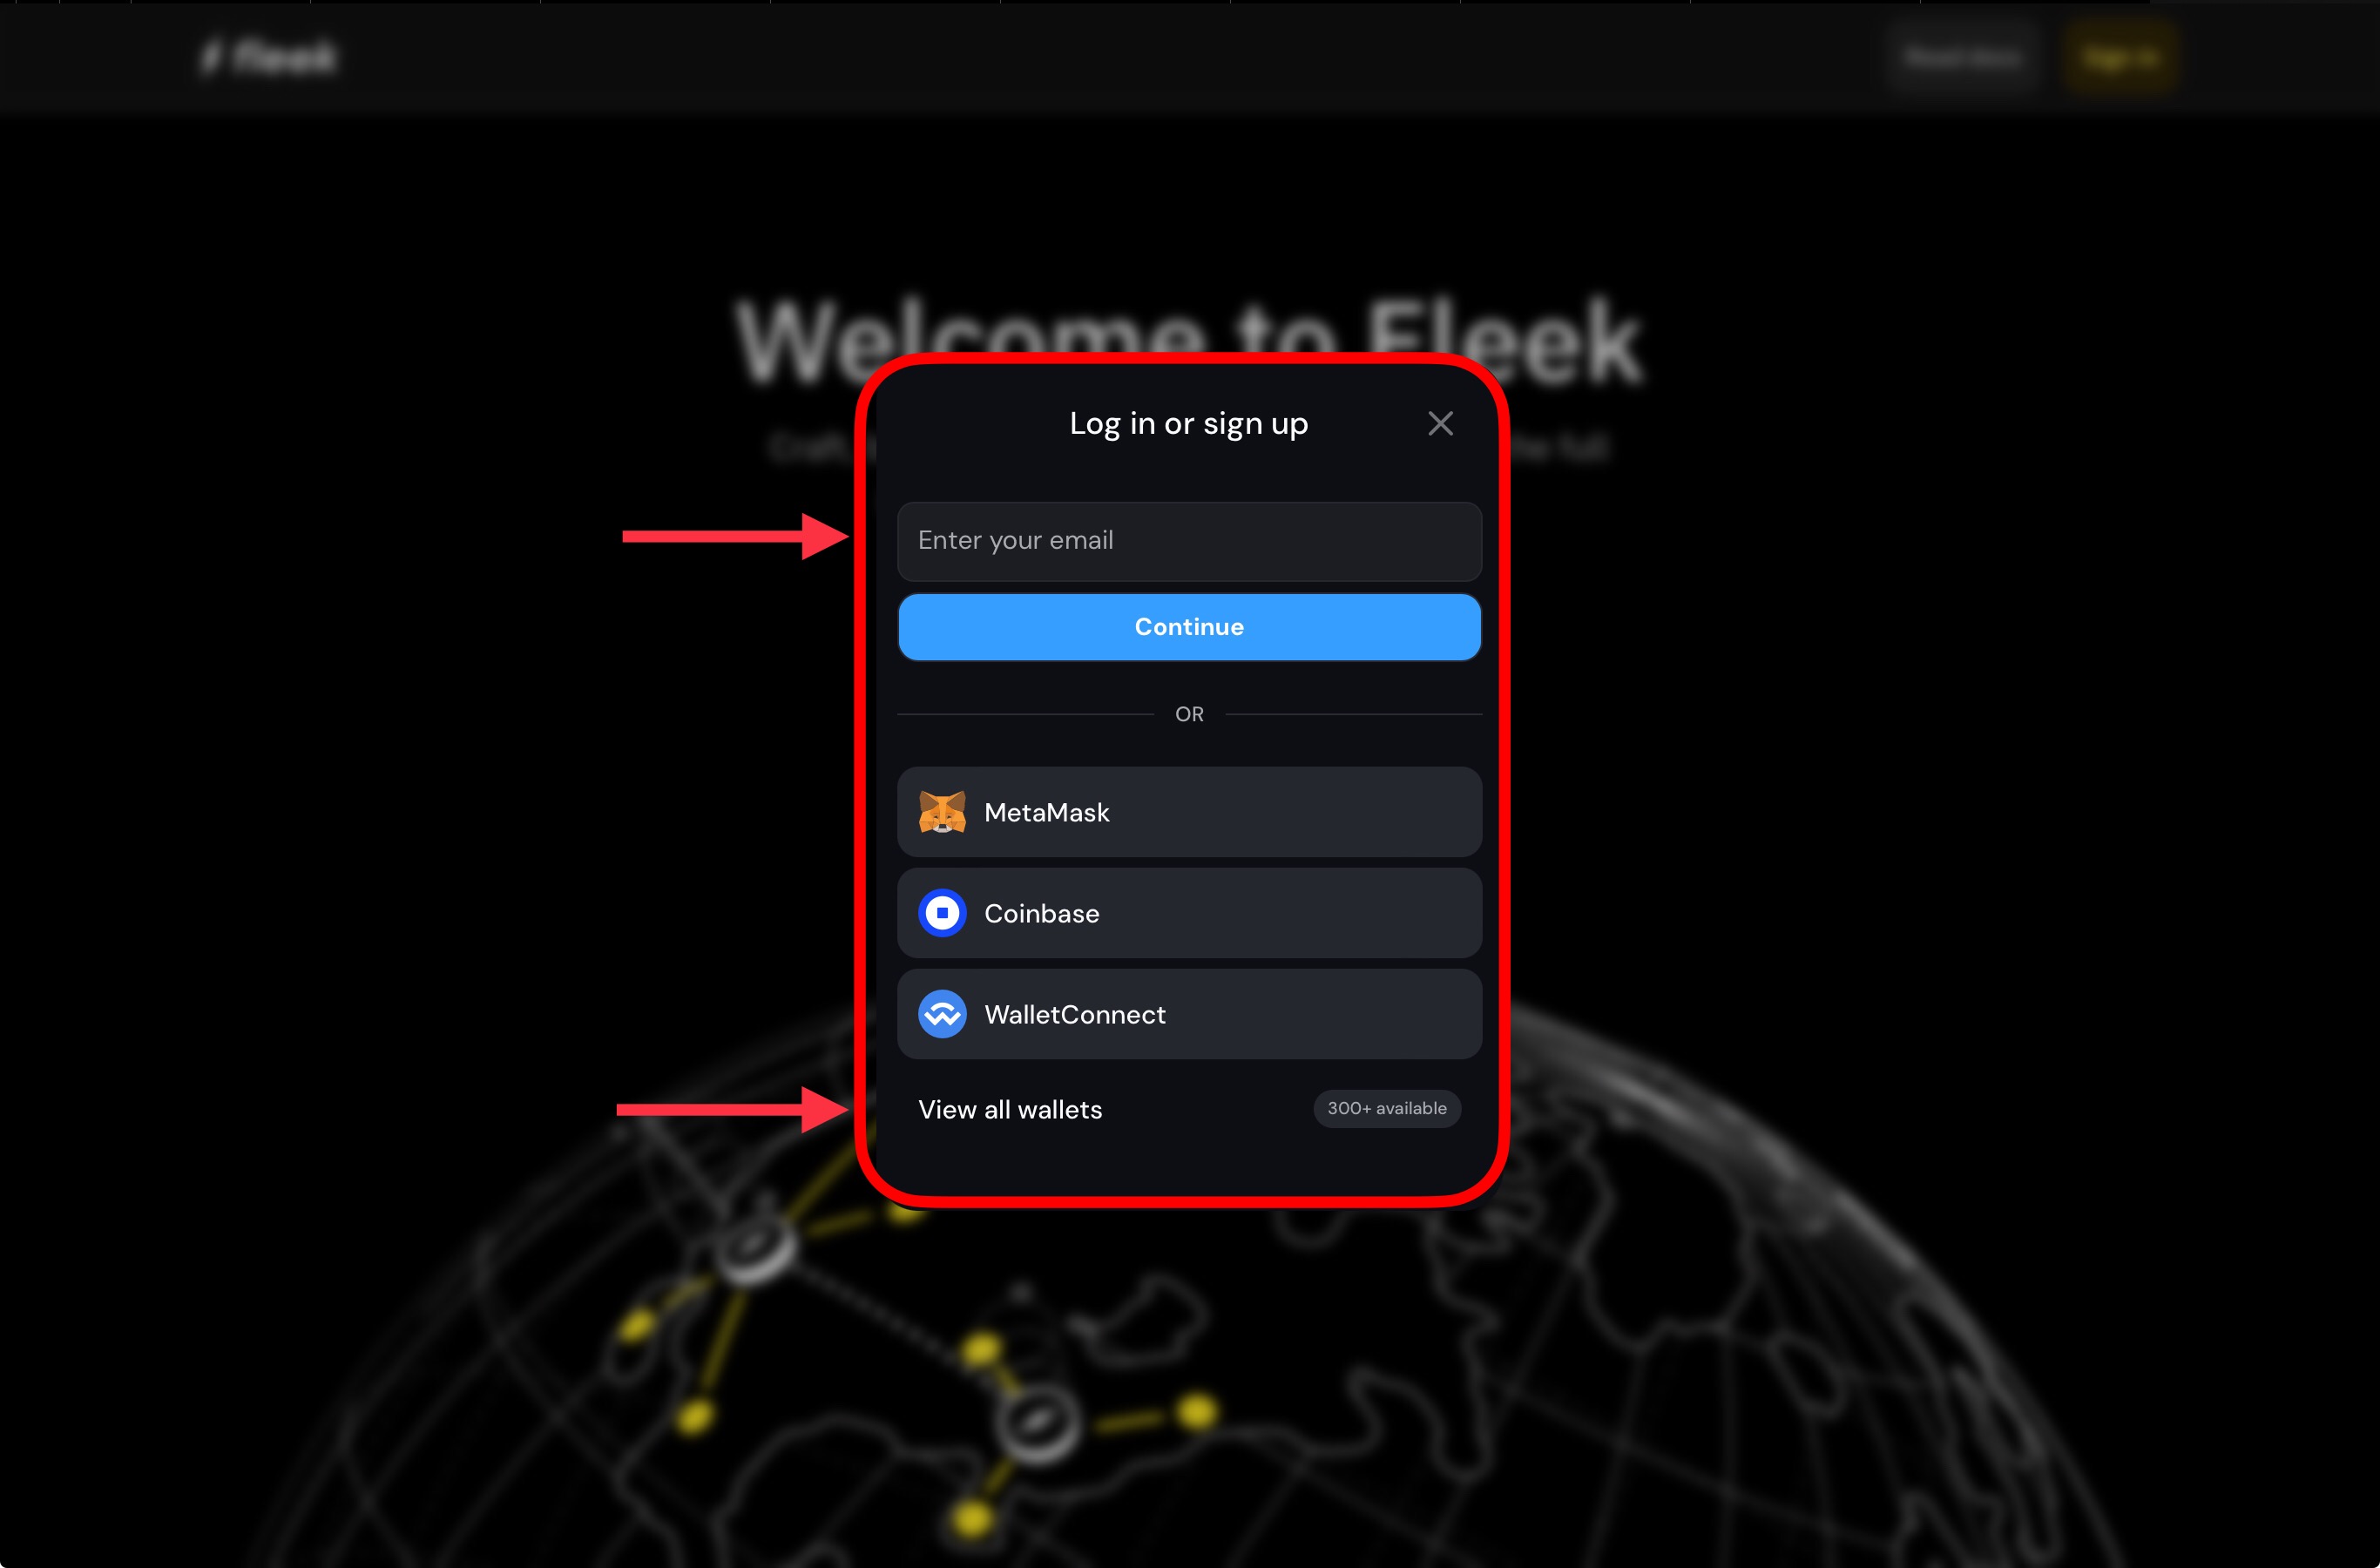
- Go to the fleek website.
- Click the button.
- Sign up for an account with a wallet or email address.
Connect GitHub Account
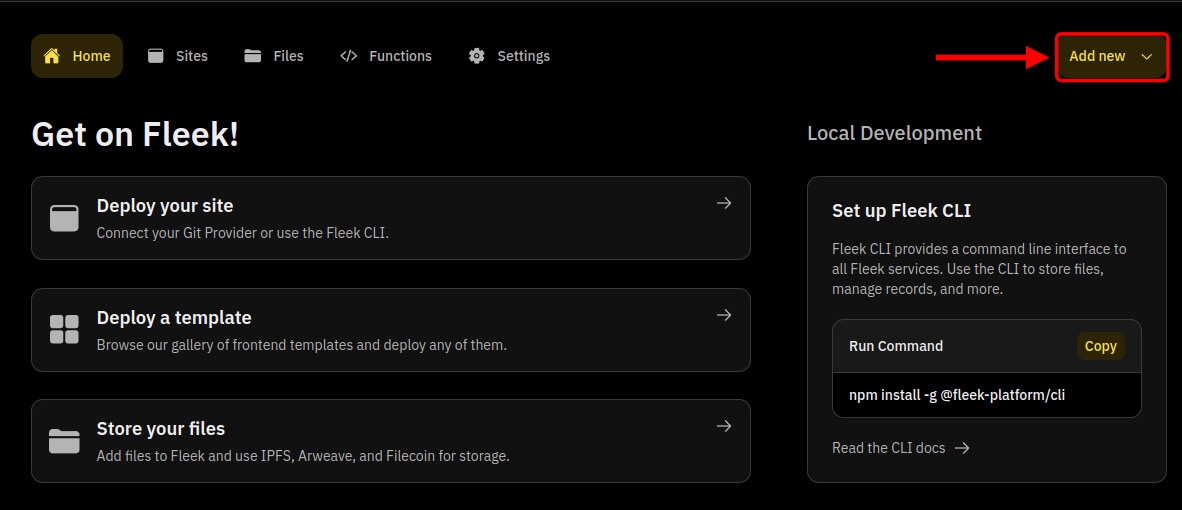
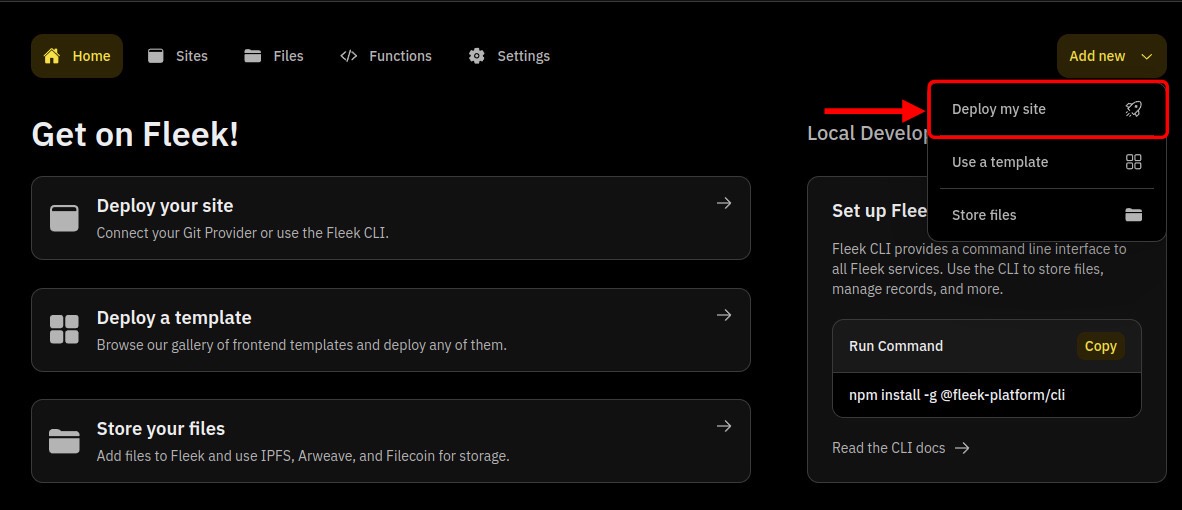
- Click the button in the top-right corner of the screen.
- From the dropdown menu, click on the button.
- Click the button.

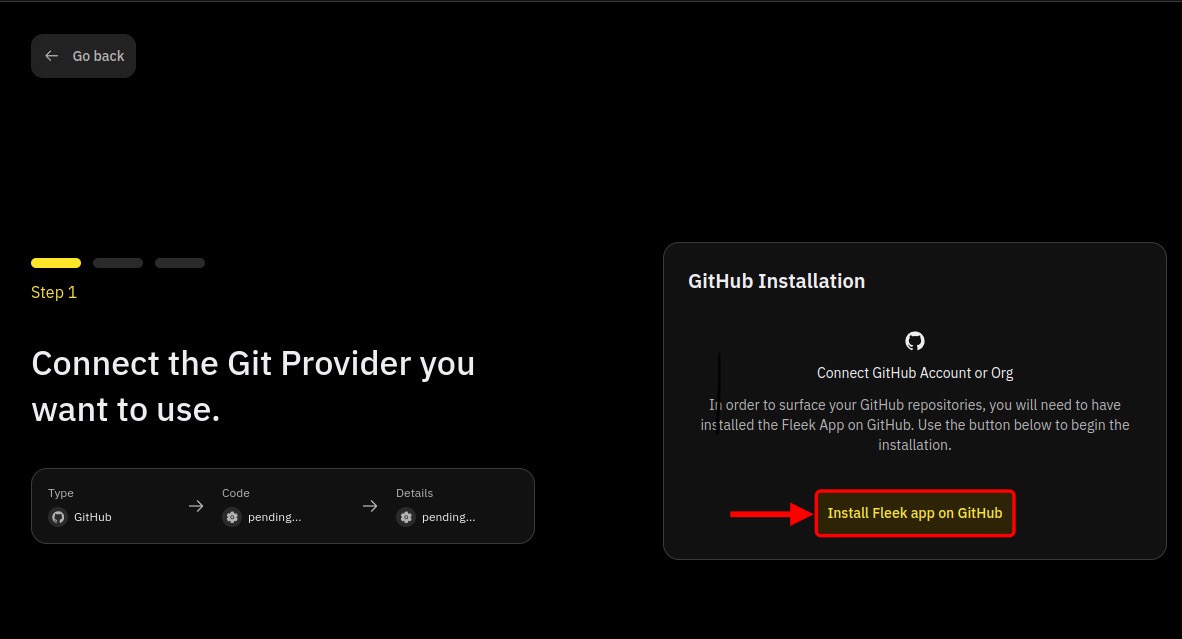
Install Fleek App
- Click the button.
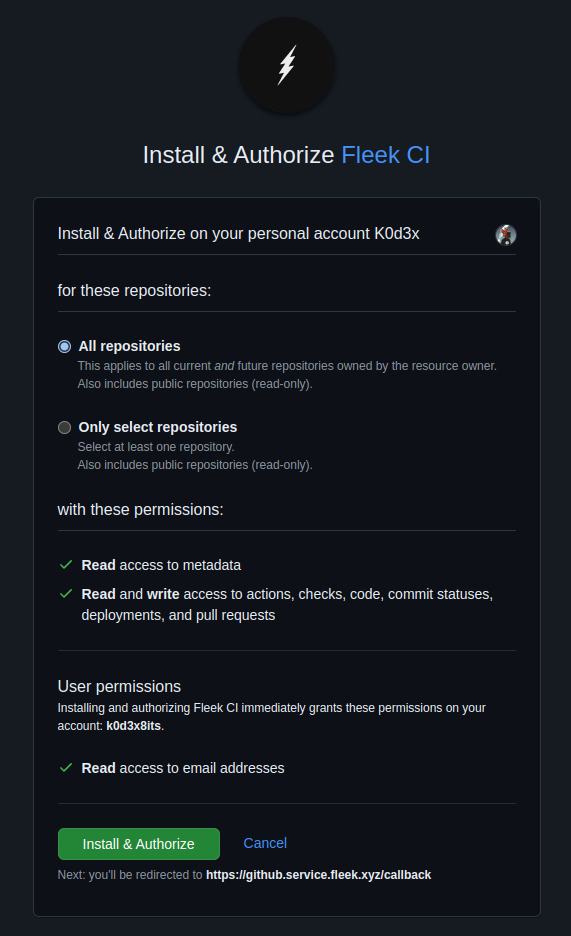
- A window populates, representing GitHub, suggesting to install & authorize Fleek CI.
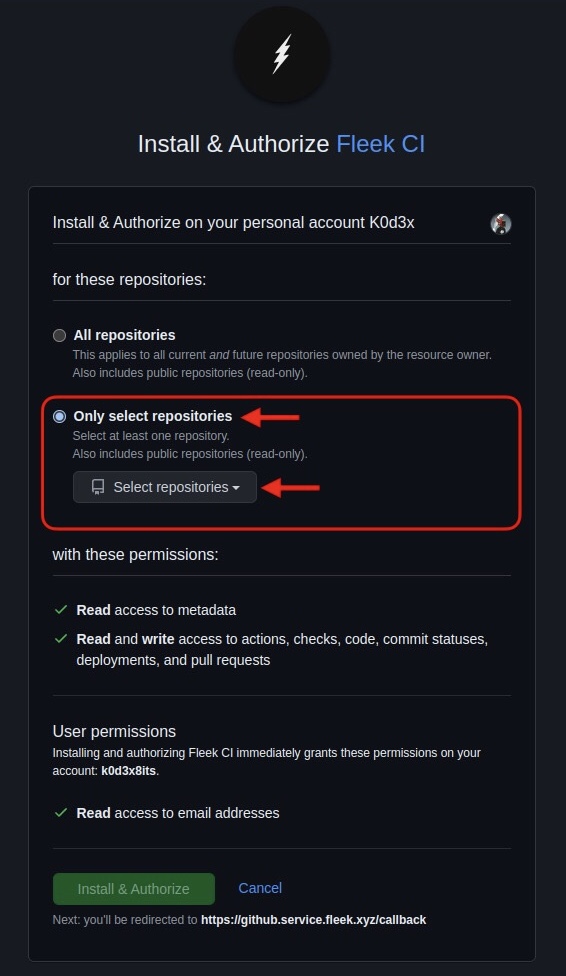
- Choose the "Only select repositories" option and select the repository, created in Step 2.2, from the menu.
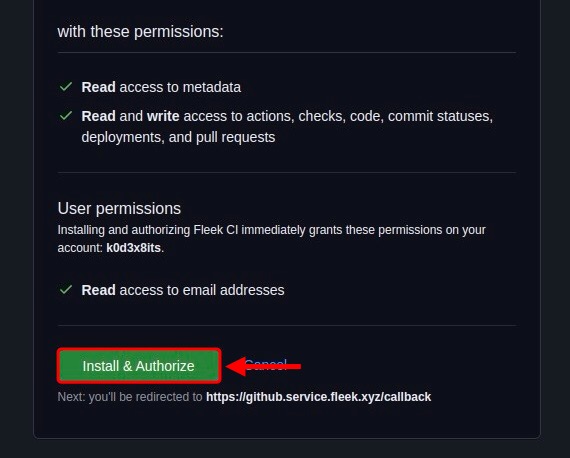
- Scroll down, if necessary, and click the button.
Upload to IPFS with Fleek
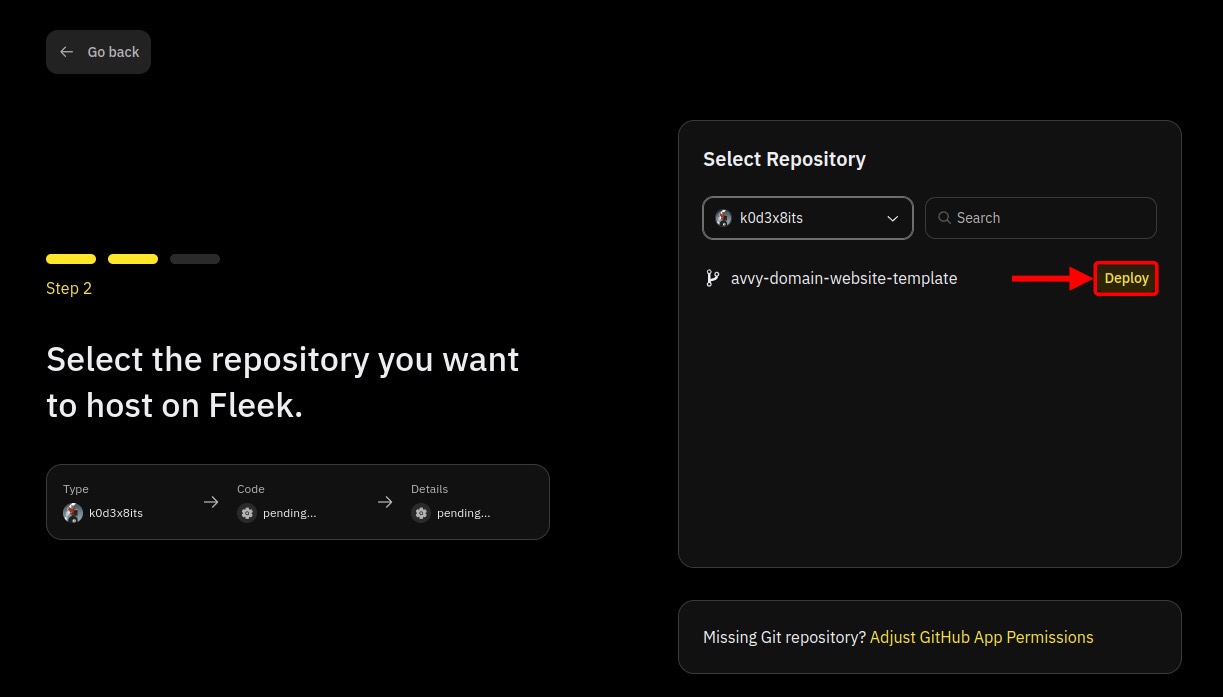
- Click the button to the right of the repository you want to deploy to IPFS as your website.
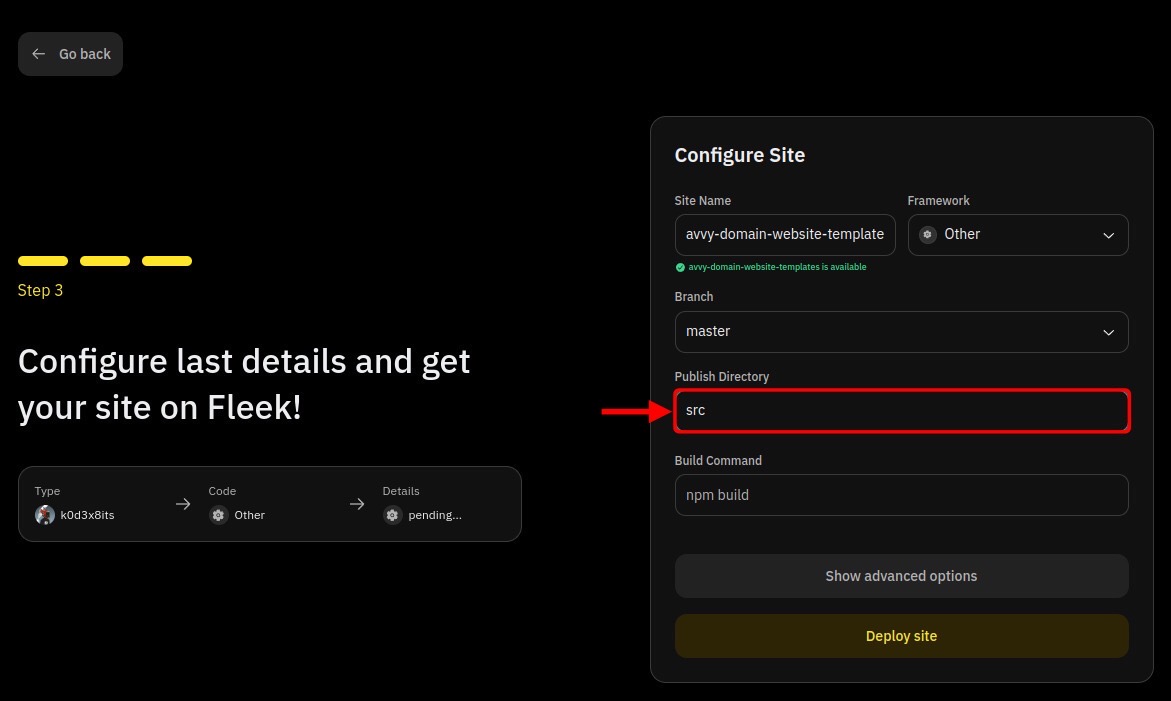
- The window changes to a new display titled "Configure Site". Change the "Publish Directory" section to "src". This is the folder you created in Step 2.3.3,
- Click the button
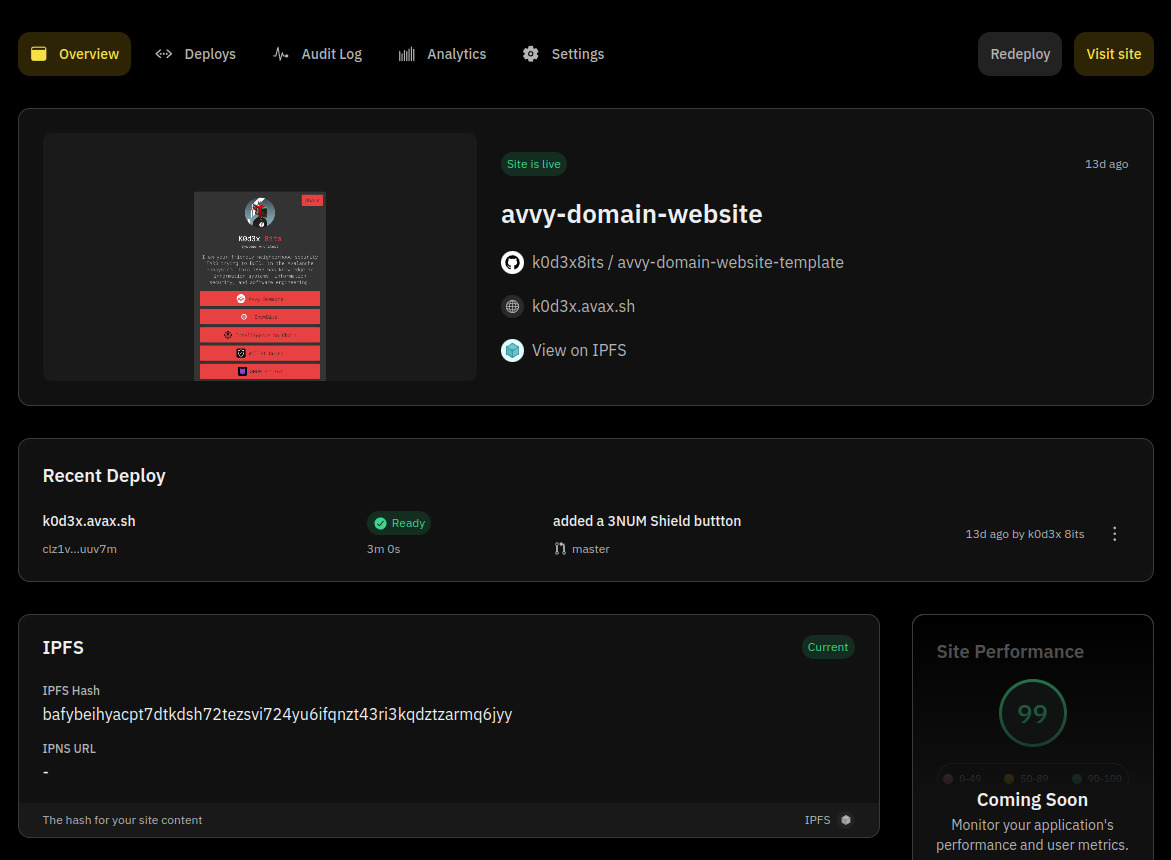
- A dashboard will display which provides the status of the initial deployment.
- An IPFS hash was generated.
Configure Fleek for Domain
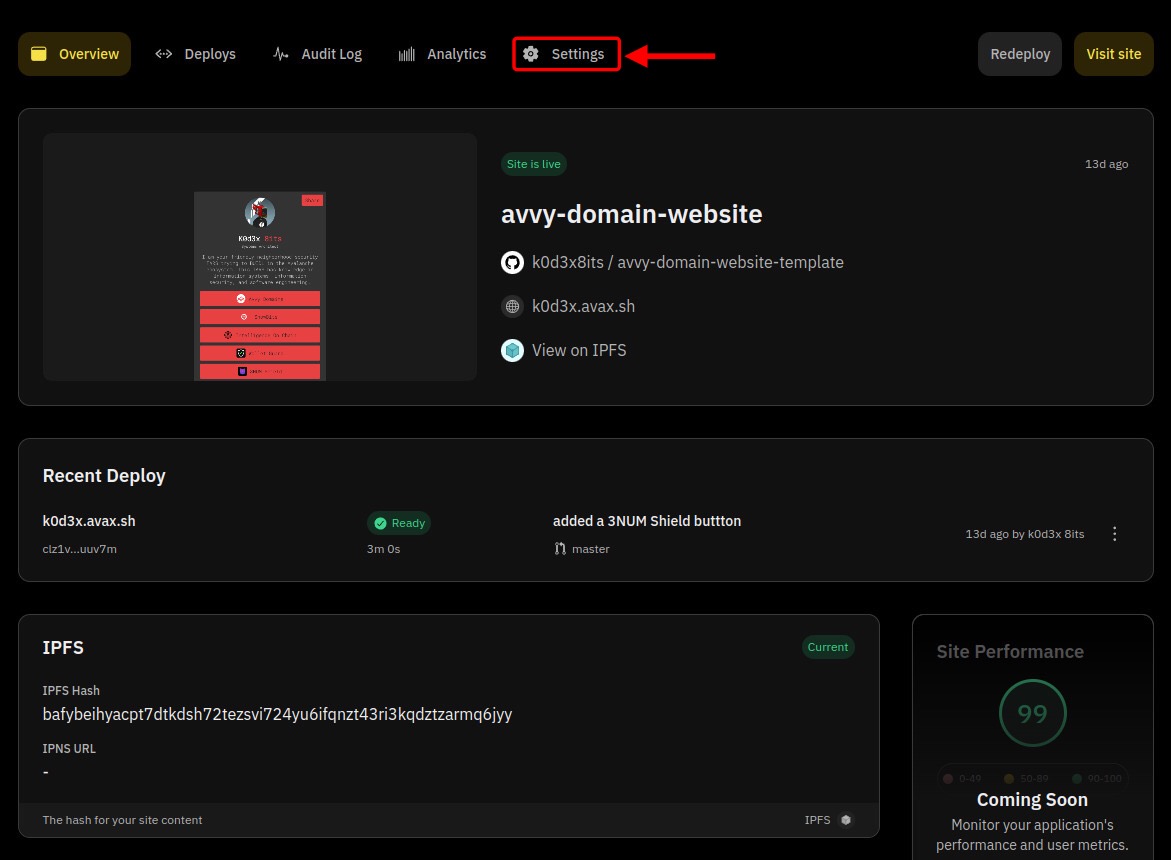
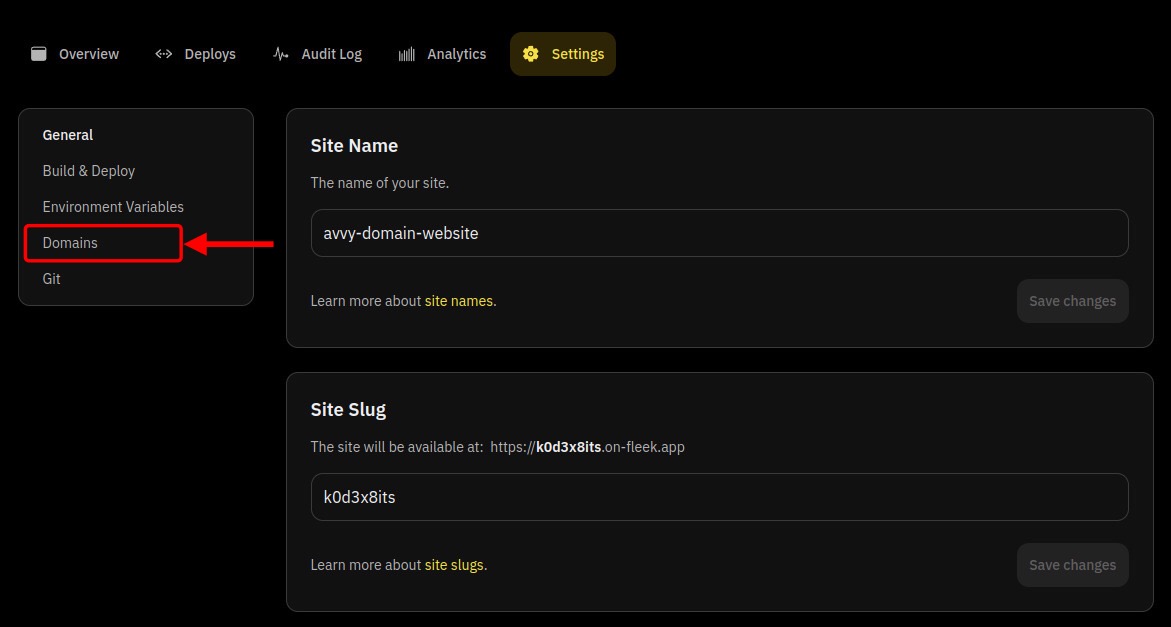
- Click the option in the menubar at the top of the website.
- A new page displays with a sidebar to the left. Click the option in the sidebar.
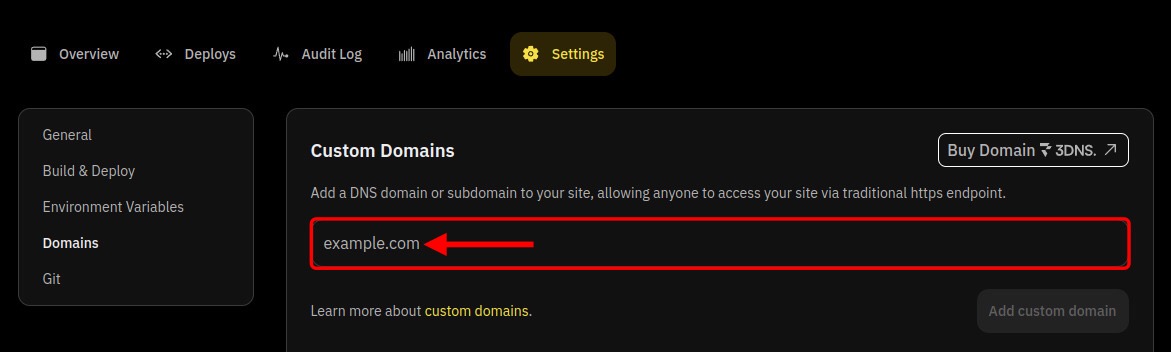
- A window to the right of the sidebar displays titled "Custom Domains". Click the "example.com" section to add your domain.
- ex: webpage.avax.sh
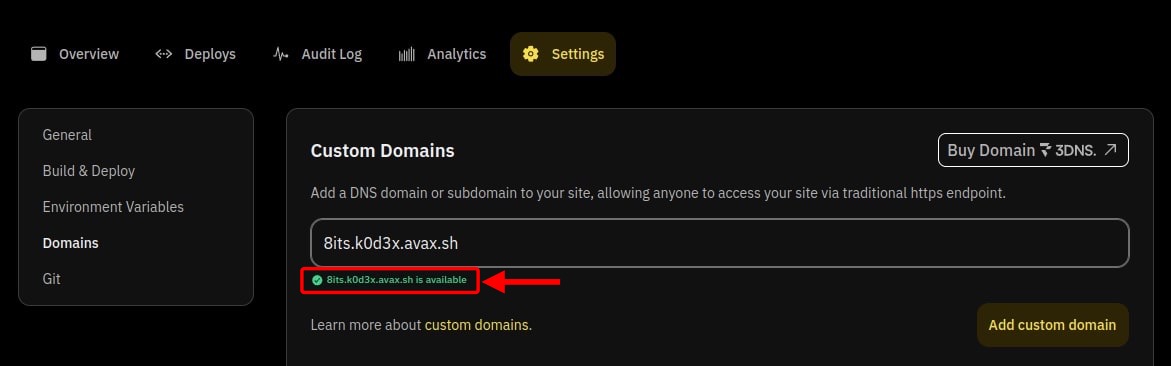
- It will check for availability and then confirm in green text below the provided input -
✔ webpage.avax.sh is available.
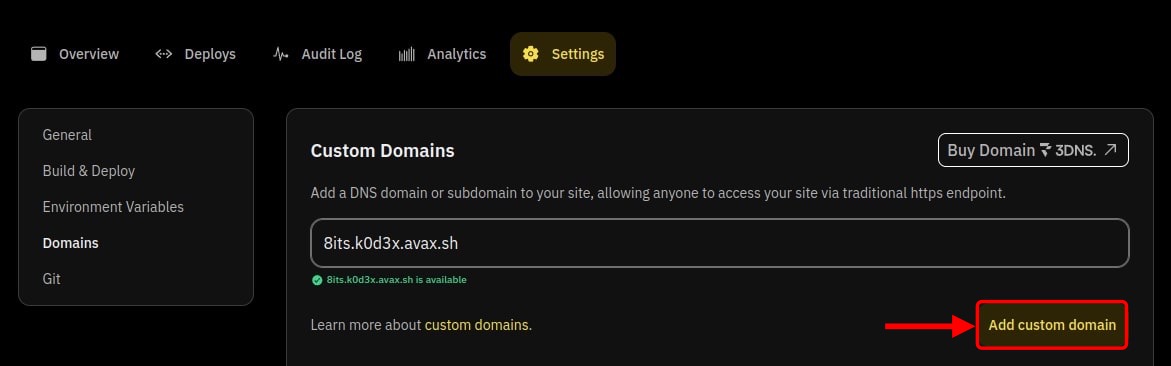
- Click the button.
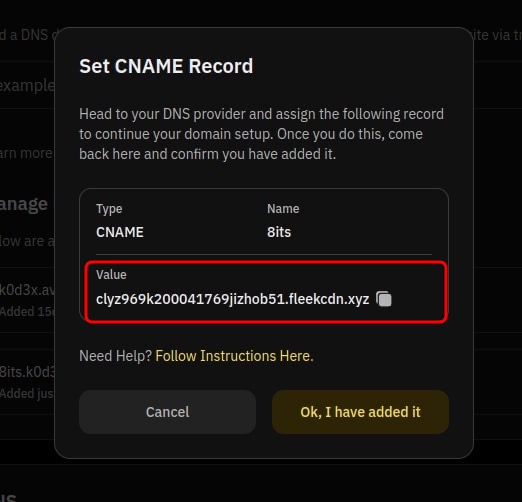
- A new window displays titled "Set CNAME Record".
Here you will notice a "Value" section. Click the
icon
to copy the link, within the "Value" section, to your clipboard.
! keep this window open! !
 return to Step 4.3.4
return to Step 5.1.1
return to Step 4.3.4
return to Step 5.1.1
Configure Your Avvy Domain
Connect Your Wallet
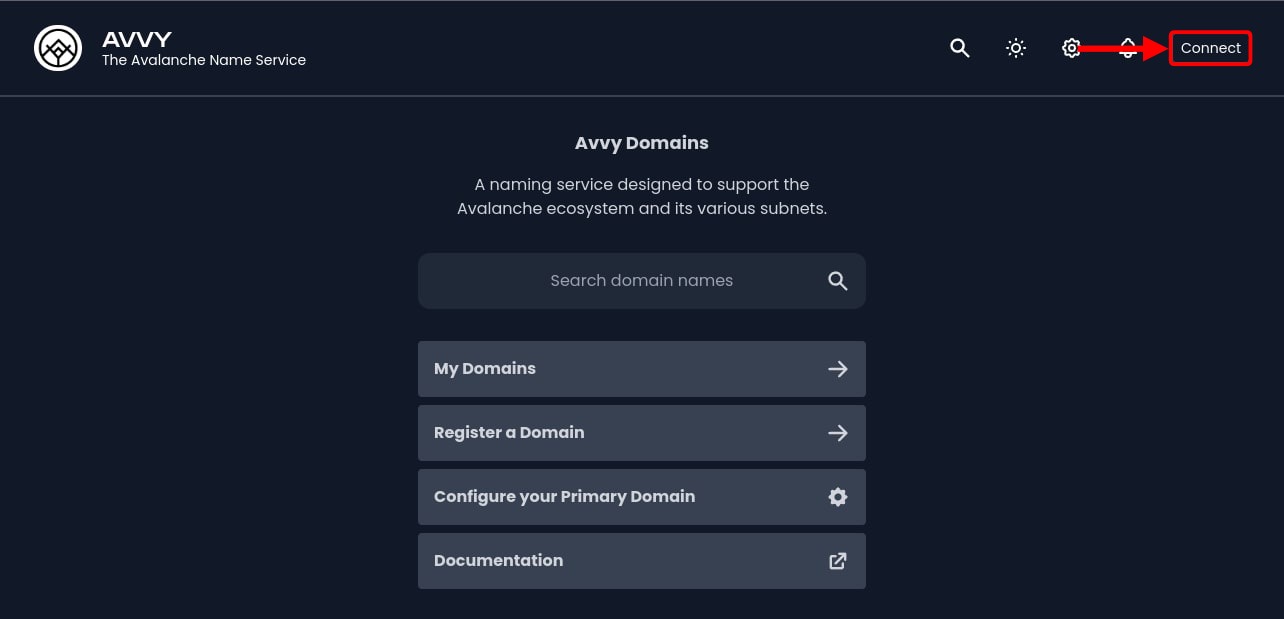
- Go to Avvy Domains website.
- Click the button.
Access Avvy Domain Records
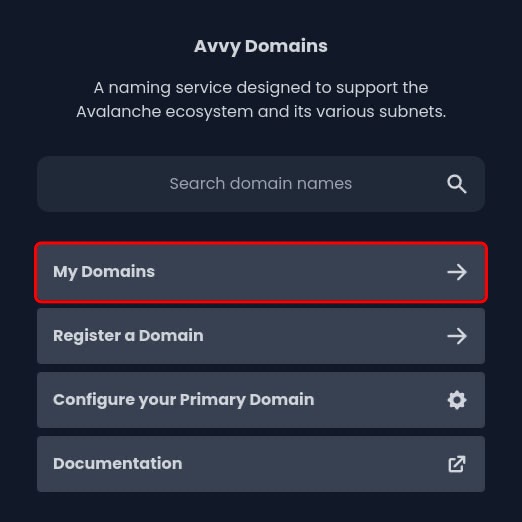
- Click the button.
- Click the domain of your choice. You are then provided the domain configuration page for that domain.
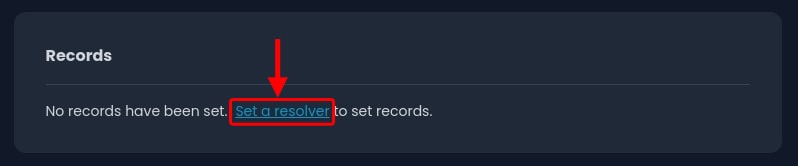
- Look for the section titled "Records".
- If this is a new domain then you will need to set the resolver. If your resolver is set, then move forward to Step 4.2.4
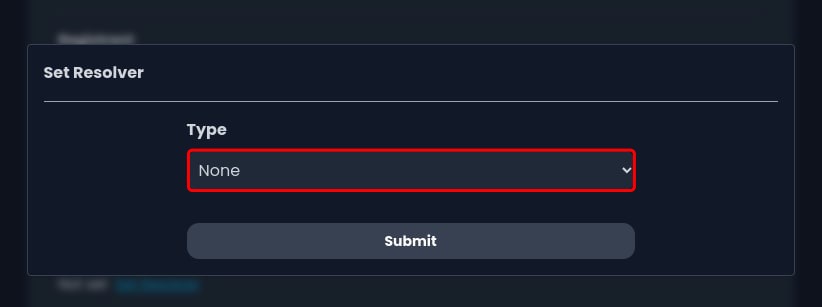
- Click on the "Set a resolver" link in the "Basic Information" section (not shown in image) or click the "Set a resolver" link in the "Records" section (shown in image).
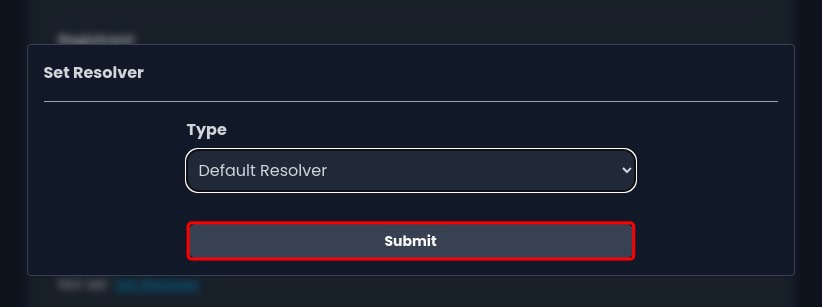
- A new window displays titled "Set Resolver". Change the "Type" section from "None" to "Default Resolver".
- Click the button.
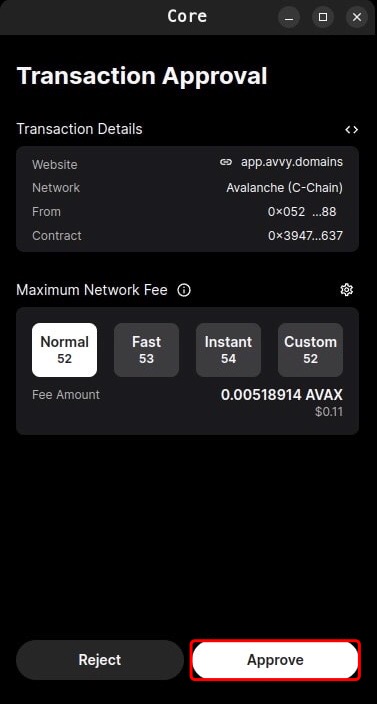
- Your preferred wallet will display a transaction user interface for you to approve the transaction initiated by clicking the button in the previous step. (A small fee must be paid to make changes to the Avalanche C-Chain).
- Click the button to authorize the transaction.
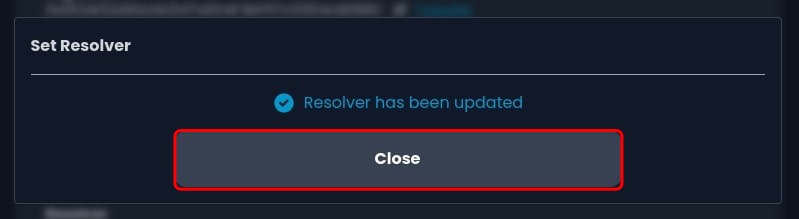
- Click the button after the transaction has confirmed. Continue to Step 4.2.4.
- Click the "Add a record" link in the section previously mentioned in Step Step 4.2.3.

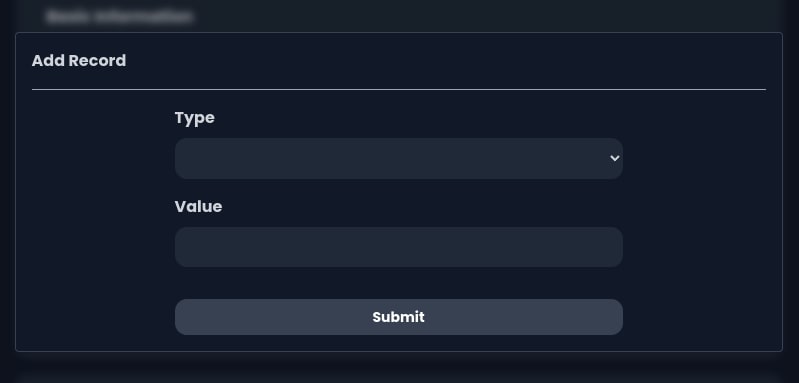
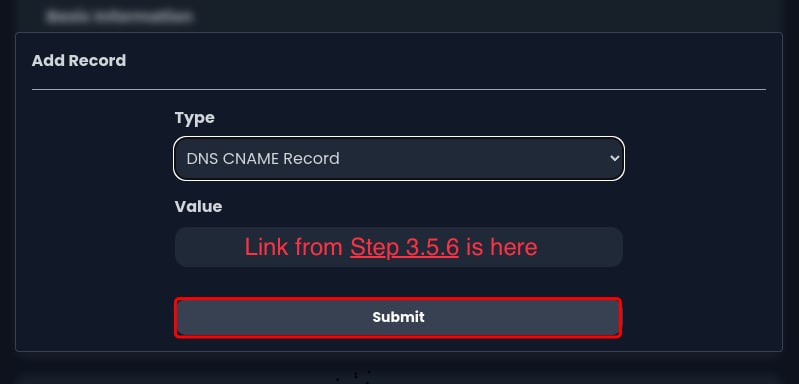
Add DNS CNAME Record
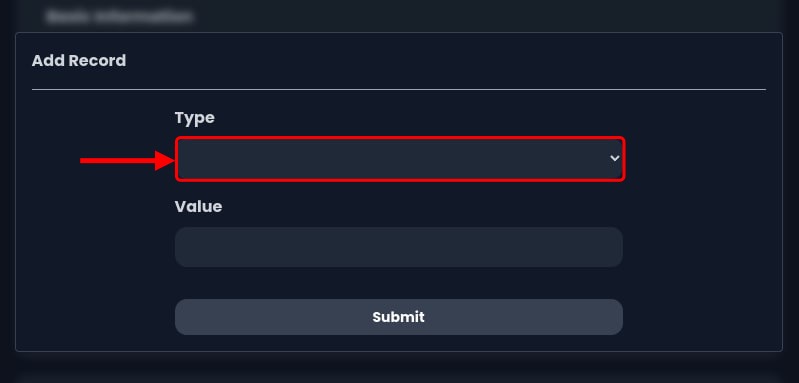
- A new window displays titled "Add Record". Two sections appear within the window titled "Type" and "Value" respectively.
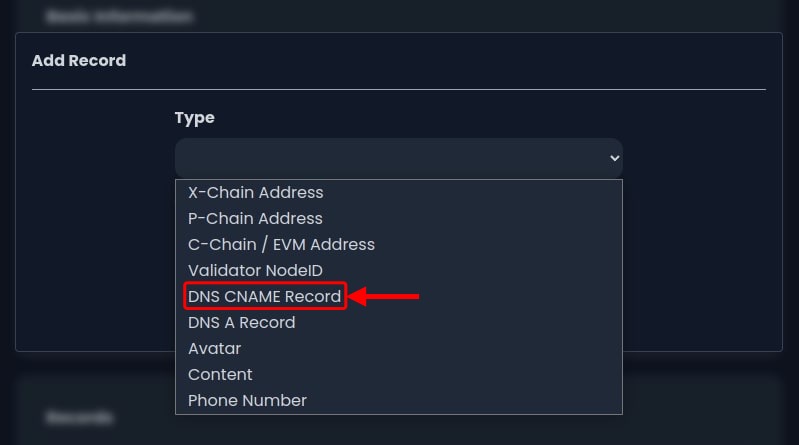
- Click the "Type" section and a dropdown menu displays.
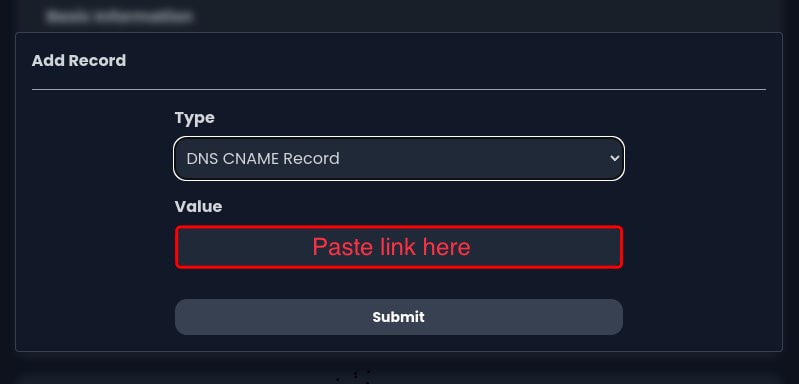
- In the dropdown menu you will notice multiple record types appear. Choose the "DNS CNAME Record" option.
- In the "Value" section you will paste the link that was copied from Step 3.5.6
- Click the button.
Transaction Approval
- Your preferred wallet will display a transaction user interface asking for you to approve the transaction initiated by clicking the button in the previous step (You must pay a small fee to add data to the Avalanche C-Chain).
- Click the button to authorize the transaction, and add the DNS CNAME to your Avvy domain that was chosen in Step 3.5.6

Deploy .avax Domain
Return to Fleek Settings
- Go back to the Fleek site where you should still see the window from Step 3.5.6.
- Click the button.
- It will begin to verify the management request.
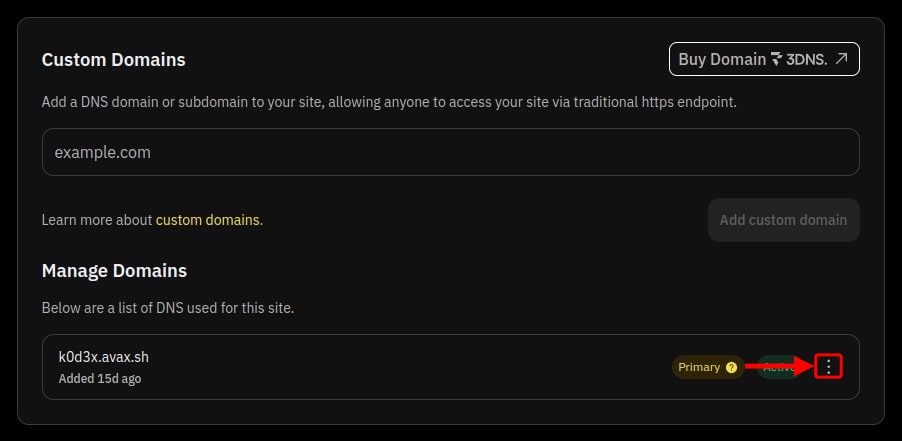
- Once verification has finished you should see a small, green Active sign next to the respected domain.
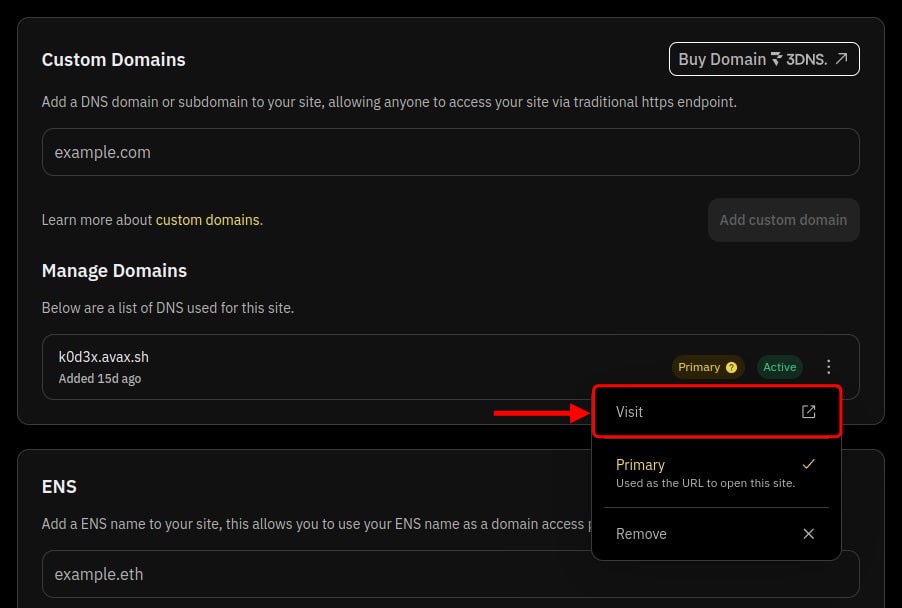
- Click the three dots to the right of the Active sign and a menu displays under it.
- Click the button. Your website should load in a new tab.
- You have just deployed your first
.avaxdomain!